Free Primitive Goose Pattern
*Free Primitive Goose Pattern*- Today’s Spring Craft Of The Day!
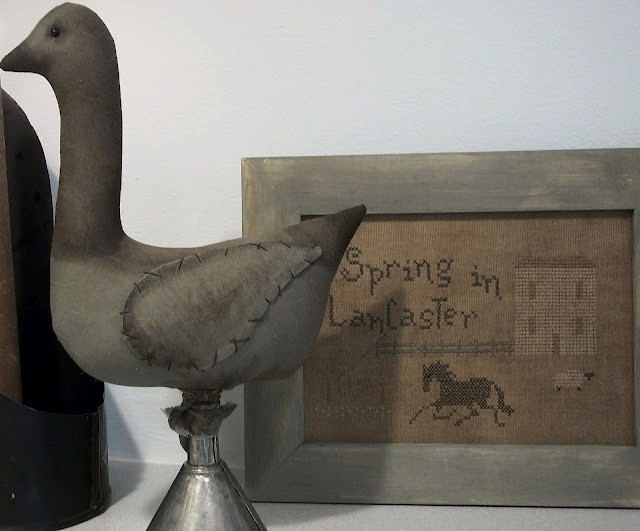
Today’s spring craft of the day is, make a Primitive Canadian Goose on a funnel~ And.. since I have passed 400 followers, I would like to thank all of my readers with a hug and give the gift of a free primitive Canadian goose pattern!
I heard the geese flying by overhead, and it is so nice to hear them, a sure sign of spring!
(Well, I guess if you live in the southern states, you are saying goodbye to them?? ) (DO they stay or do they leave there completely? Where I live, they arrive in the Spring, and leave in the Fall~)
To save my pattern, click on it, then, right click on that image;- select “open image in new tab”. Expand that image fully, right click, SAVE. Print full page, borderless.
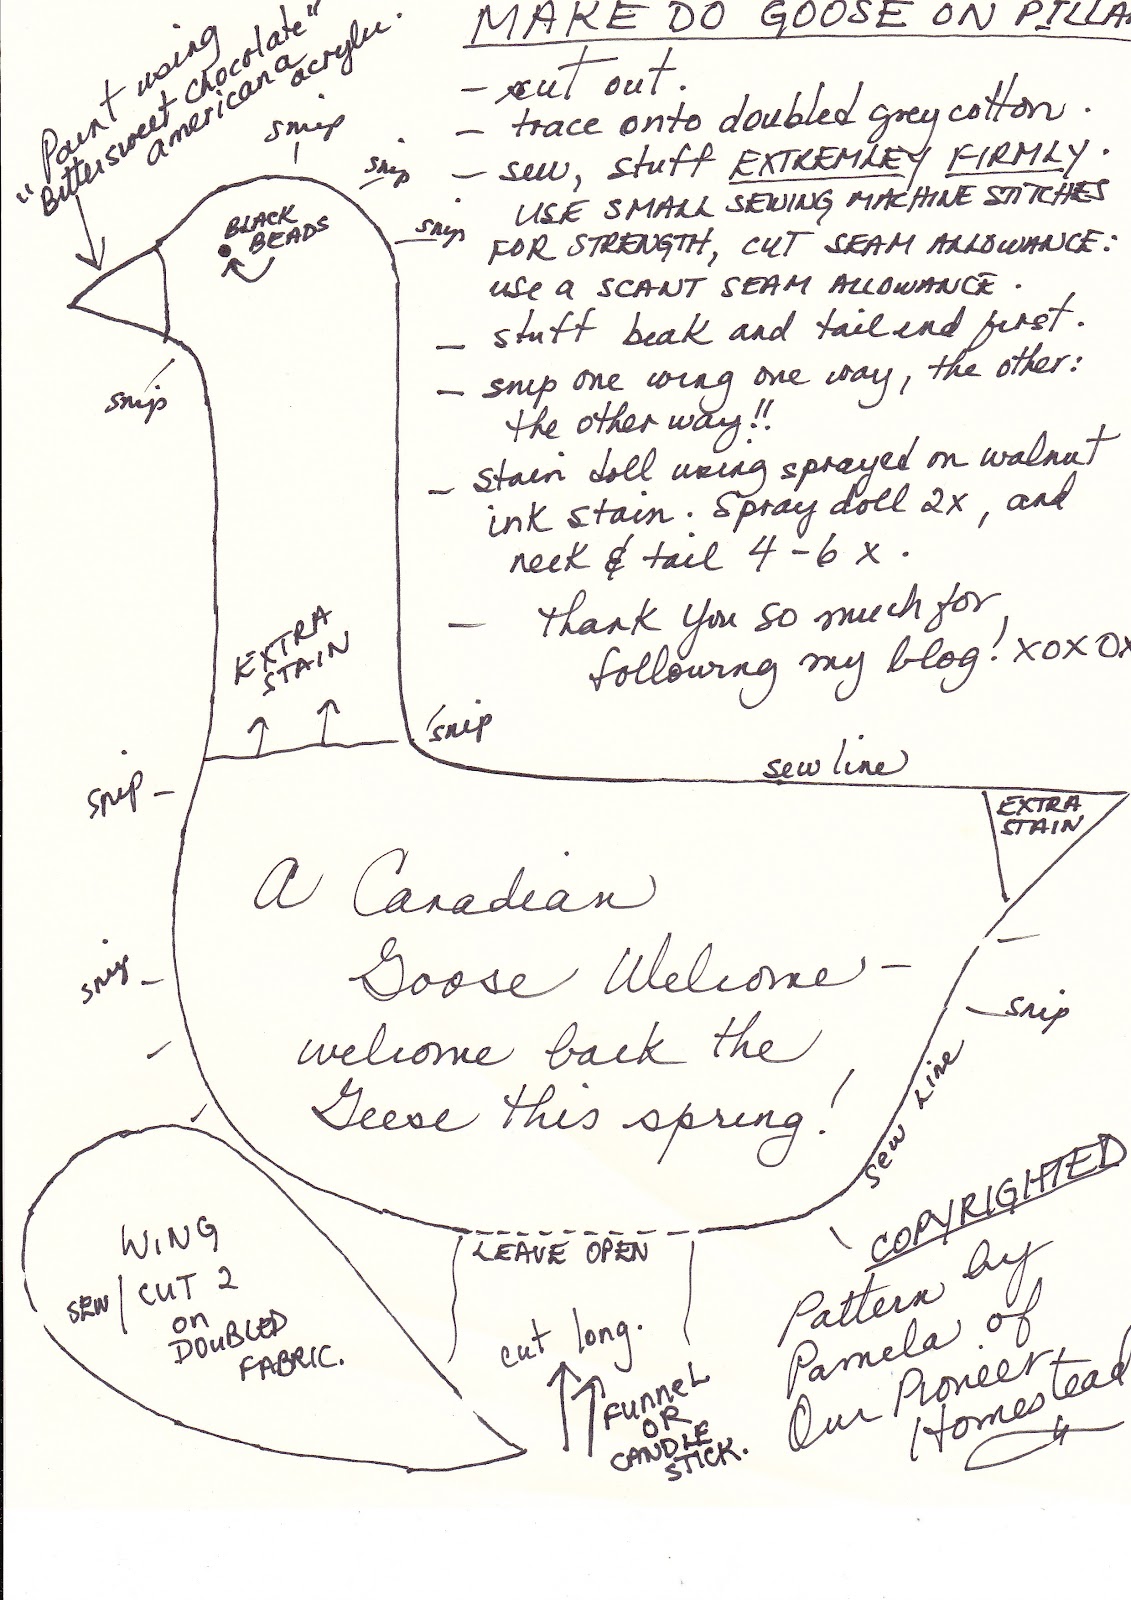
Edge lines are trace/sew lines, including the wings.
THIS PATTERN MAY BE FREE: BUT IT IS PROTECTED BY COPYRIGHT NONETHELESS. IT IS STILL MY DESIGN.
COPYING THIS PATTERN AND SELLING THE PATTERN ITSELF FOR MONETARY GAIN IS THEFT.
You are free to make items for sale with this pattern, however, please, give credit to Pamela of Our Pioneer Homestead for the design. Thanks so much.
******************************************************
TIME TO COMPLETE: about an hour.
– fairly easy.
What you’ll need:
-Grey cotton fabric, sewing machine- threaded with grey, brown thread for whip stitching.
–small metal funnel; about 2.5″- 3″ at widest; the older looking the better.
-a stick to jam tightly into the funnel- (extending it into the bird);
-a glue gun, twine,
-walnut ink, 2 black beads, brown acrylic paint and a small flat brush; (I used “bittersweet chocolate” Americana.)
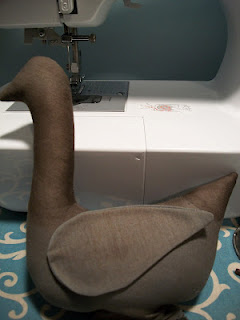
Print pattern, cut it out, follow directions-sewing as specified. STUFF BIRD EXTREMELY FIRM. Pay special attention to the denseness where the stick will poke upwards into his back. Ensure there is a firm padding of stuffing there. Leave a flap of fabric at the opening, as you will use this to pull the bird downward onto the stick, and tie it.
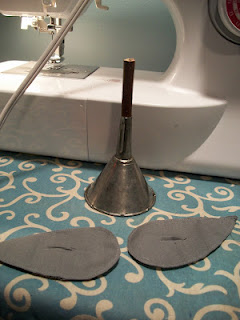
Sew wings all the way around. Make sure you cut the slits for turning- each wing in opposite directions.
Press them, once you have turned them right side out.
~Staining and wing placement~
I sprayed the stuffed bird and wings (before attaching the wings on-) 2x with walnut ink, drying it immediately with a hot blow dryer. Then, I repeatedly applied walnut ink to the neck and tail only- (4- 6x) ALWAYS blow dry between applications.
The wings remain UNSTUFFED. Attach wings with a dab of hot glue in the middle. Then, whipstitch them all around, primitively. Do this in brown thread.
Sew on the beaded eyes.
Countersink ever so slightly using tension.

Using a DRY BRUSH- no water involved, dry brush on the beak, and “feather on” the paint gently: accentuating the base of the neck (stroke upwards) and the tail (stroke inwards.)
Place upside down funnel on a firm surface.
Put a lot of hot glue on the stick, (not the metal nozzle) and insert into bird. Do this viewing bird “cross section”,(as above) to ensure you press bird down and it is straight, not tilting to one side or the other. If you just look at the bird from the side, it may be crooked and you will not be able to tell. Push down and hold for a few minutes.
Then pull down fabric flaps, and tie firmly onto the tip of the metal funnel.
Rub a bit of the brown paint on the twine and ends of the fabric flap too. You can also accentuate the wings, by grubbying them up with the paint.
***For dry brushing accents, use VERY little paint. NO WATER. Always go from the paint source to: rub off onto a rag to: -the project. *****
Facebook Conversations