Zippered and Slip Pocket Tutorial
Zippered Pocket Tutorial
One of the biggest phobias of sewing is the dreaded zipper. The truth is, with the proper tools, putting in a zipper is no problem. The most important tool is a zipper foot. Some sort of adhesive is very helpful as well. I like to use fusible tape, but an ordinary glue stick will do the job.
Materials:
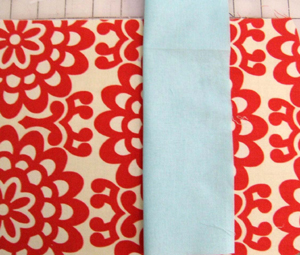
9 x 14 inch rectangle of fabric
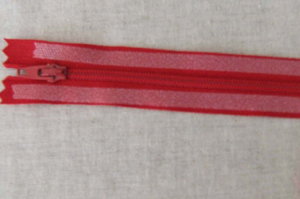
7 inch zipper (if you have a longer zipper, it can easily be cut down)
Water-soluble marker or tailor’s chalk
Fusible tape or glue stick
Zipper Foot
To follow this tutorial, first cut all your purse pieces and interface as desired. The measurements given are meant to be a guide but can be adjusted as desired.
Find the center (side to side) of your lining piece and your pocket piece.
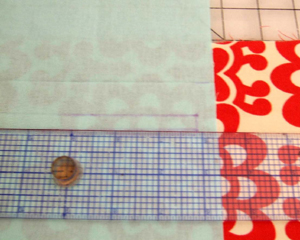
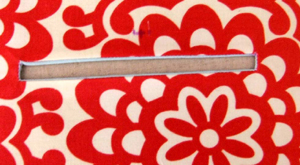
I’ve found the easiest way to determine the center is first fold the lining piece in half, side to side and make a crease with your fingernail. Open and lay flat Place the pocket fabric wrong side up on the lining. Position it so that it is centered side to side and the top to bottom center of the pocket is about 1.5 inches from the top raw edge of the lining. That sounds way more complicated than it is, but I couldn’t come up with simpler wording. Sorry. Use a couple of pins to hold in place. With the water soluble pen or chalk, draw a rectangle that is ½ inch tall x 7 inches long beginning 2- 2.5 inches down from the top raw edge of the lining going out 3.5 inches from the center on either side or half your desired zipper length.
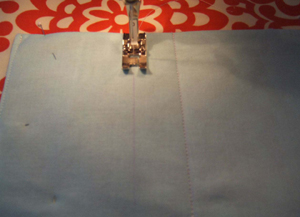
Machine stitch along the marked lines.
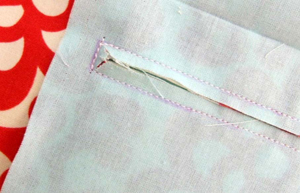
Cut a slit in the center of the rectangle stopping about 1/4 inch from either end then angled out to the corners. Don’t cut through your stitching.
Push the pocket through the window to the backside of the lining pressing the seam away from the center.
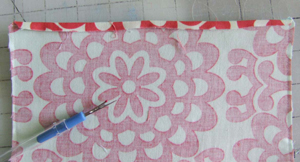
This is how it looks from the front side. The purple mark above the window is for magnetic clasp placement, ignore that for this tutorial.
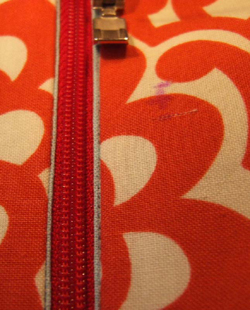
You can secure the zipper in place using pins at this point, but I find it much easier to glue it in place instead. I am using fusible tape but you can also use a bit of glue from a glue stick along the outside edge of the zipper tape. Don’t get the glue too close to the teeth. If your zipper is longer than the window, that is OK. Line it up so that when closed the zipper pull is at one end of the window. The excess can be cut off the other end after the zipper is sewn in place.
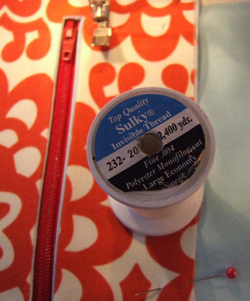
Place the zipper right side up in the window and press with a hot iron to activate the glue on the fusible tape or to set the glue from the glue stick. Let cool for a moment.
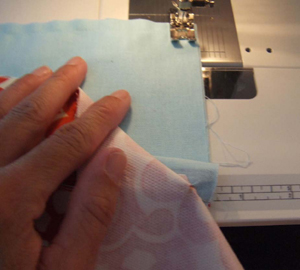
Stitch around all 4 sides of the rectangle. I try to keep my stitching in the seam line where the pocket fabric and the lining meet. Be sure the pocket fabric is flat and out of the way before stitching. Use a thread that matches the pocket fabric. I like to use invisible thread for times I don’t want my stitching to be obvious.
On the backside bring the pocket sides together. Cut any excess off the closed end of the zipper. Stitch around the sides and bottom of the pocket.
To keep the pocket fabric from getting caught in the zipper, sew along the top of the zipper window once again.
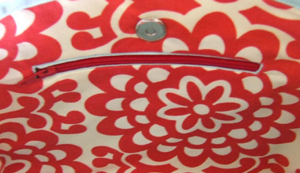
The finished zipper.
Simple Slip Pocket Tutorial
Materials:
Fabric for pocket
Fusible interfacing- any heavyweight interfacing- I typically use Pellon Craft Fuse
Water soluble marker or tailors chalk
Seam Ripper
Straight Edge
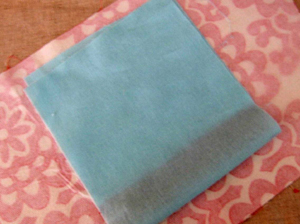
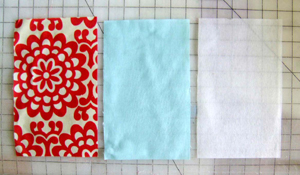
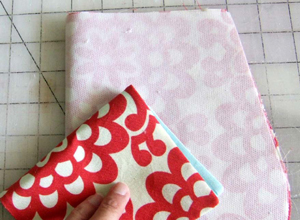
You can make a slip pocket to put in the lining of your purse as large or small as you like and will vary depending on the size of your purse. Start with the fabric you wish to use for your pocket. I am using two different fabrics for this tut, but you can make yours using just one.
Cut 2 rectangles from fabric and one from interfacing ½-1 inch larger than the dimensions you wish your finished pocket to be.
Fuse the interfacing to the back of one fabric piece. Pin fabric pieces right sides together and stitch around all four sides. Leave a small (~3inch) section on one long side open for turning. Tip* When I have to leave a section open for turning I stitch around the sides as usual and backstitch at the place to be left unstitched. Then lengthen my stitch length and sew a 3-inch section with long stitches, backstitching at the end to secure. Press the seam allowance open and then remove the long stitches with a seam ripper. This way the open section will blend evenly with the seam line.
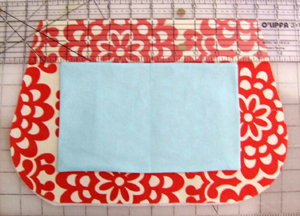
Clip the corners and turn right side out. When pinning the pocket onto the lining, position so that the open section is the bottom of the pocket.
To center, the pocket on the lining, determine the center of each piece by folding in half side to side. Line the center of the pocket up with the center of the lining about 2- 2.5 inches down from the top raw edge of the lining. Pin in place.
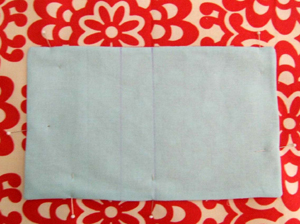
If you would like any divisions in your pocket make marks for them at this time using a water soluble pen or tailors chalk and a straight edge. For this pocket I am making two lines, one in the center and another one inch from the first mark. This will make a pocket with two sections and a pen slot.
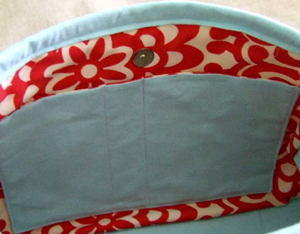
Stitch along sides and bottom and along marked lines. Be sure to backstitch several times at the beginning and end of stitching.
A little water will remove the lines if you used a water-soluble pen.
Bonus Tutorial: Inserting a Magnetic Clasp
Inserting a magnetic clasp is easy; you just have to remember to do it before your bag is assembled. I usually do this after I’ve sewn the pockets in place.
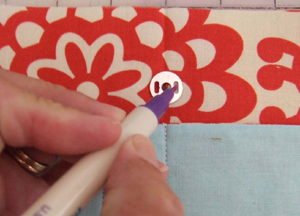
If you haven’t already found the side to side center of the lining piece, do so now. Make a mark at the center point about 1.5 inches from the top edge of the lining. The magnetic clasp will consist of 4 pieces, the male and female part of the clasp and washers for each. Center one washer over the mark you just made to use as a template for cutting slits to insert the tabs of the clasp through. Make a mark through the opening on either side of the center hole.
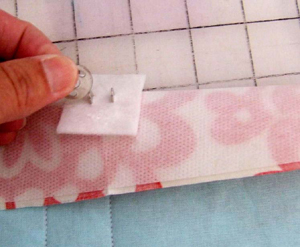
With the point of a seam ripper make a small hole at the end of each line and then with the blade portion make a small (1/4 inch) slit. Do this carefully so you don’t cut too much of your lining fabric (or your finger). Do the same with a small square of interfacing doubled or a square of timtex or really any scrap of fabric doubled; this will just act as reinforcement. Repeat for the other side of the lining. Push the clasp pieces thought the slits with the interfacing/timtex behind the lining.
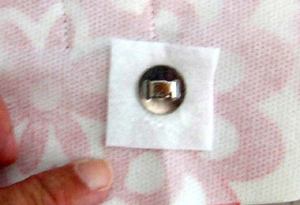
Place the washer over the tabs and fold the tabs into the center. Repeat on the other side.
Facebook Conversations