Bow Tutorial
Here we go! This one is even longer than the last.
{I used about 2 1/2 yards of ribbon for this package.}
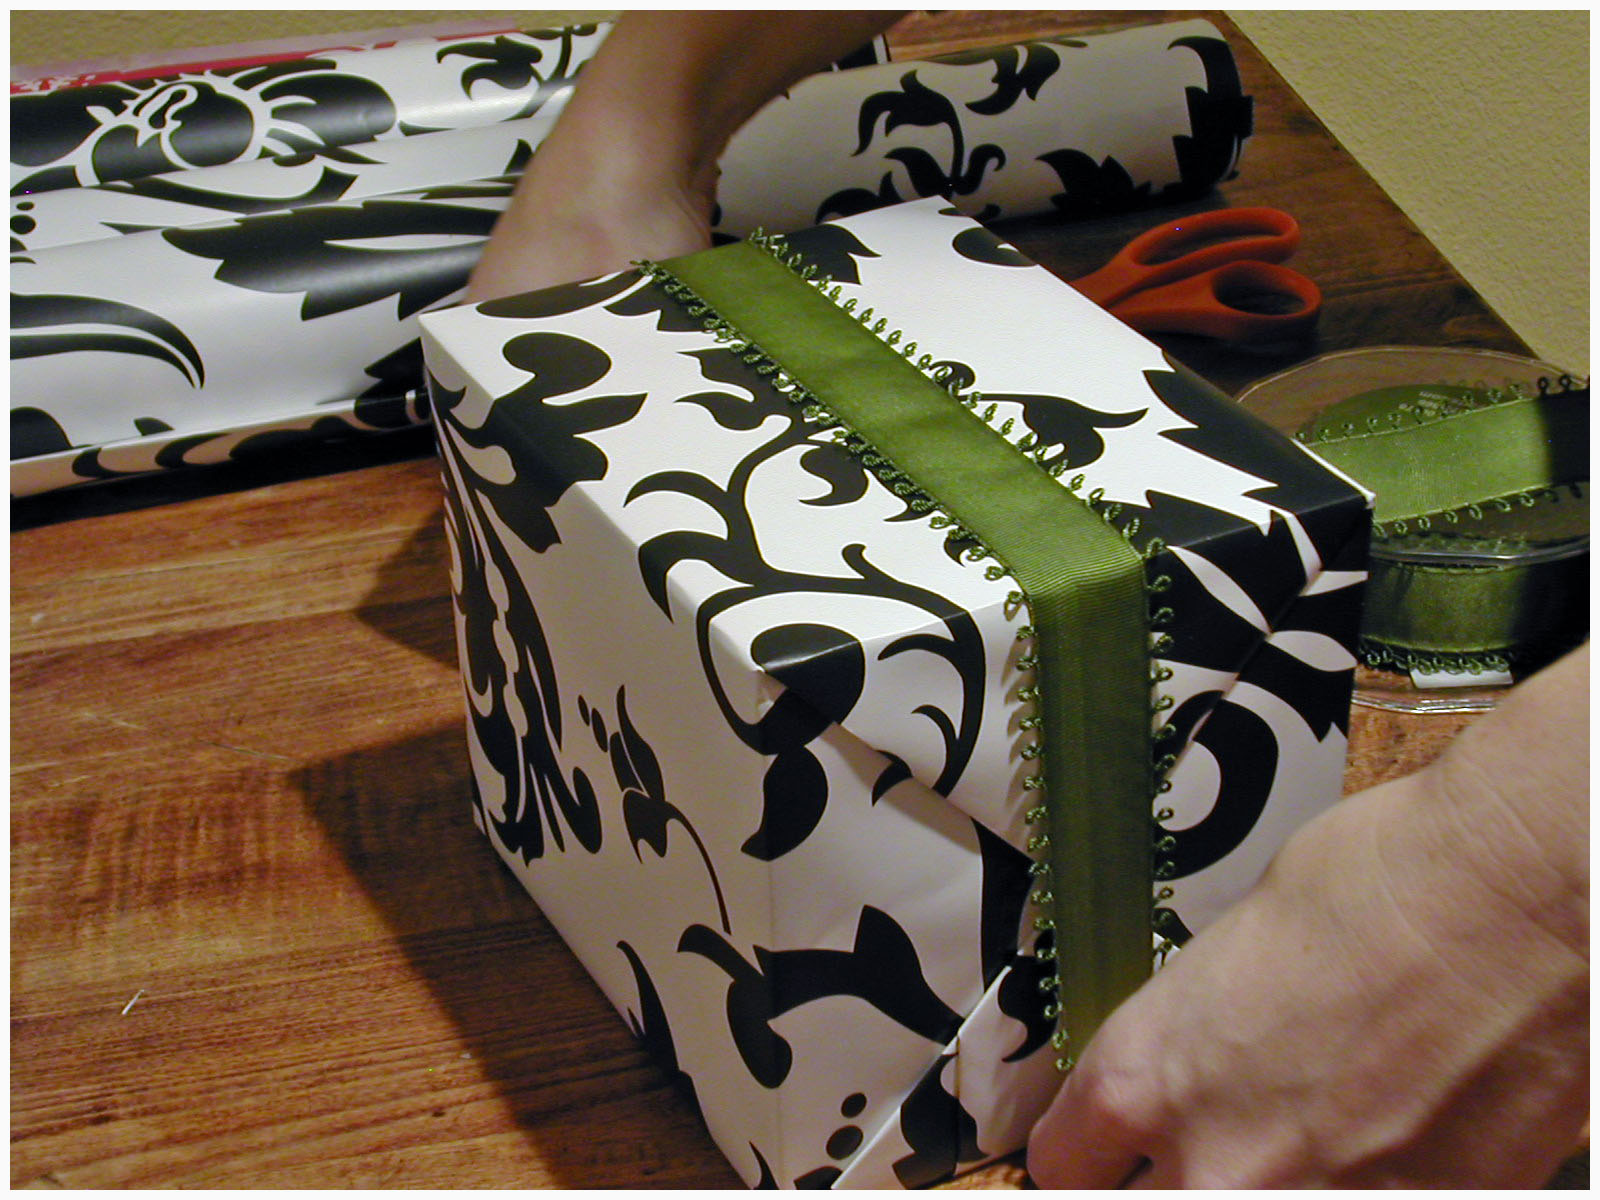
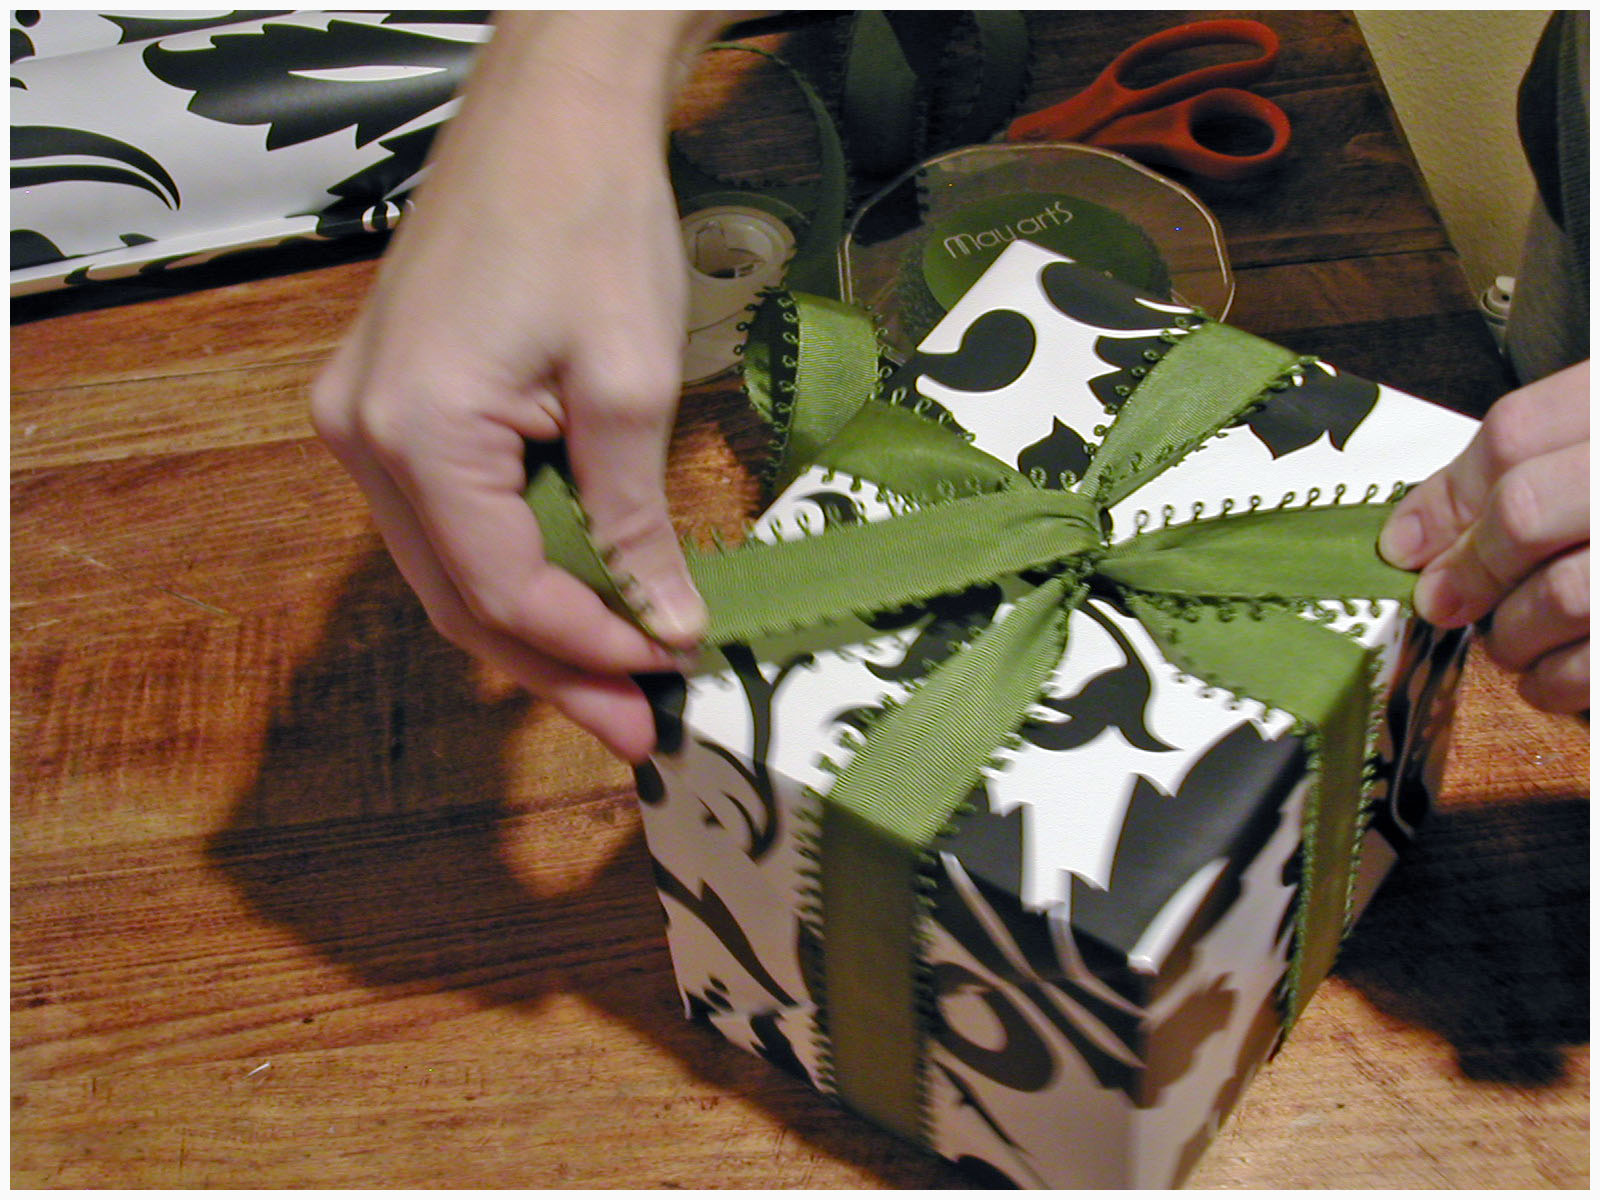
Step 1: Place your package with the seam on the paper facing down. Pull the ribbon length wise over the package. While still holding onto both ends of the ribbon, turn package over. The seam on the paper should now be facing up.
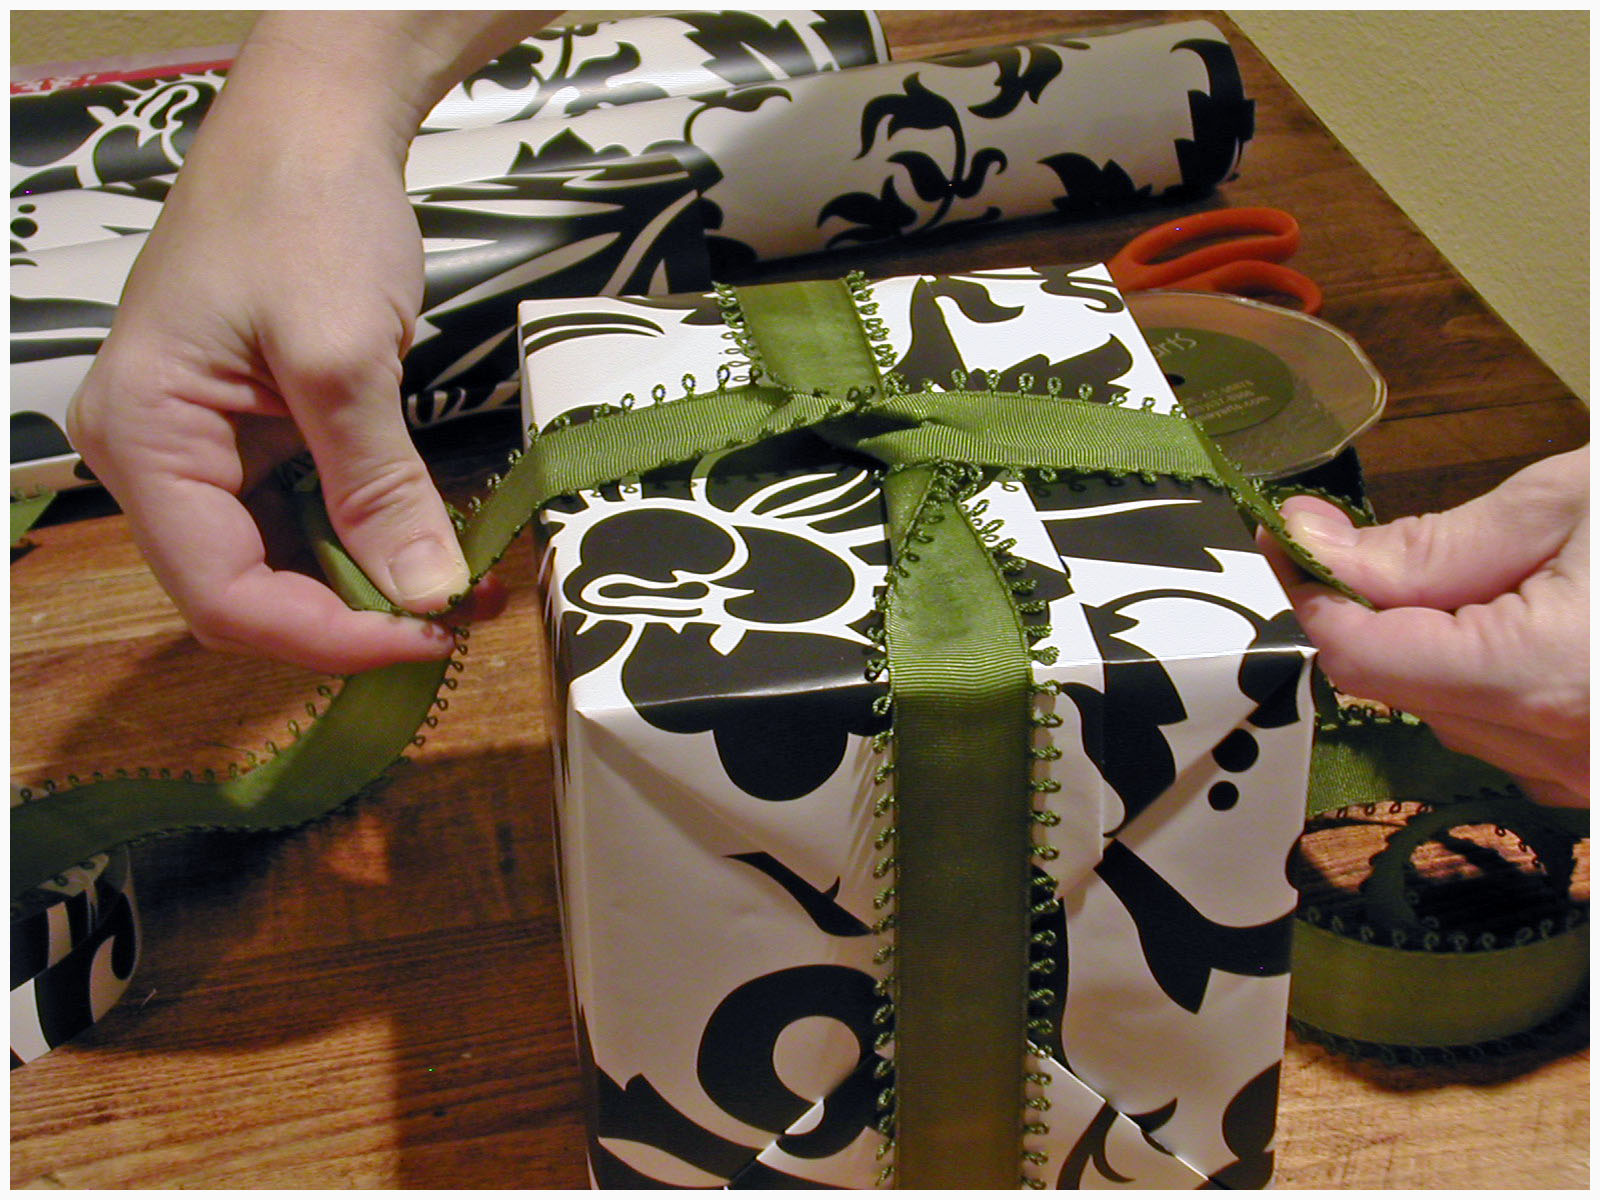
Step 2: While holding ribbon taught in both hands, twist ribbon so you are now wrapping it width wise over the package. While holding tightly on both ends of the ribbon, turn package over again so the seam on the paper is facing down.
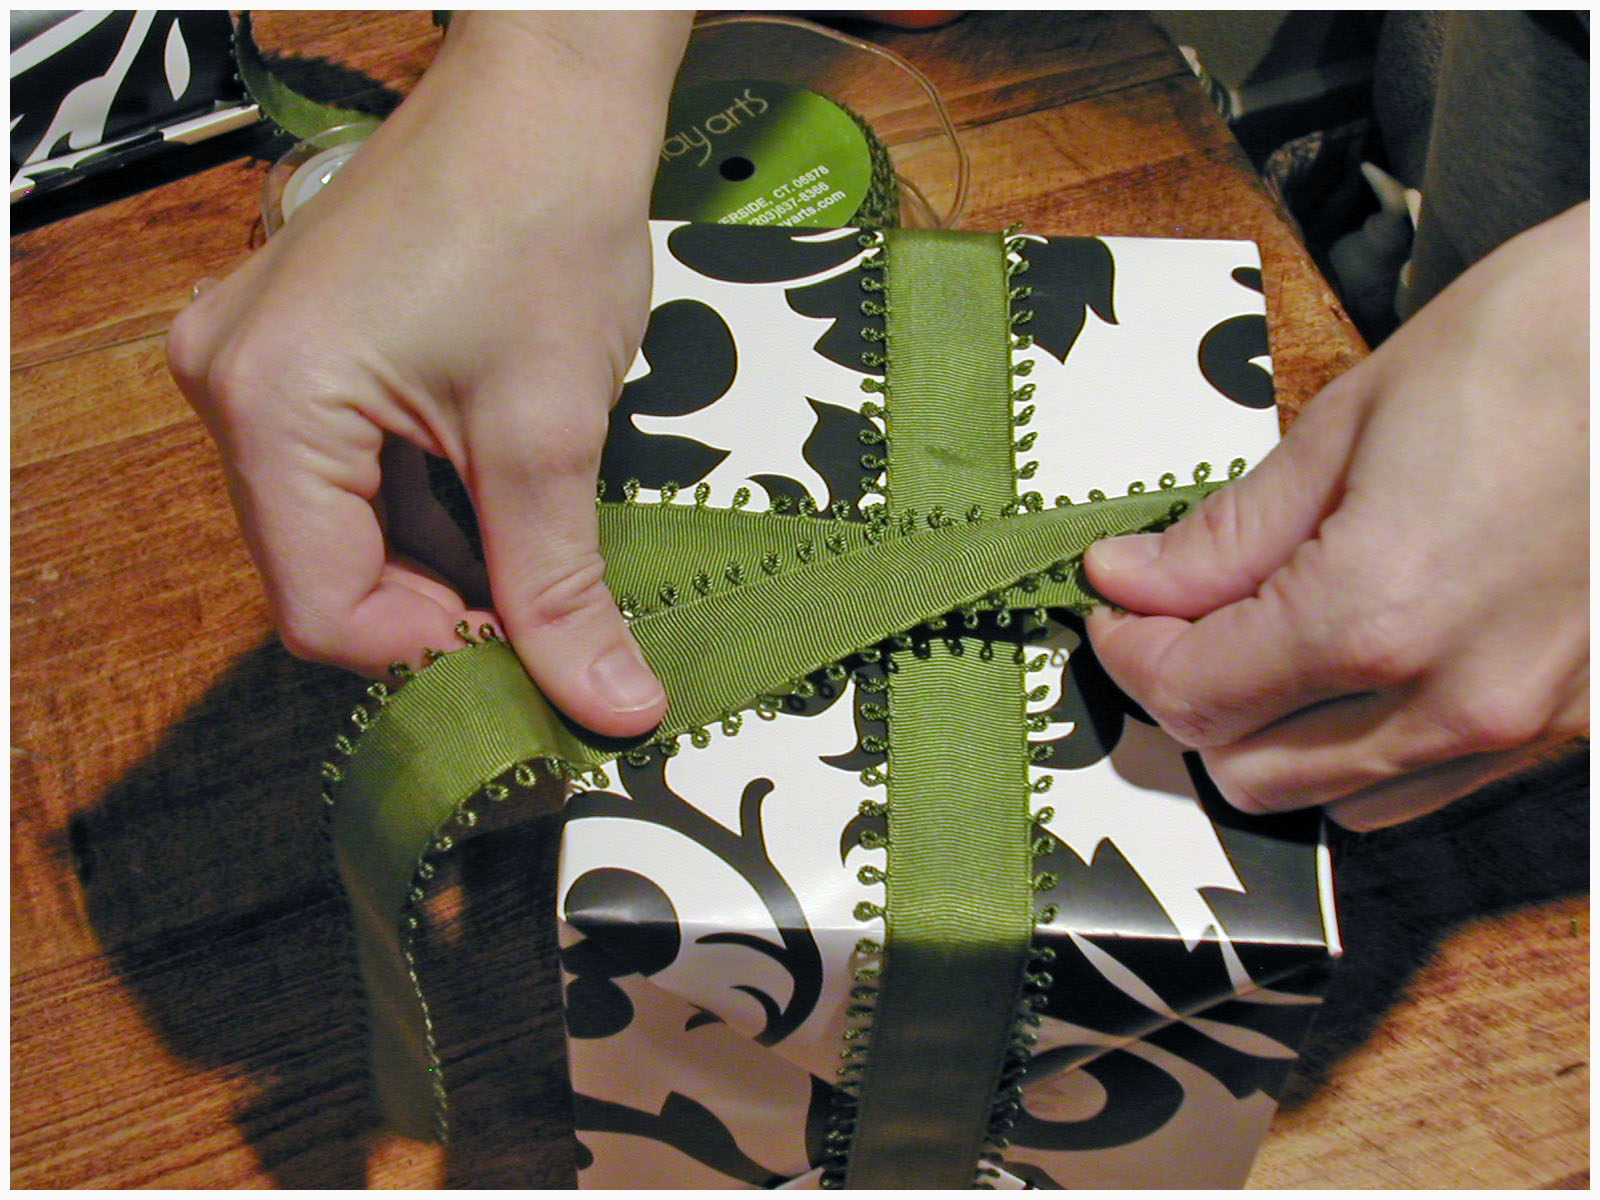
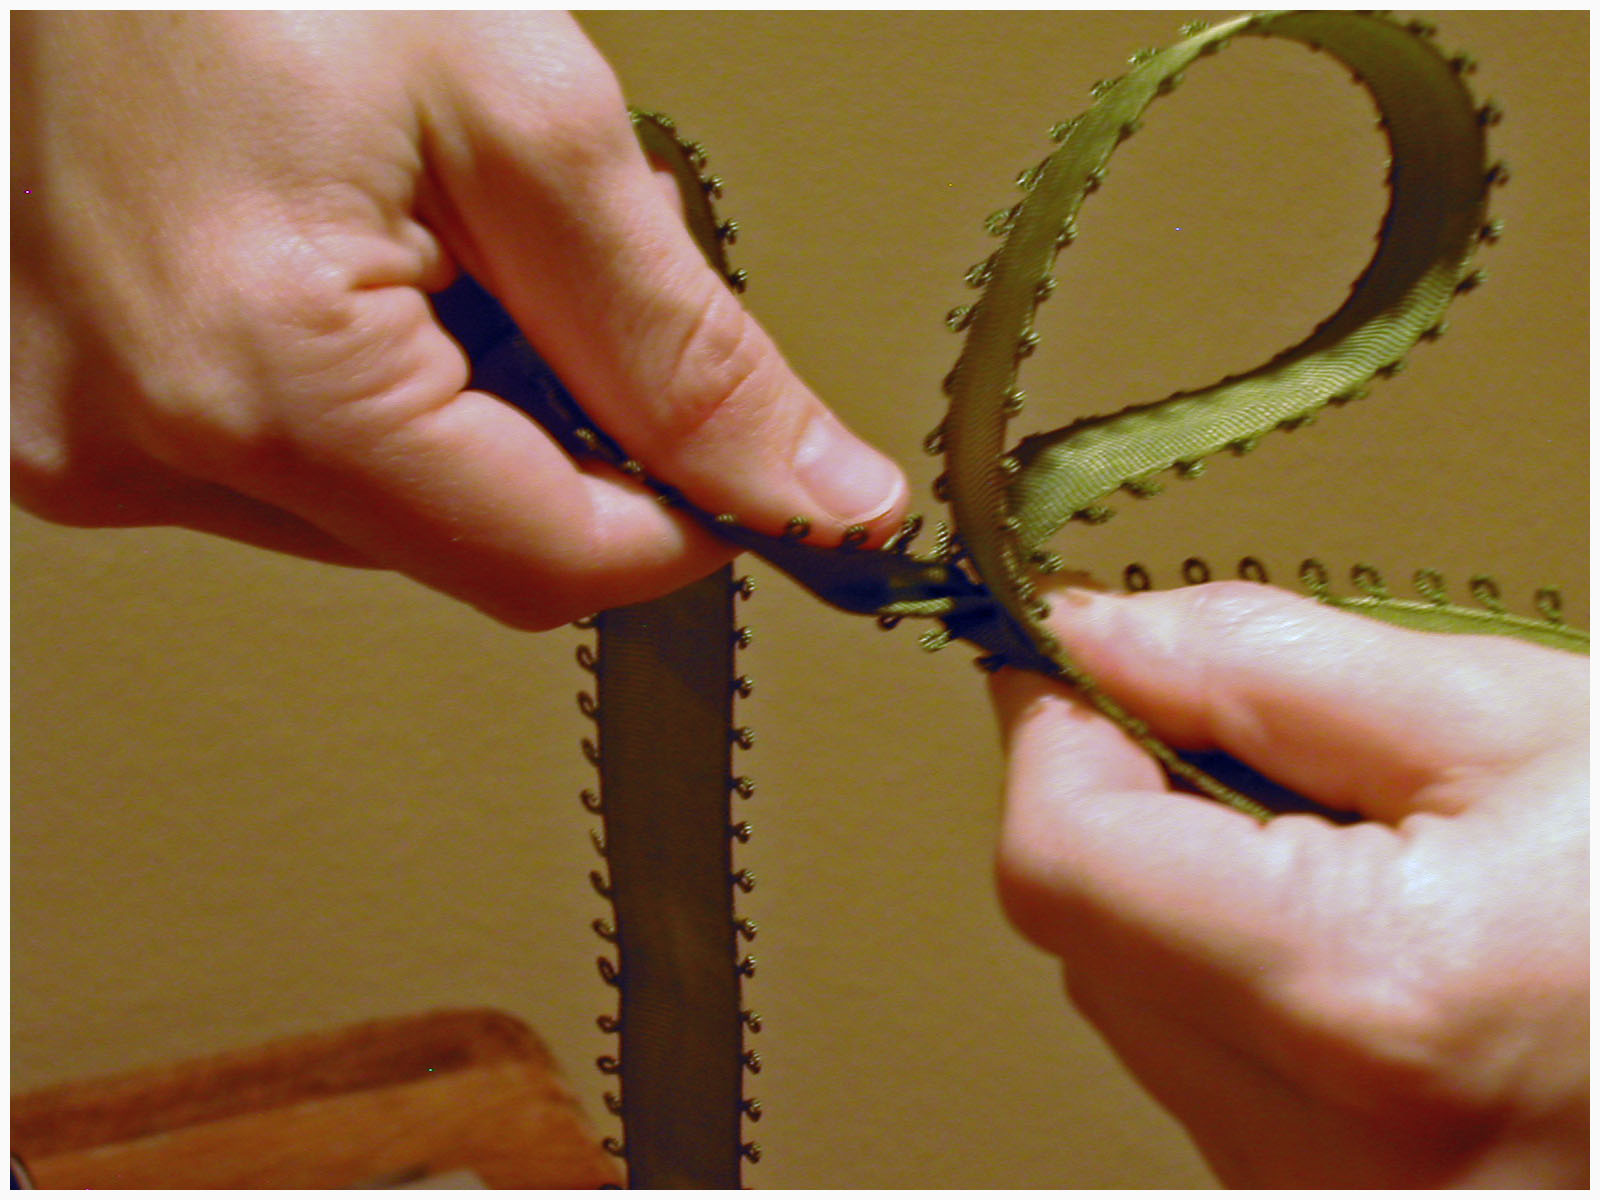
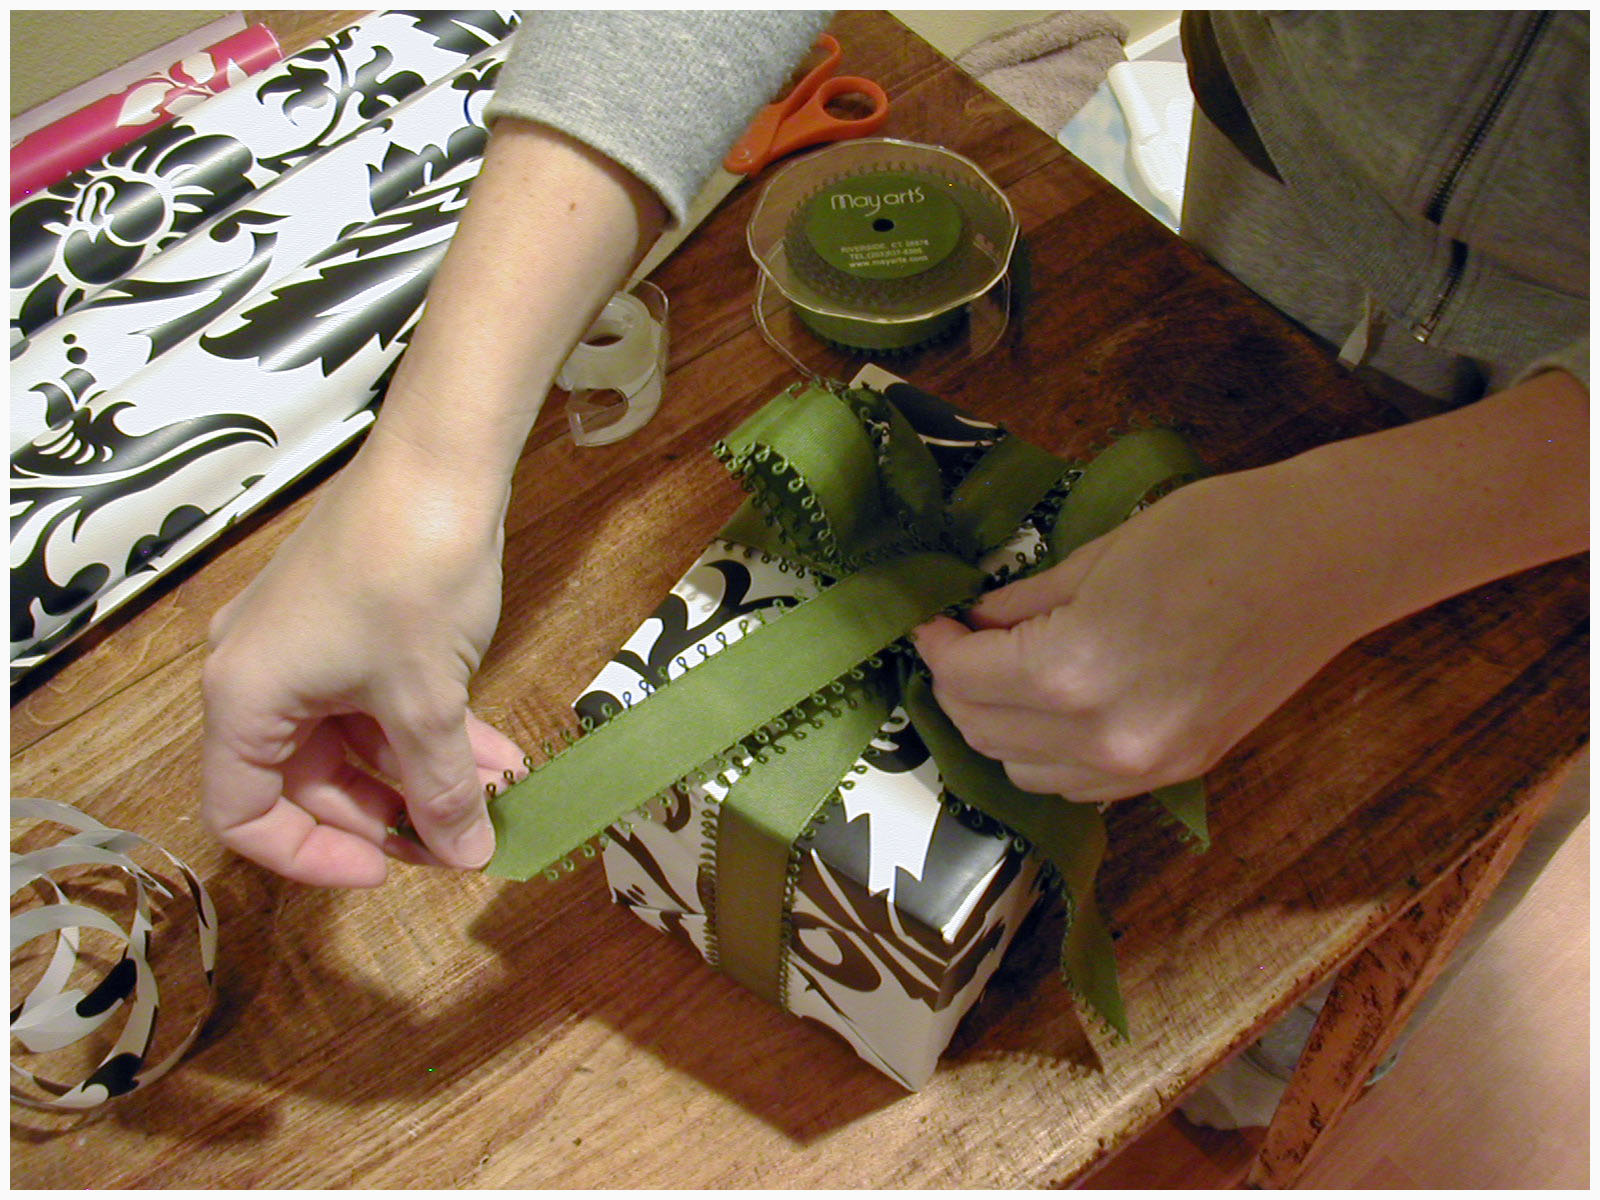
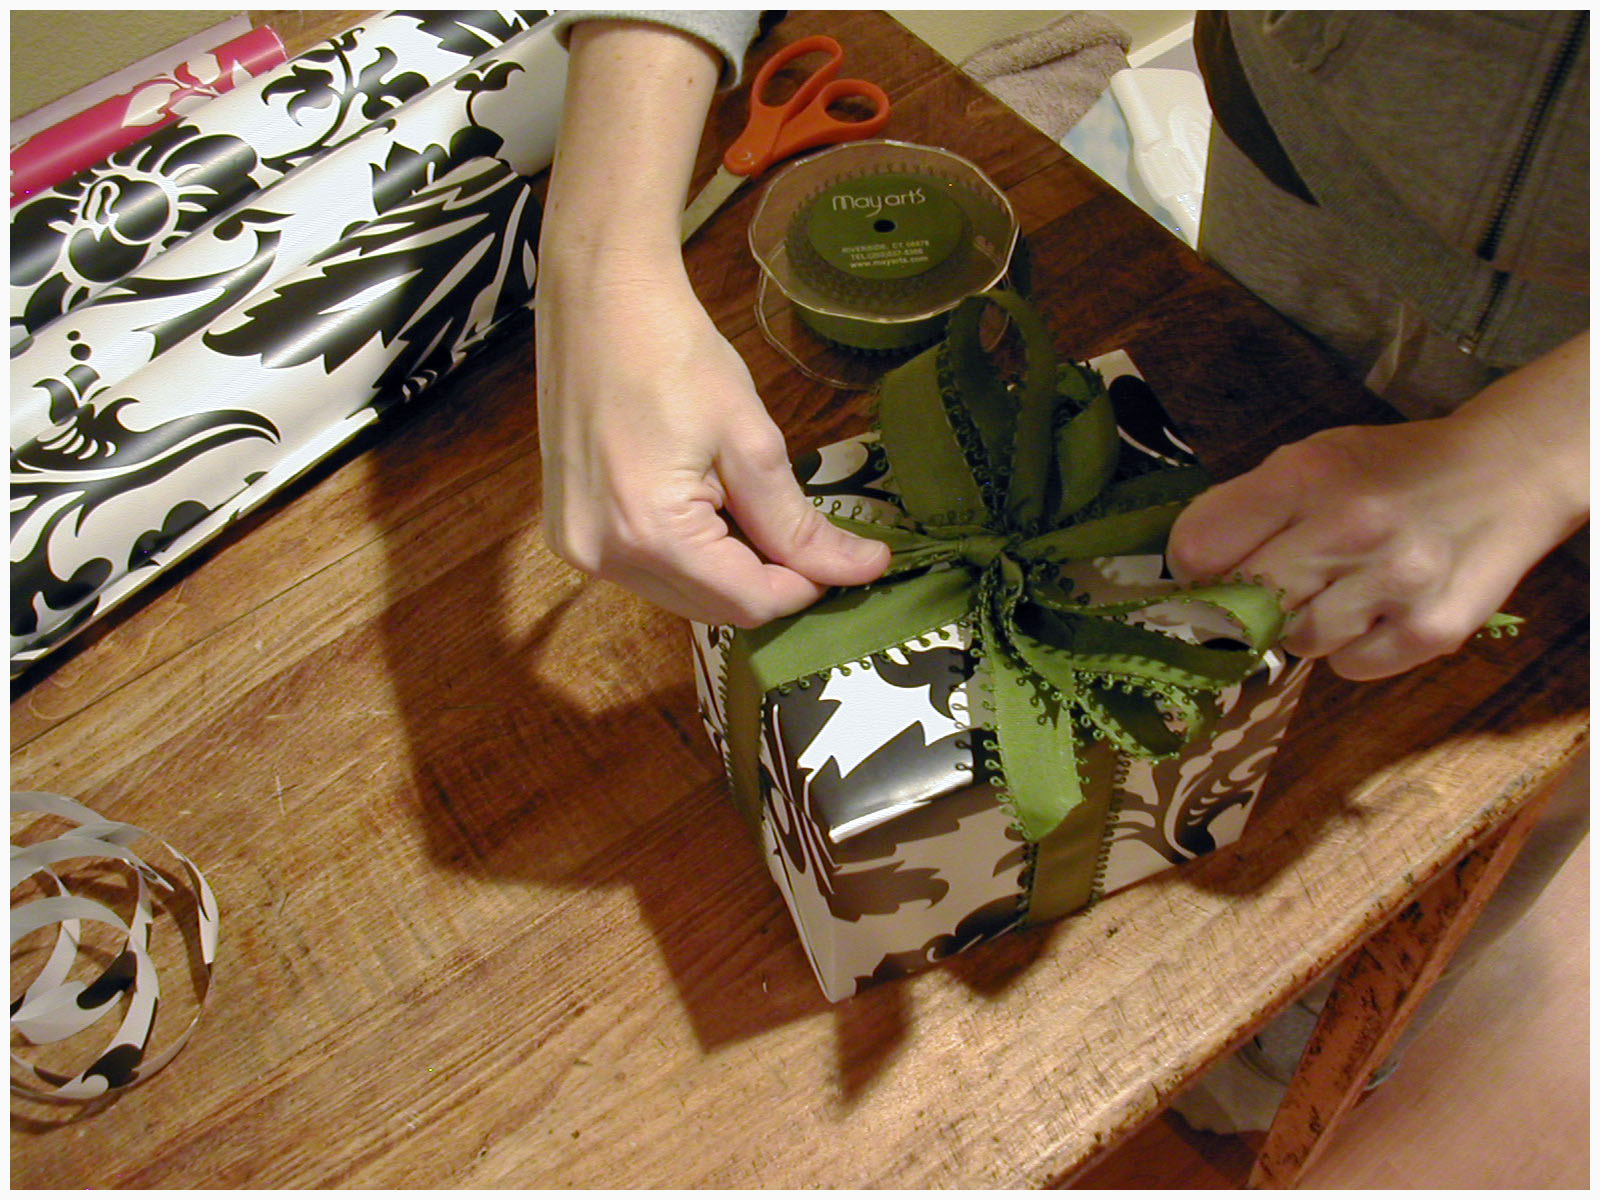
Step 3: Now that the package is right-side-up, loop both ends of the ribbon through itself so it stays in place while you assemble your bow. {you can tie it in a knot if you like}

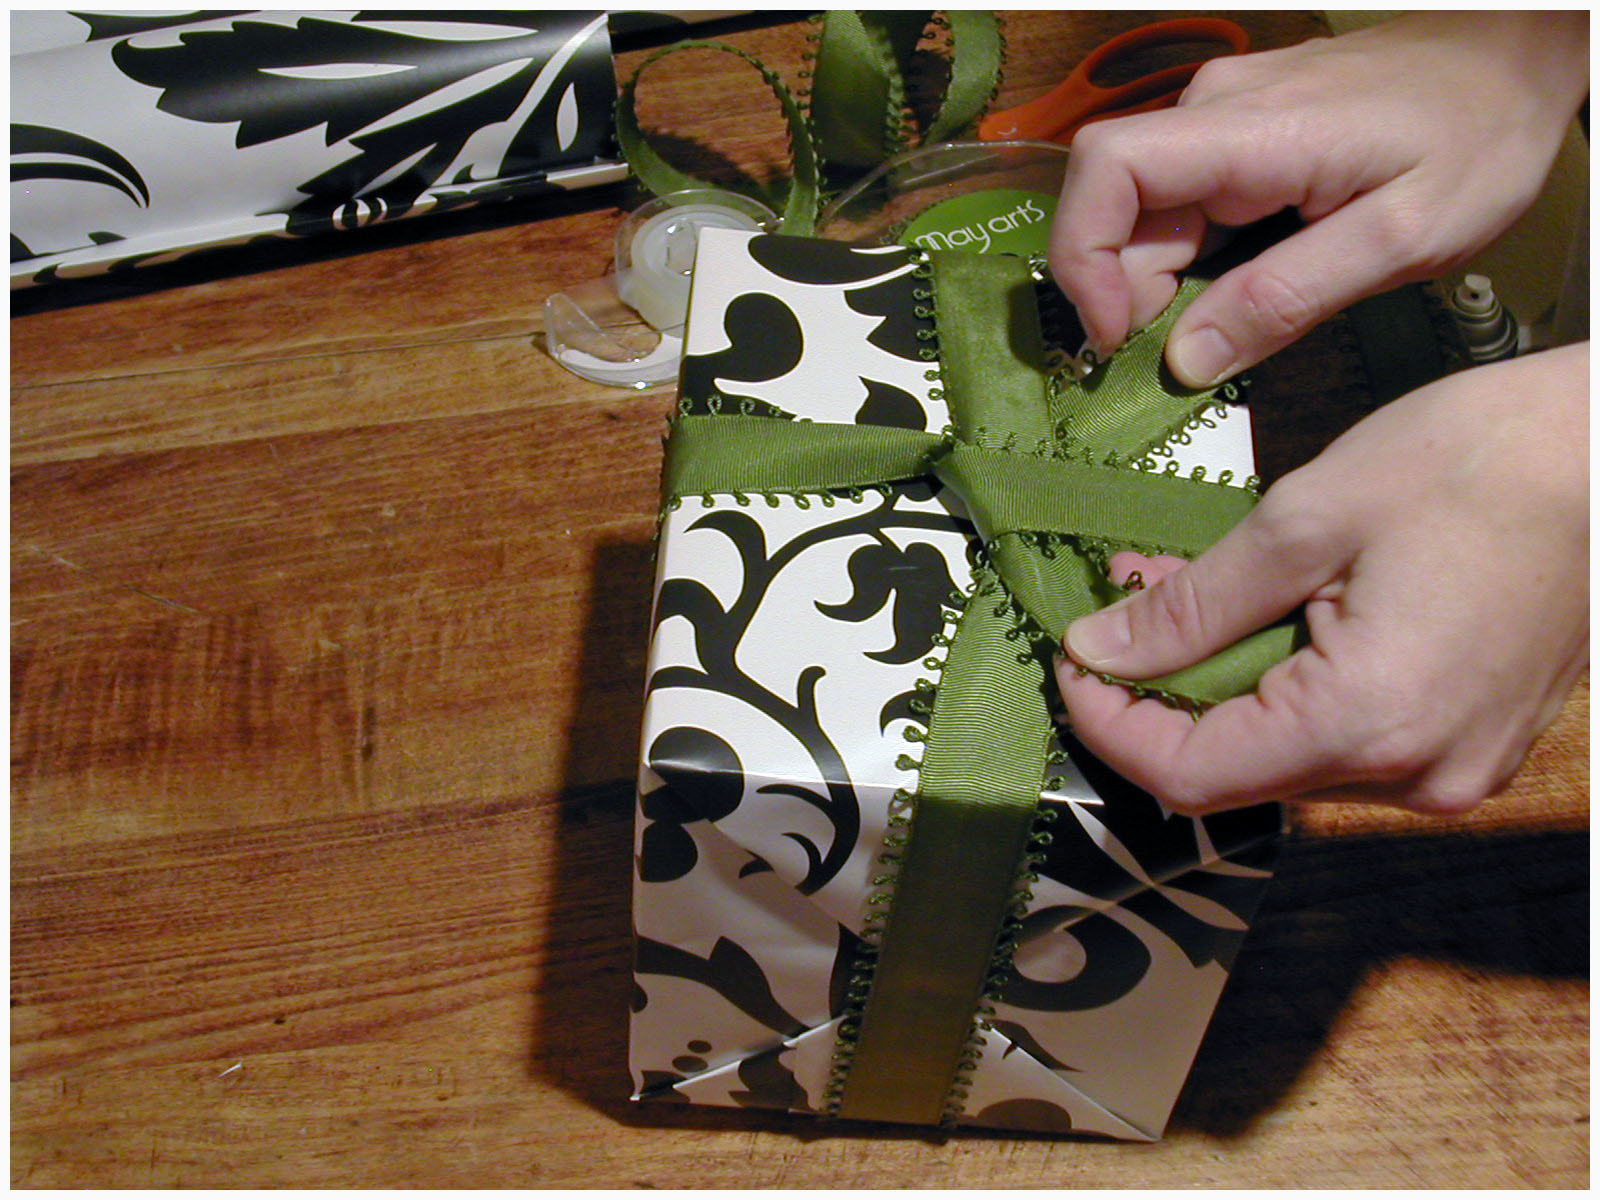
Step 4: To assemble a nice size bow you will need approximately 1 yard of ribbon.
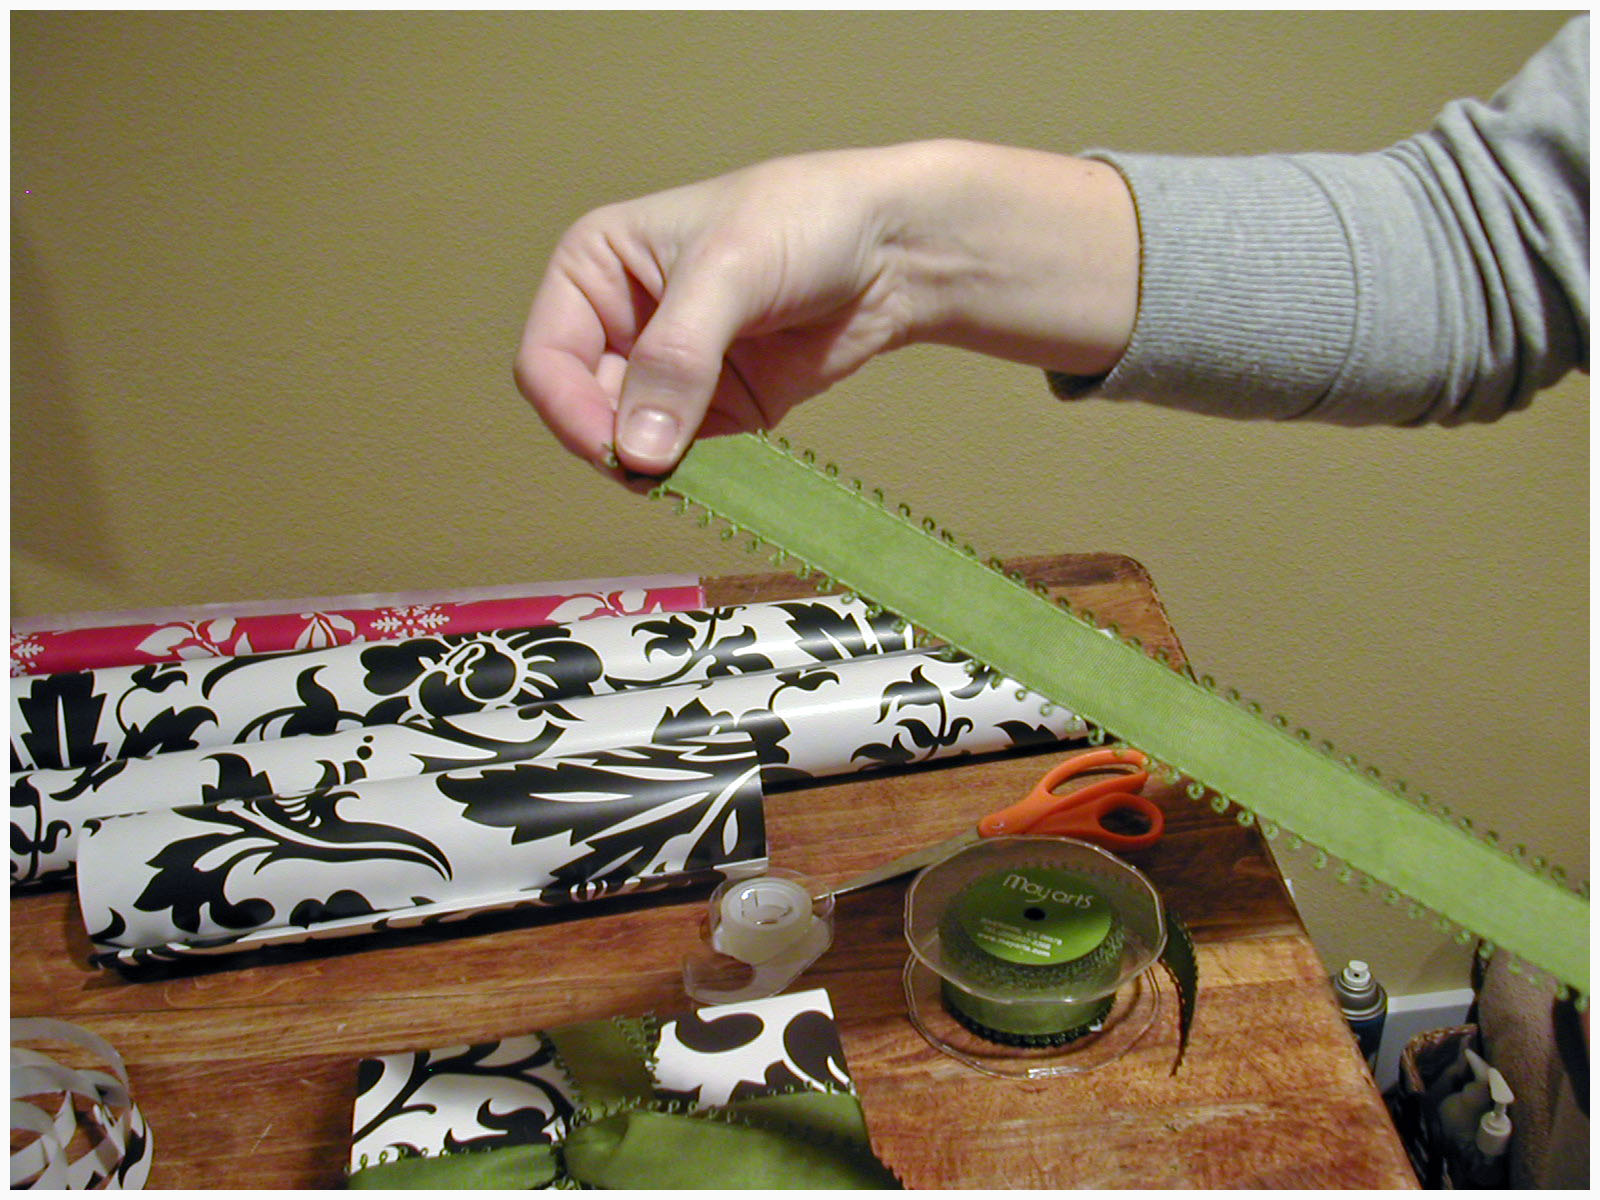
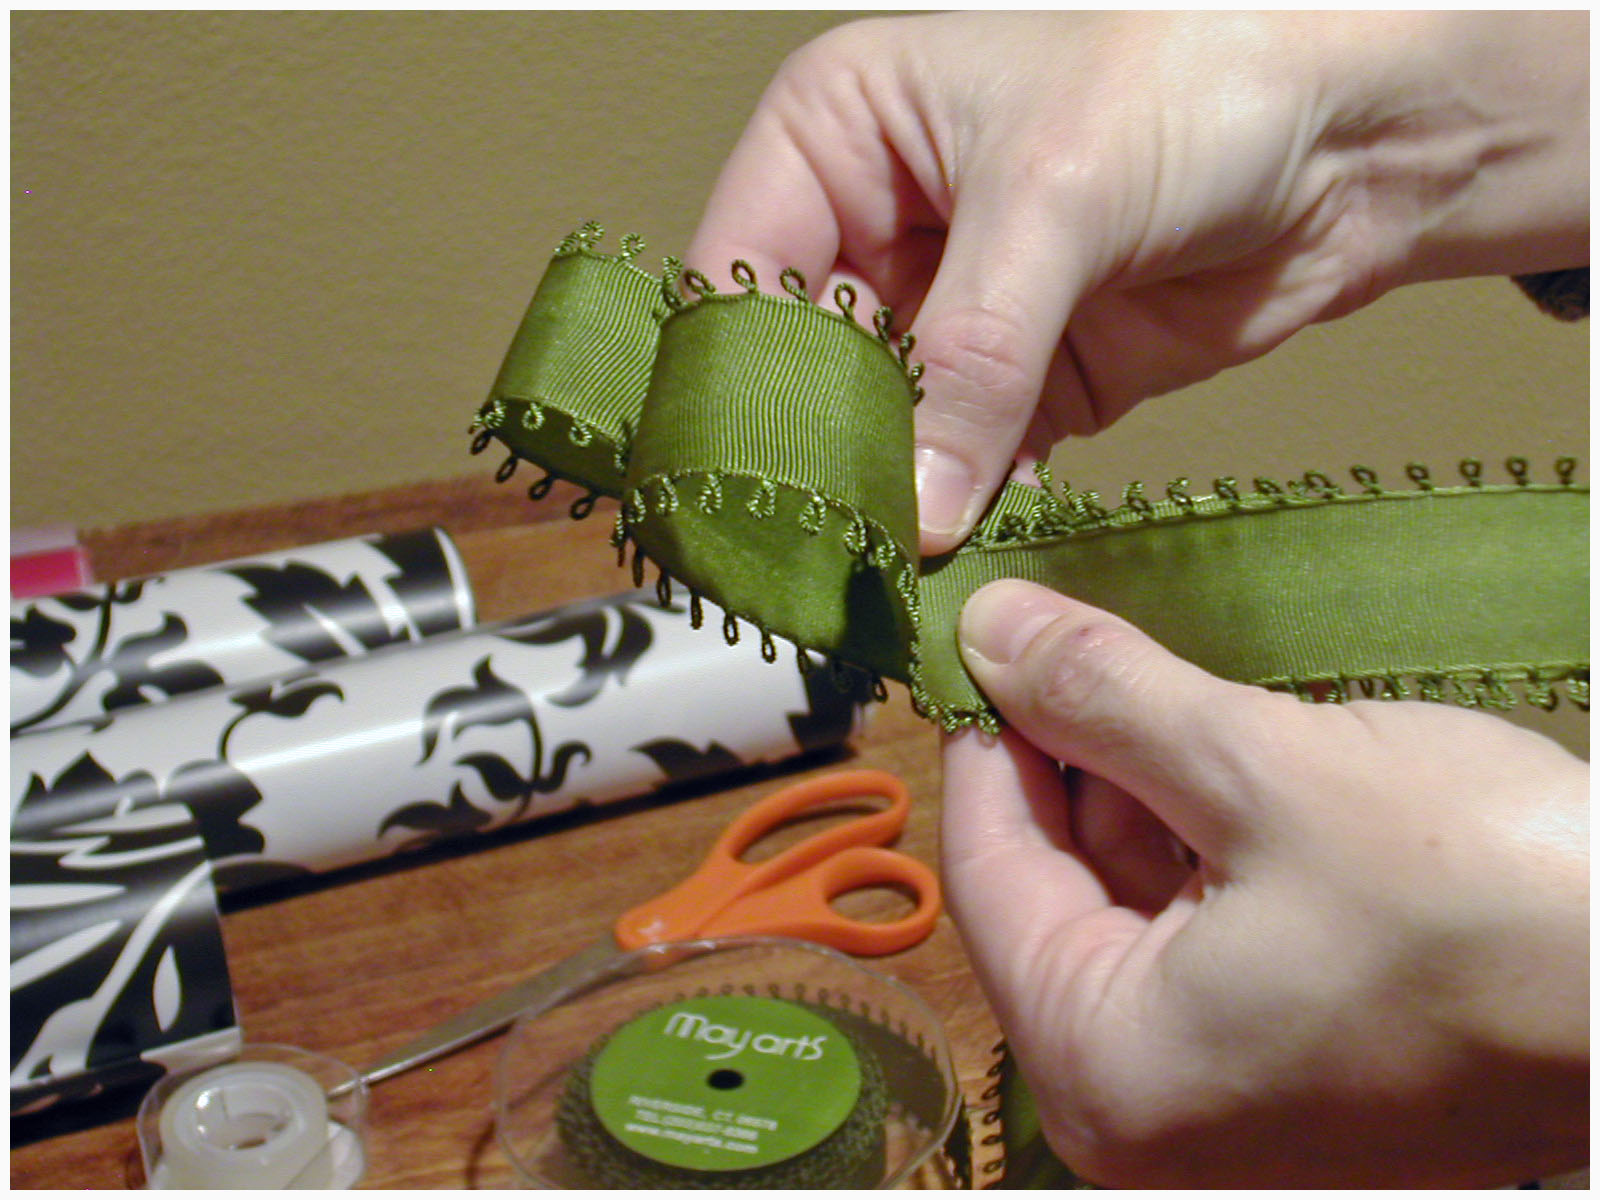
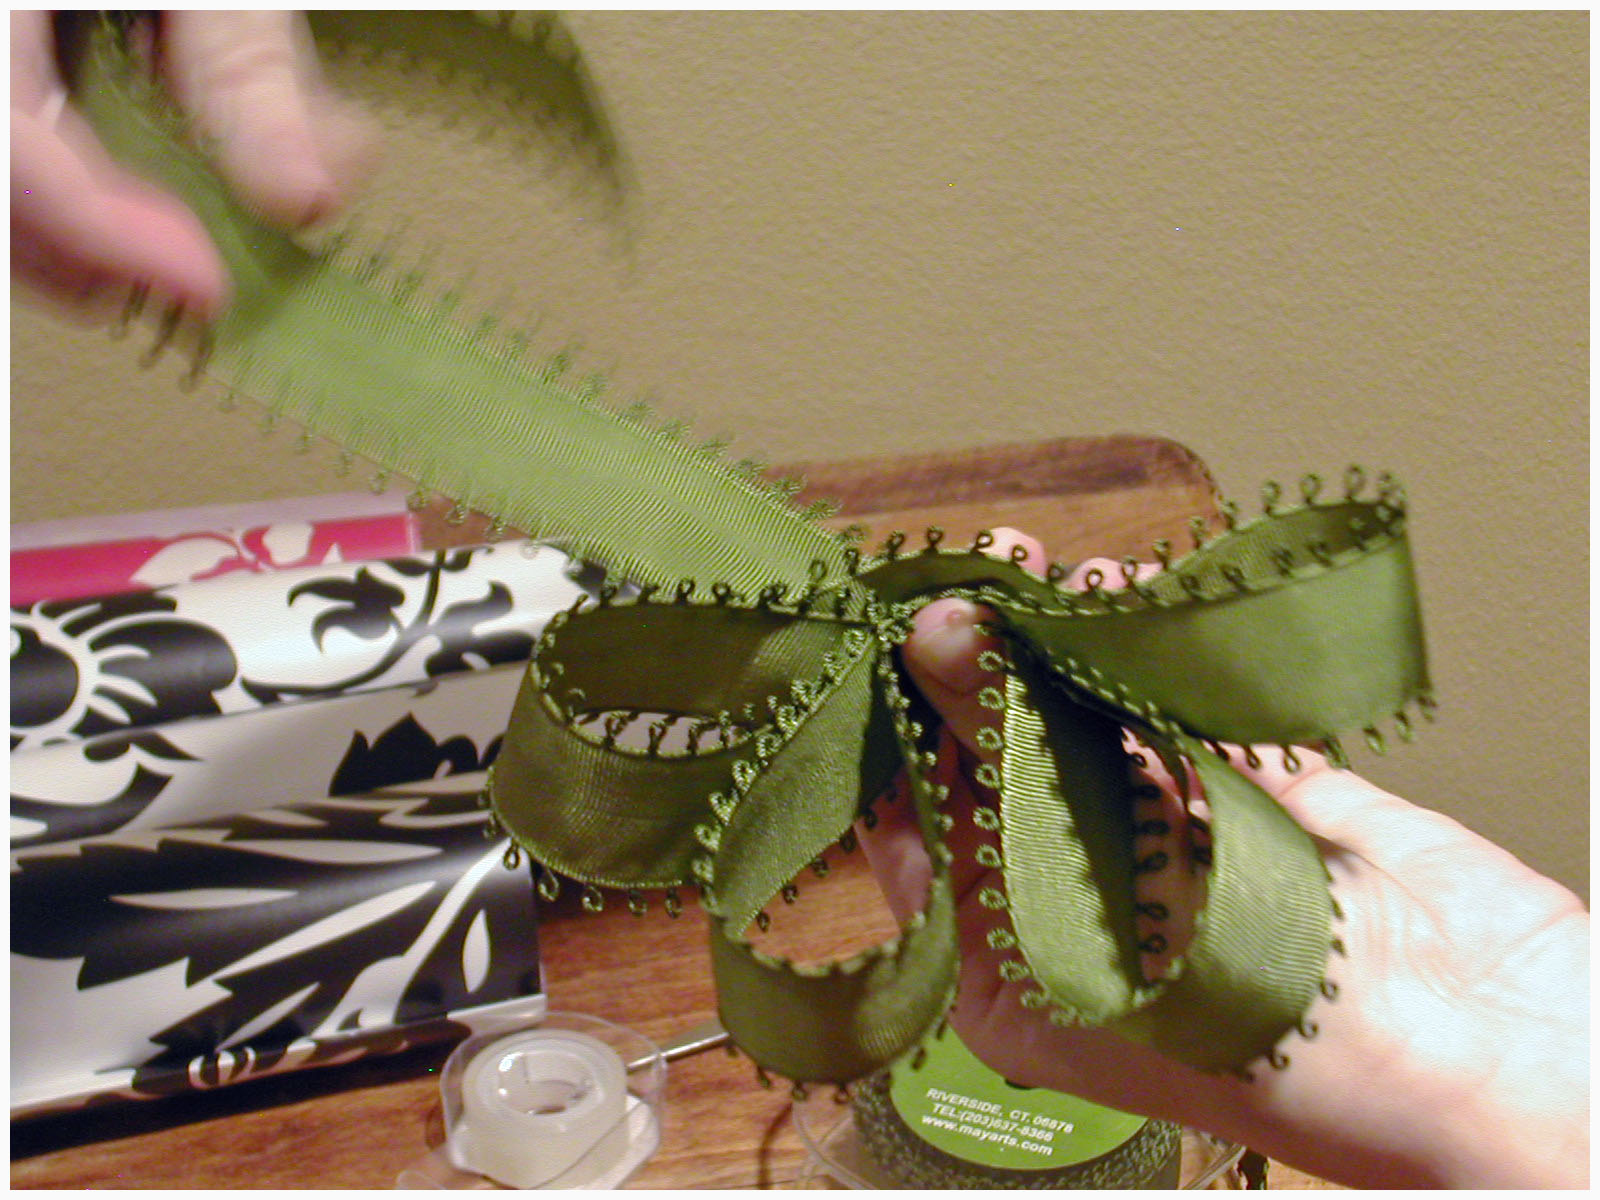
Step 5: Take 8 inches of ribbon on fold it over onto itself. Hold the tail of the ribbon {this will be the short tail} in your left hand while you work.
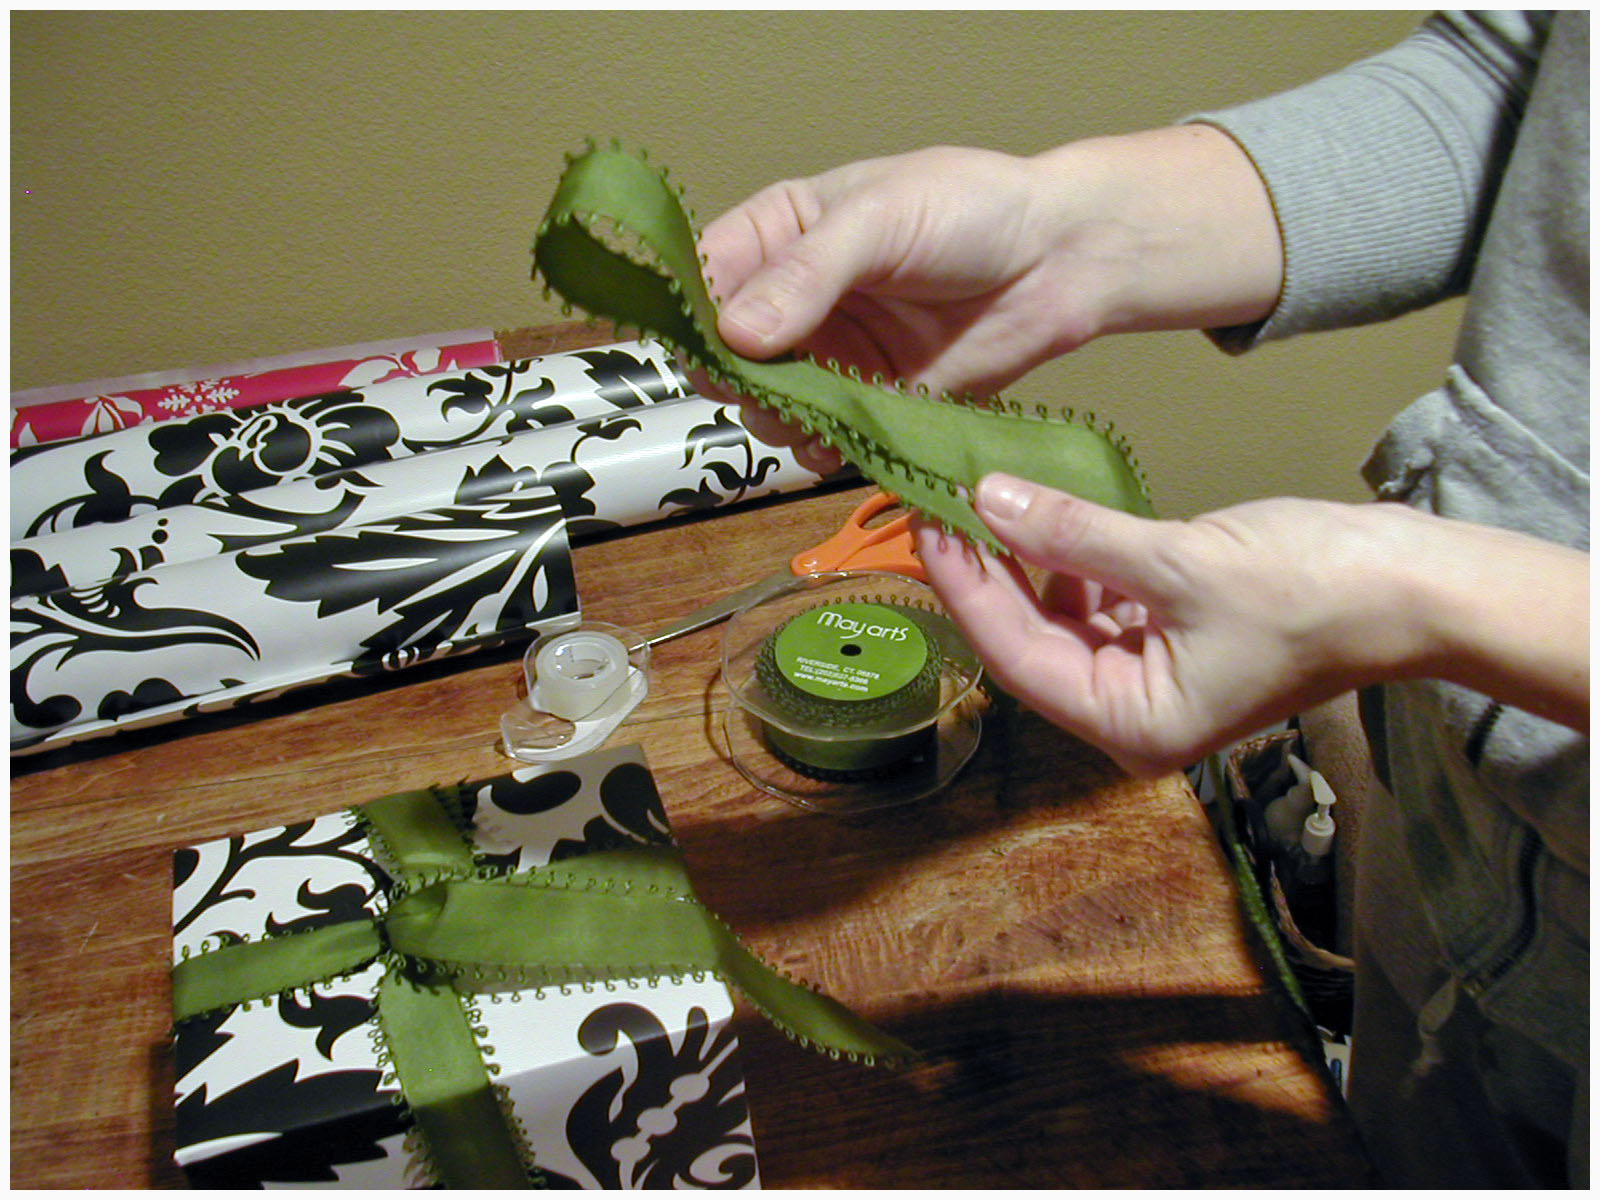
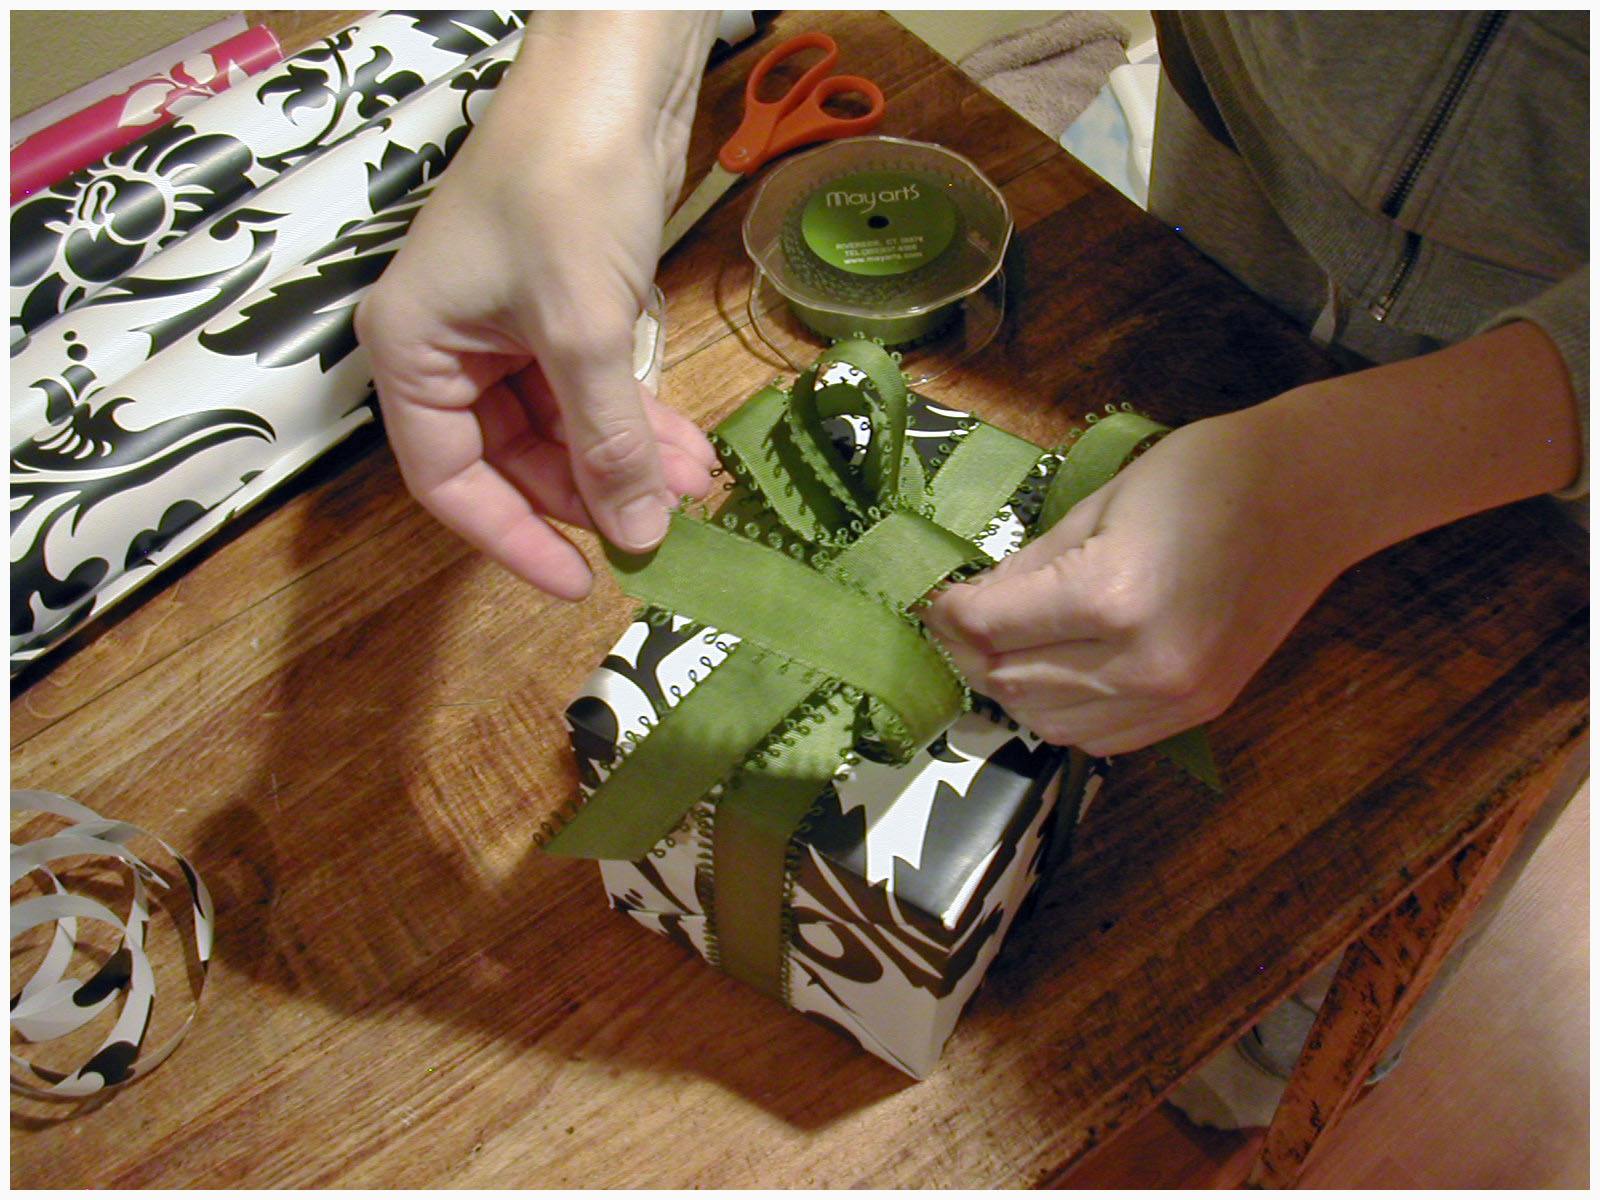
Step 6: Make another loop, this time coming from the opposite end of the ribbon {the long tail}.
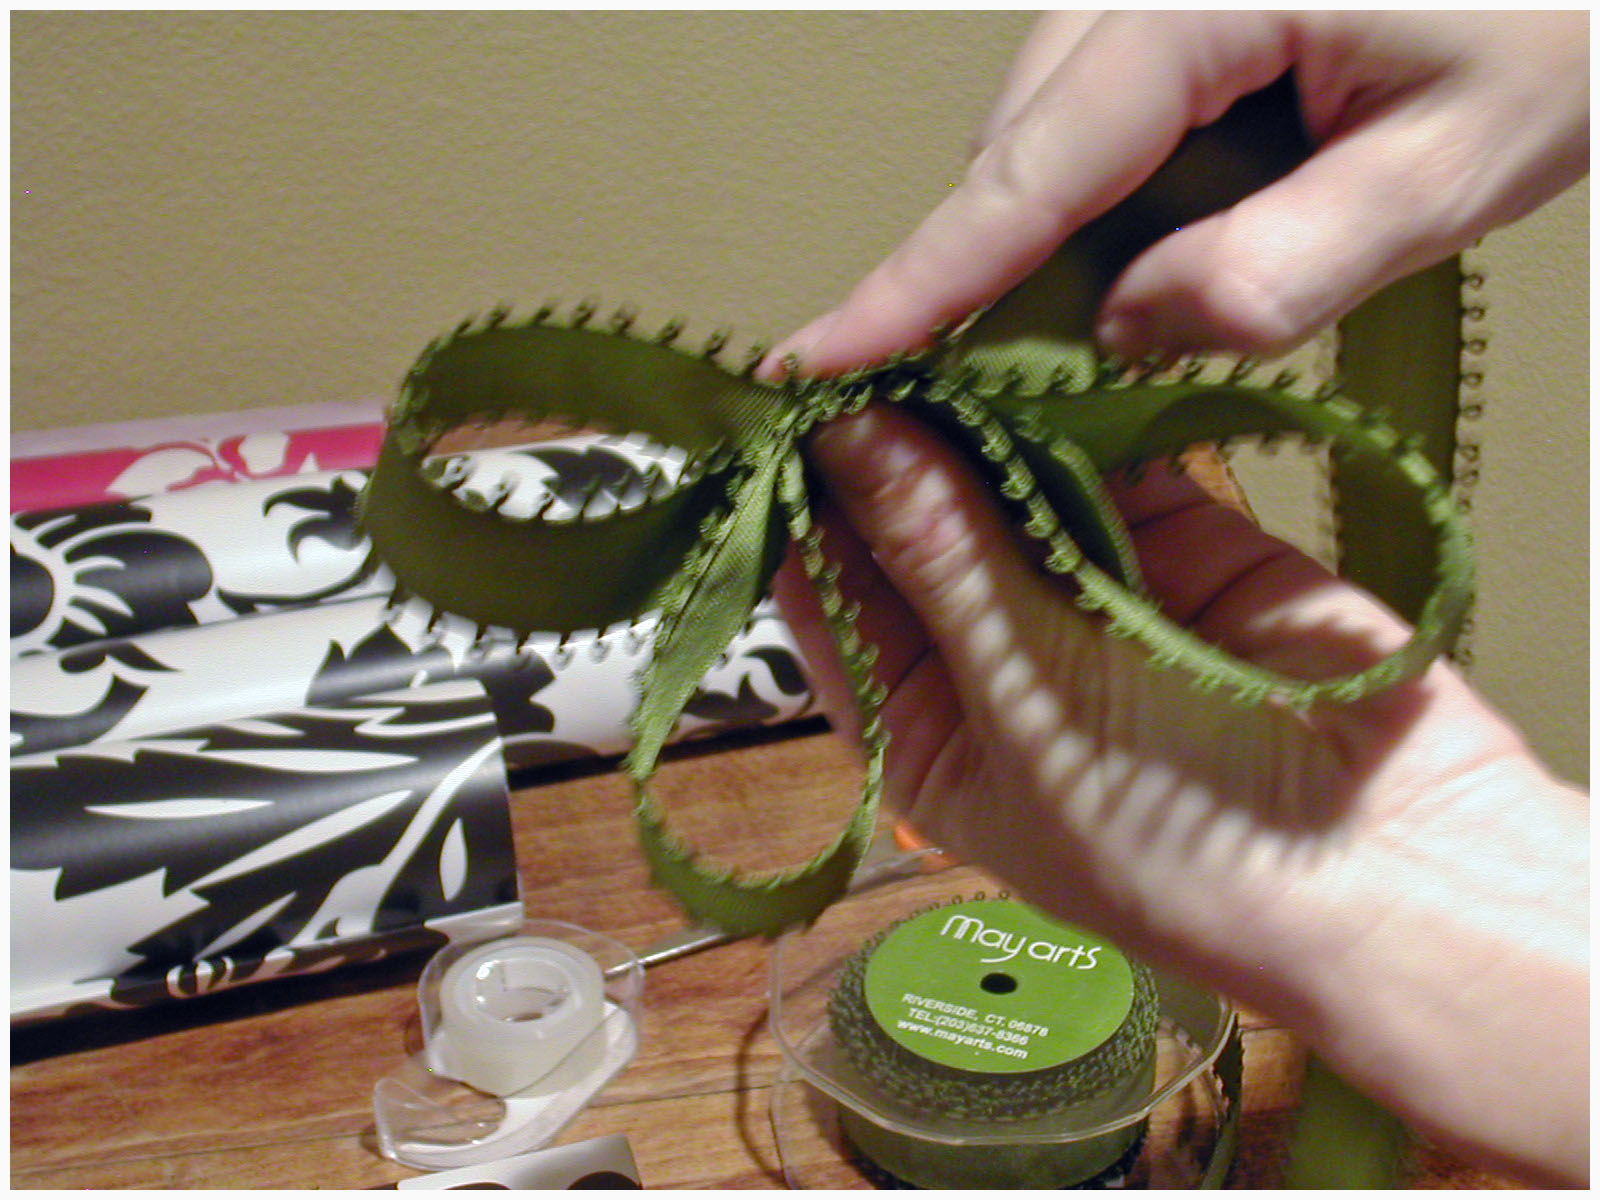
Note: The long tail is the end that you are supplying the loops from.
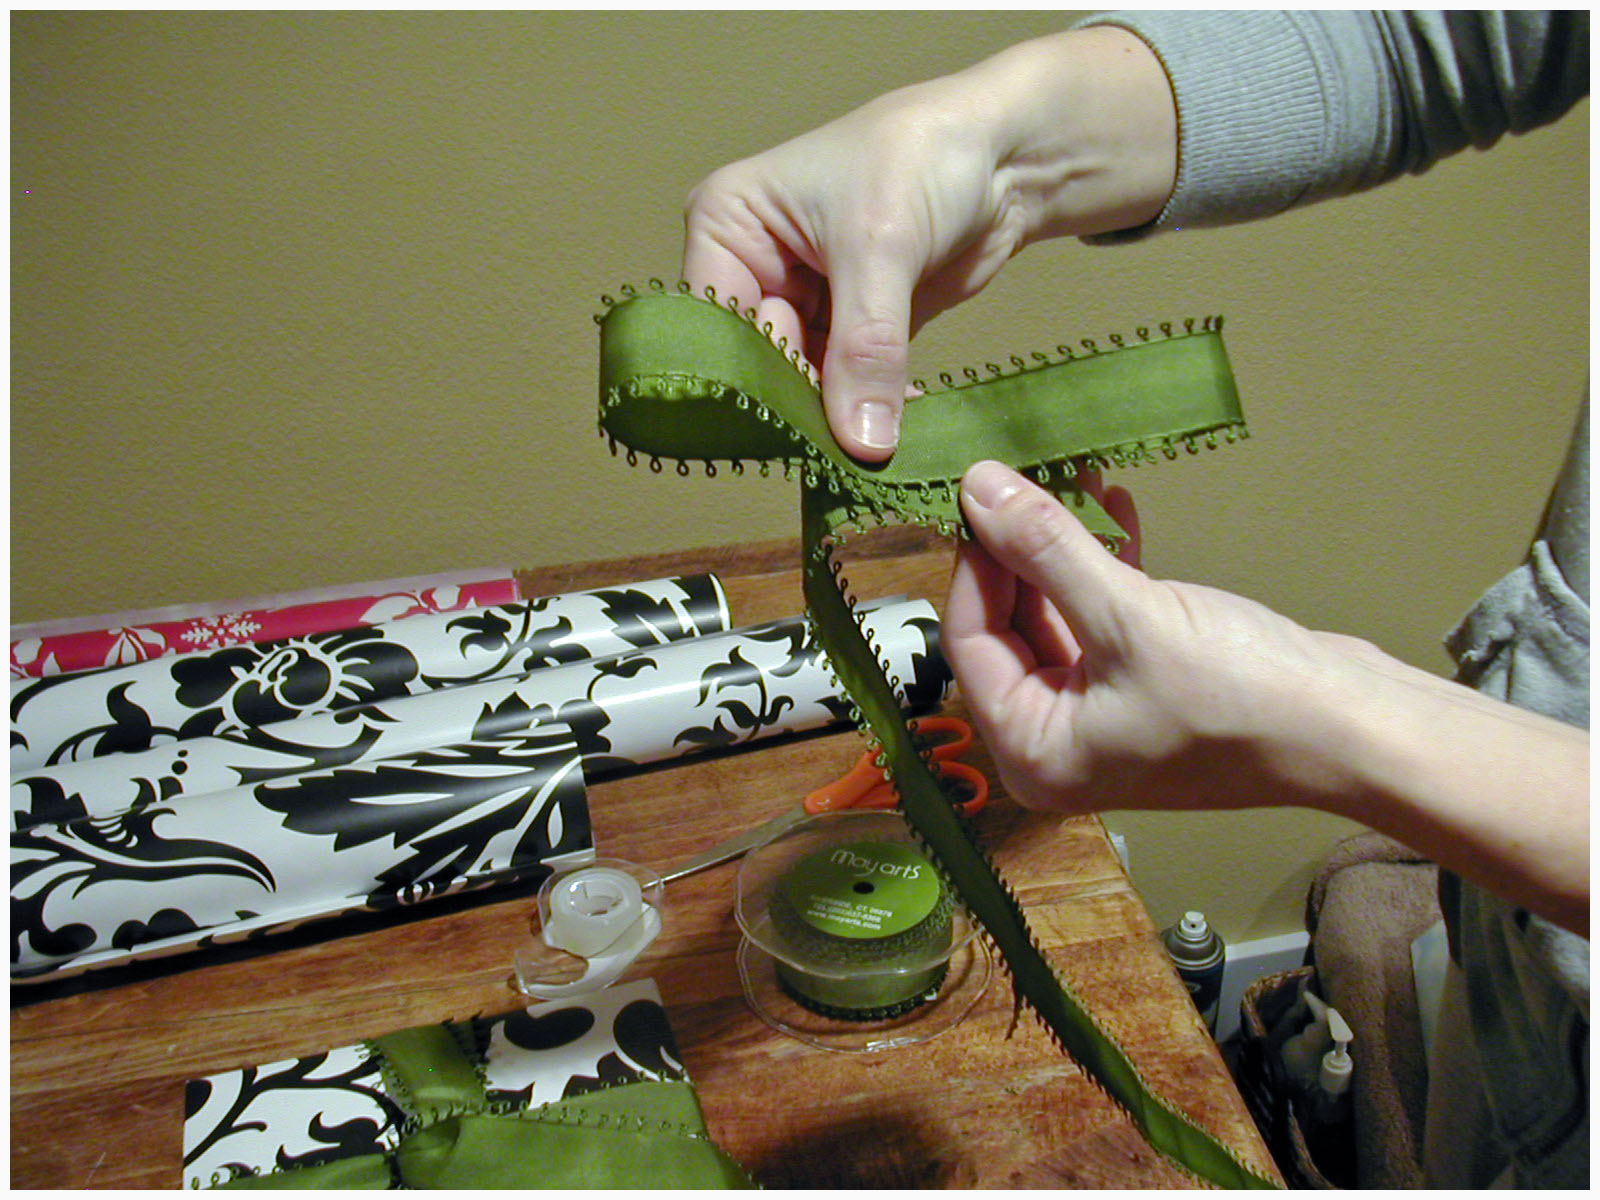
Step 7: Continue to make 3 loops on both sides of your bow.
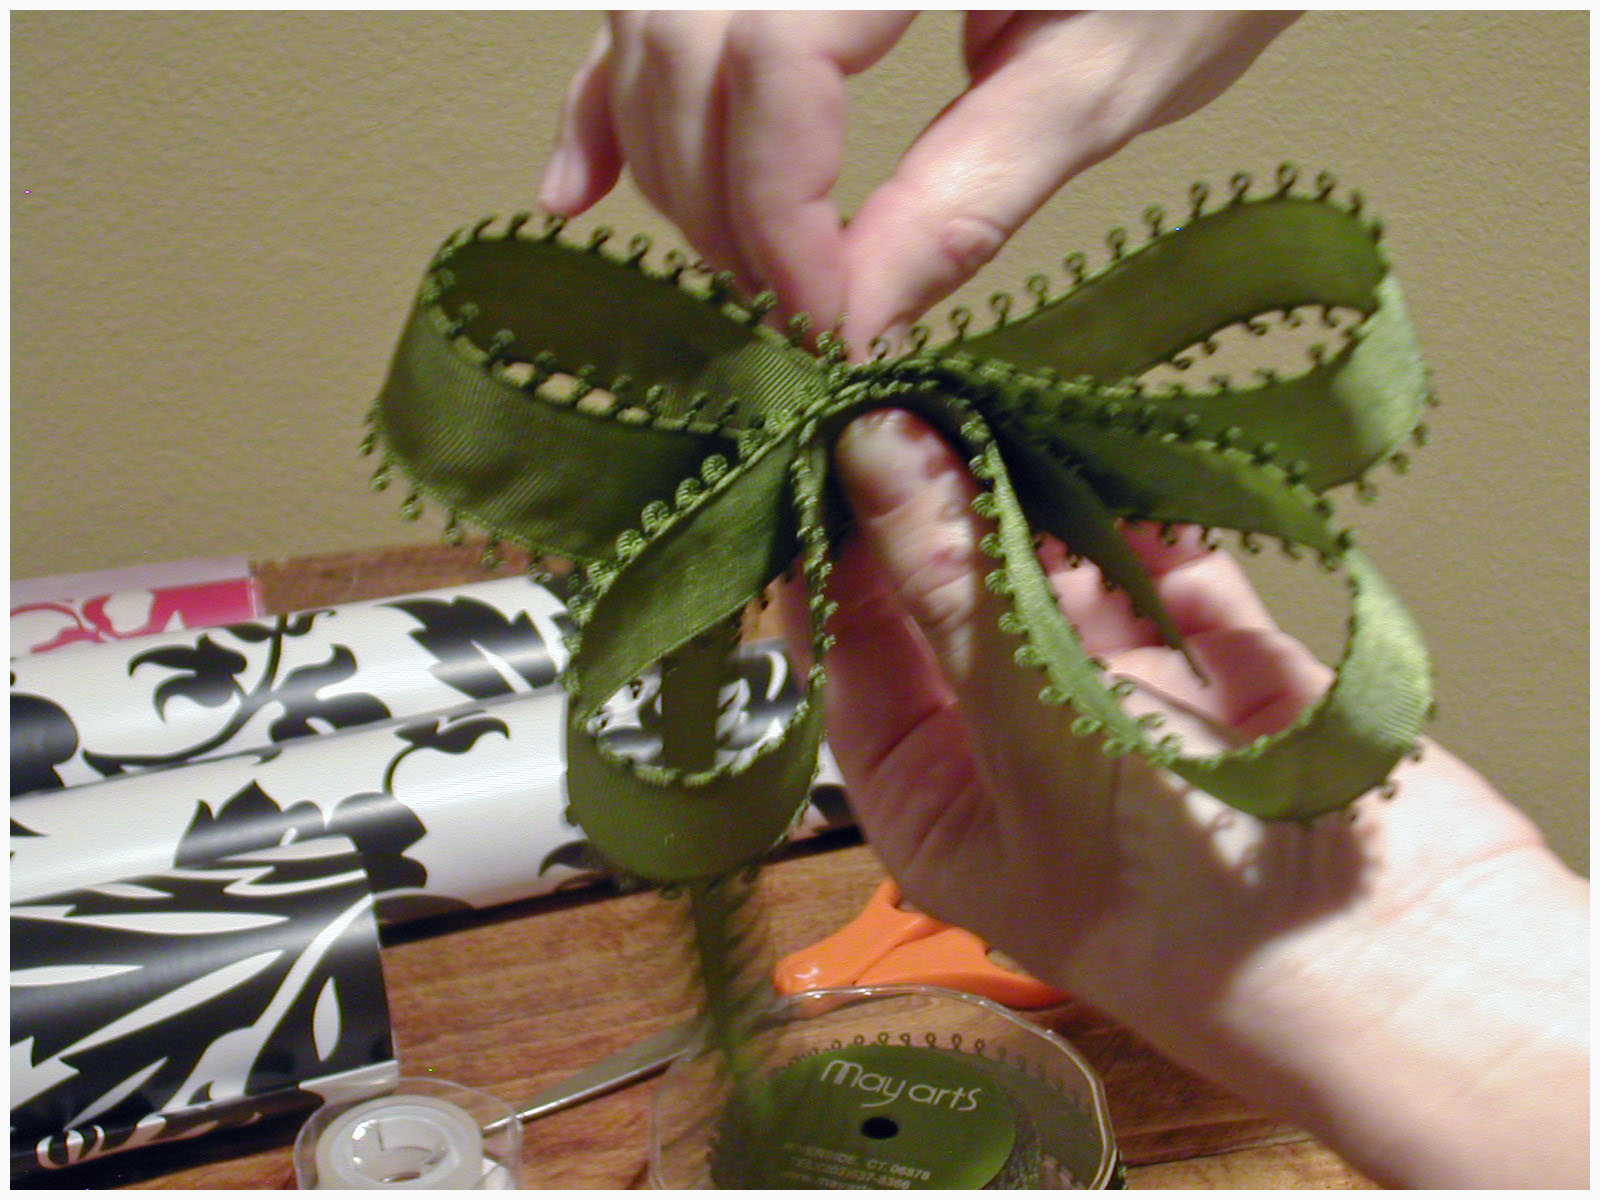
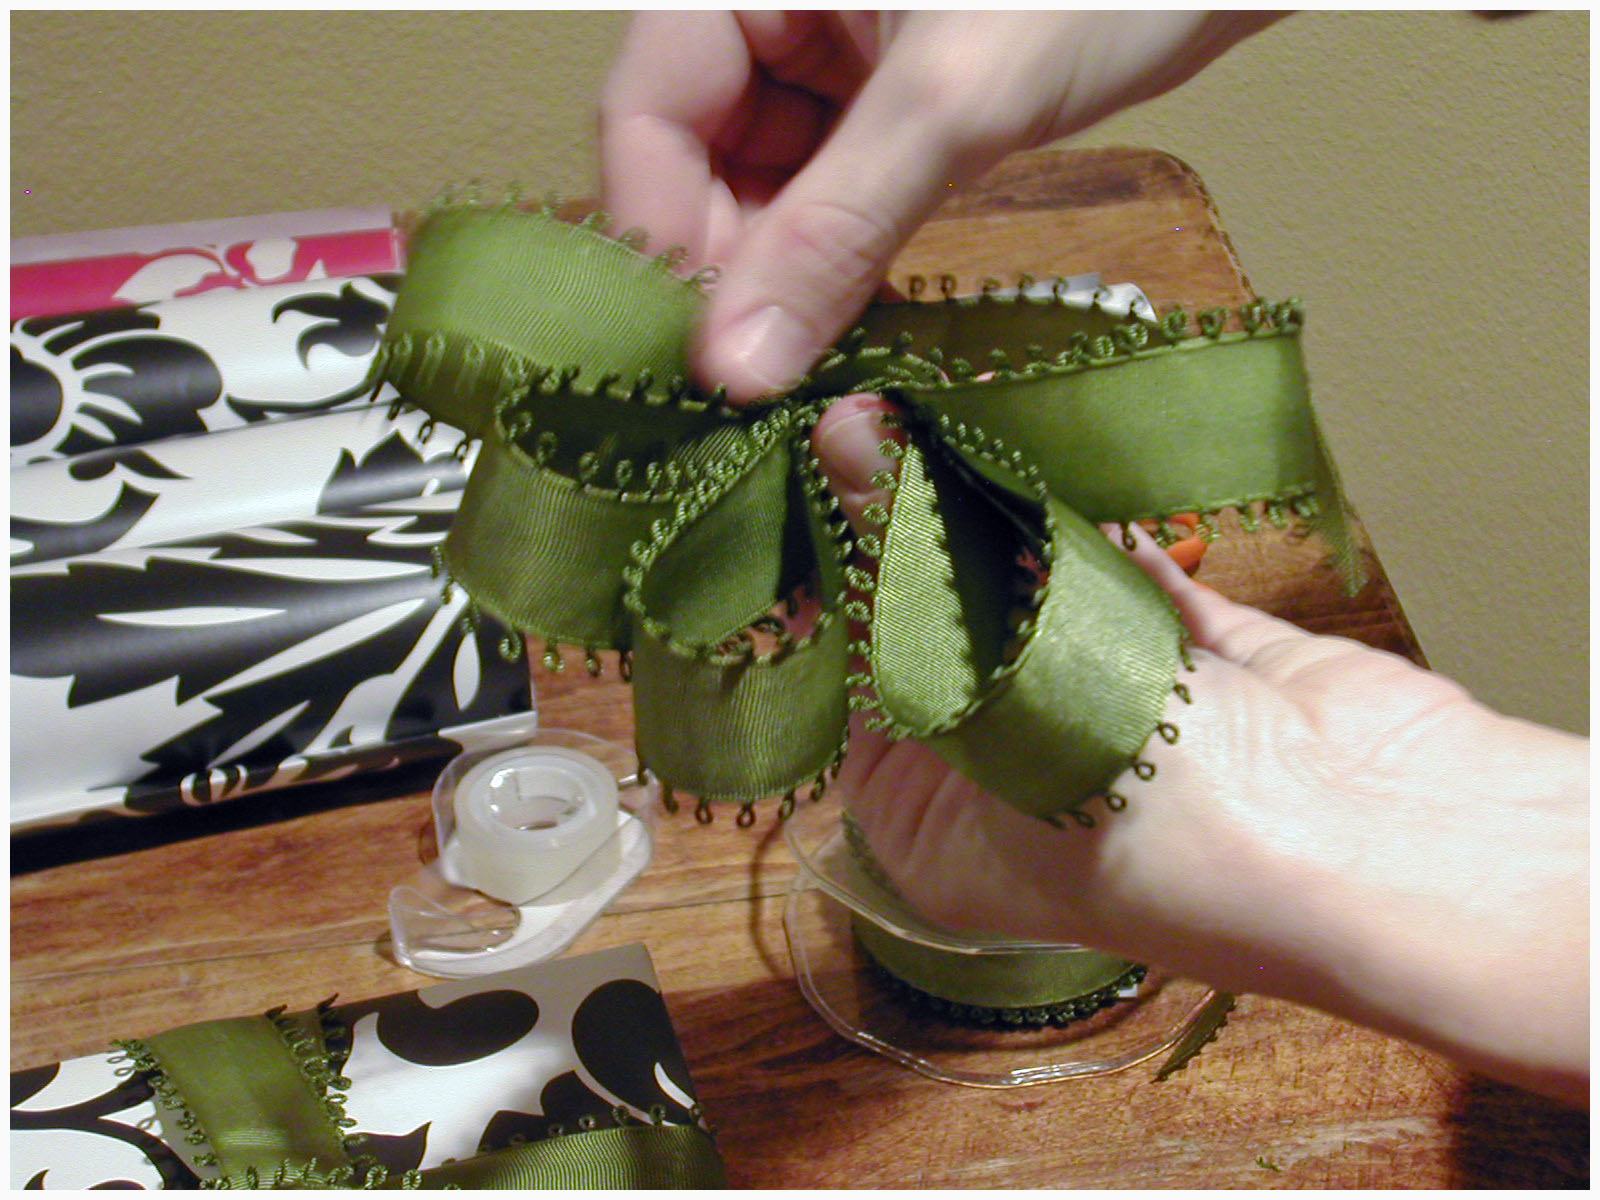
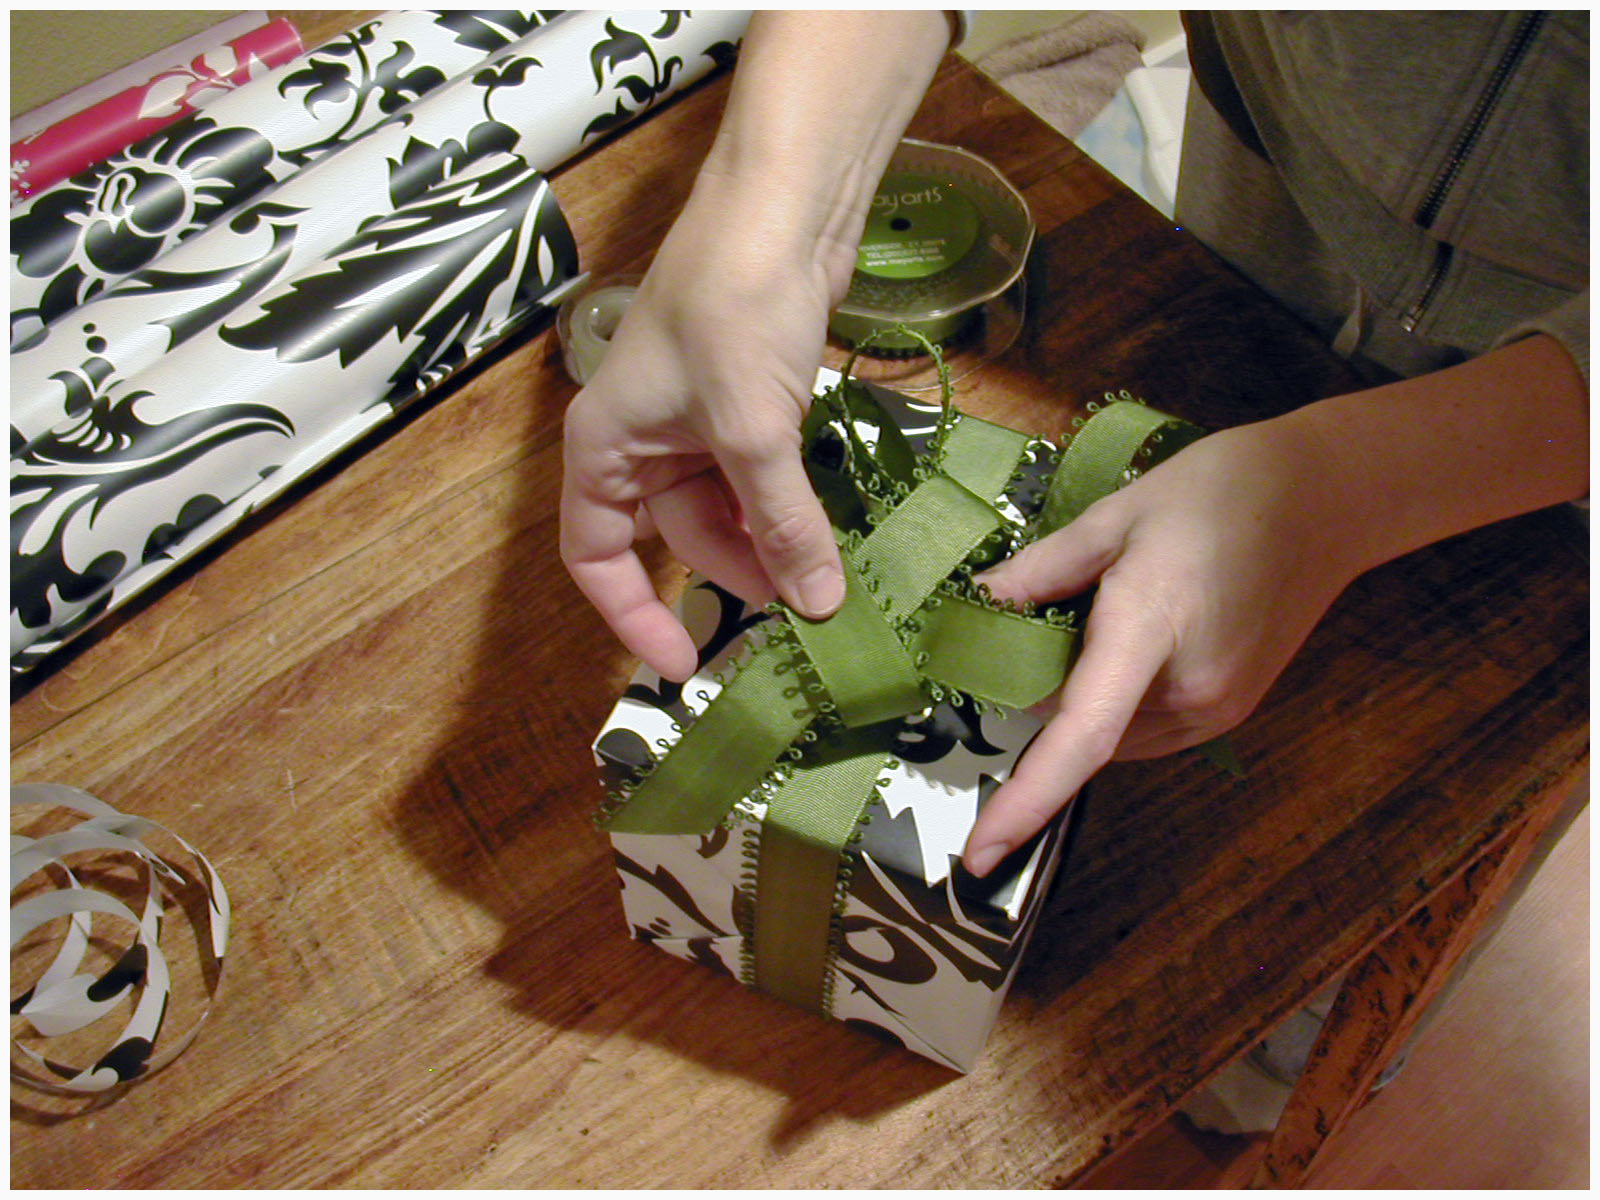
Step 8: Once you have completed all of your loops, hold the bow together tightly in your hand and place over the knot on your package.
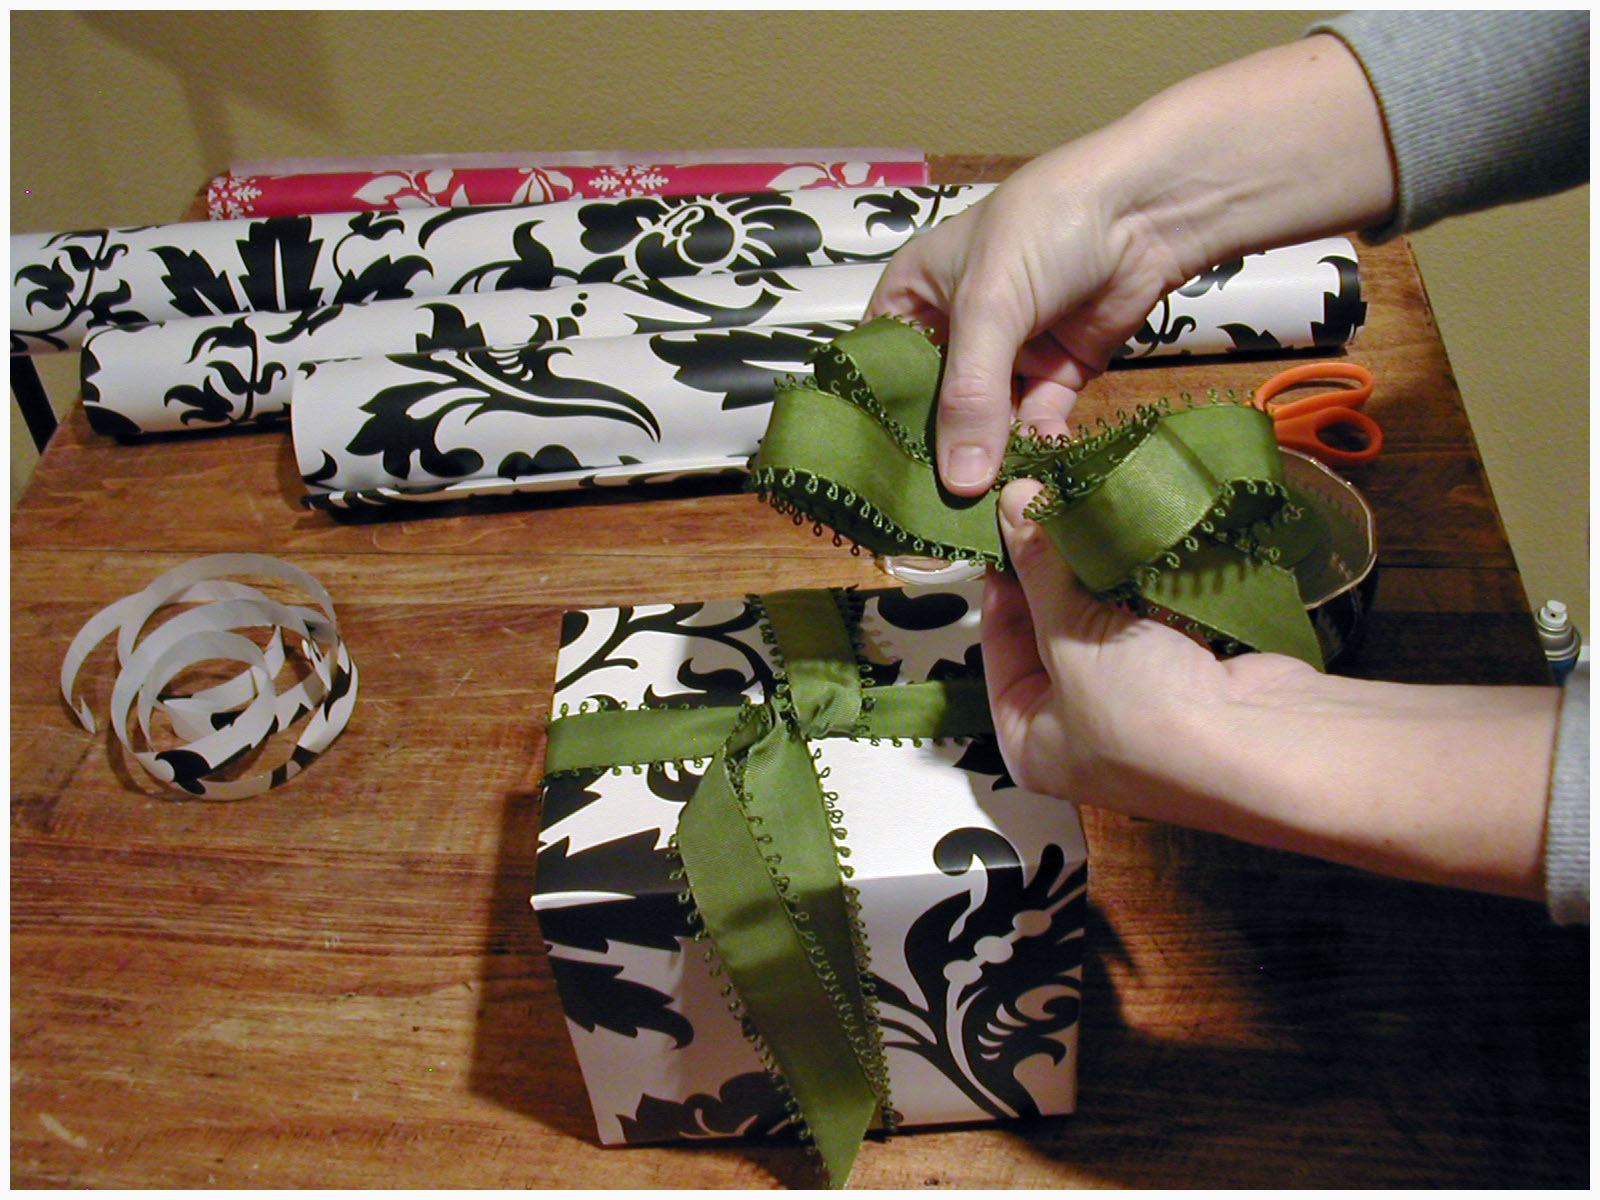
Step 9: Using the ribbon tails from the knot on your package, tie another knot over the bow you have just created and secure tightly.
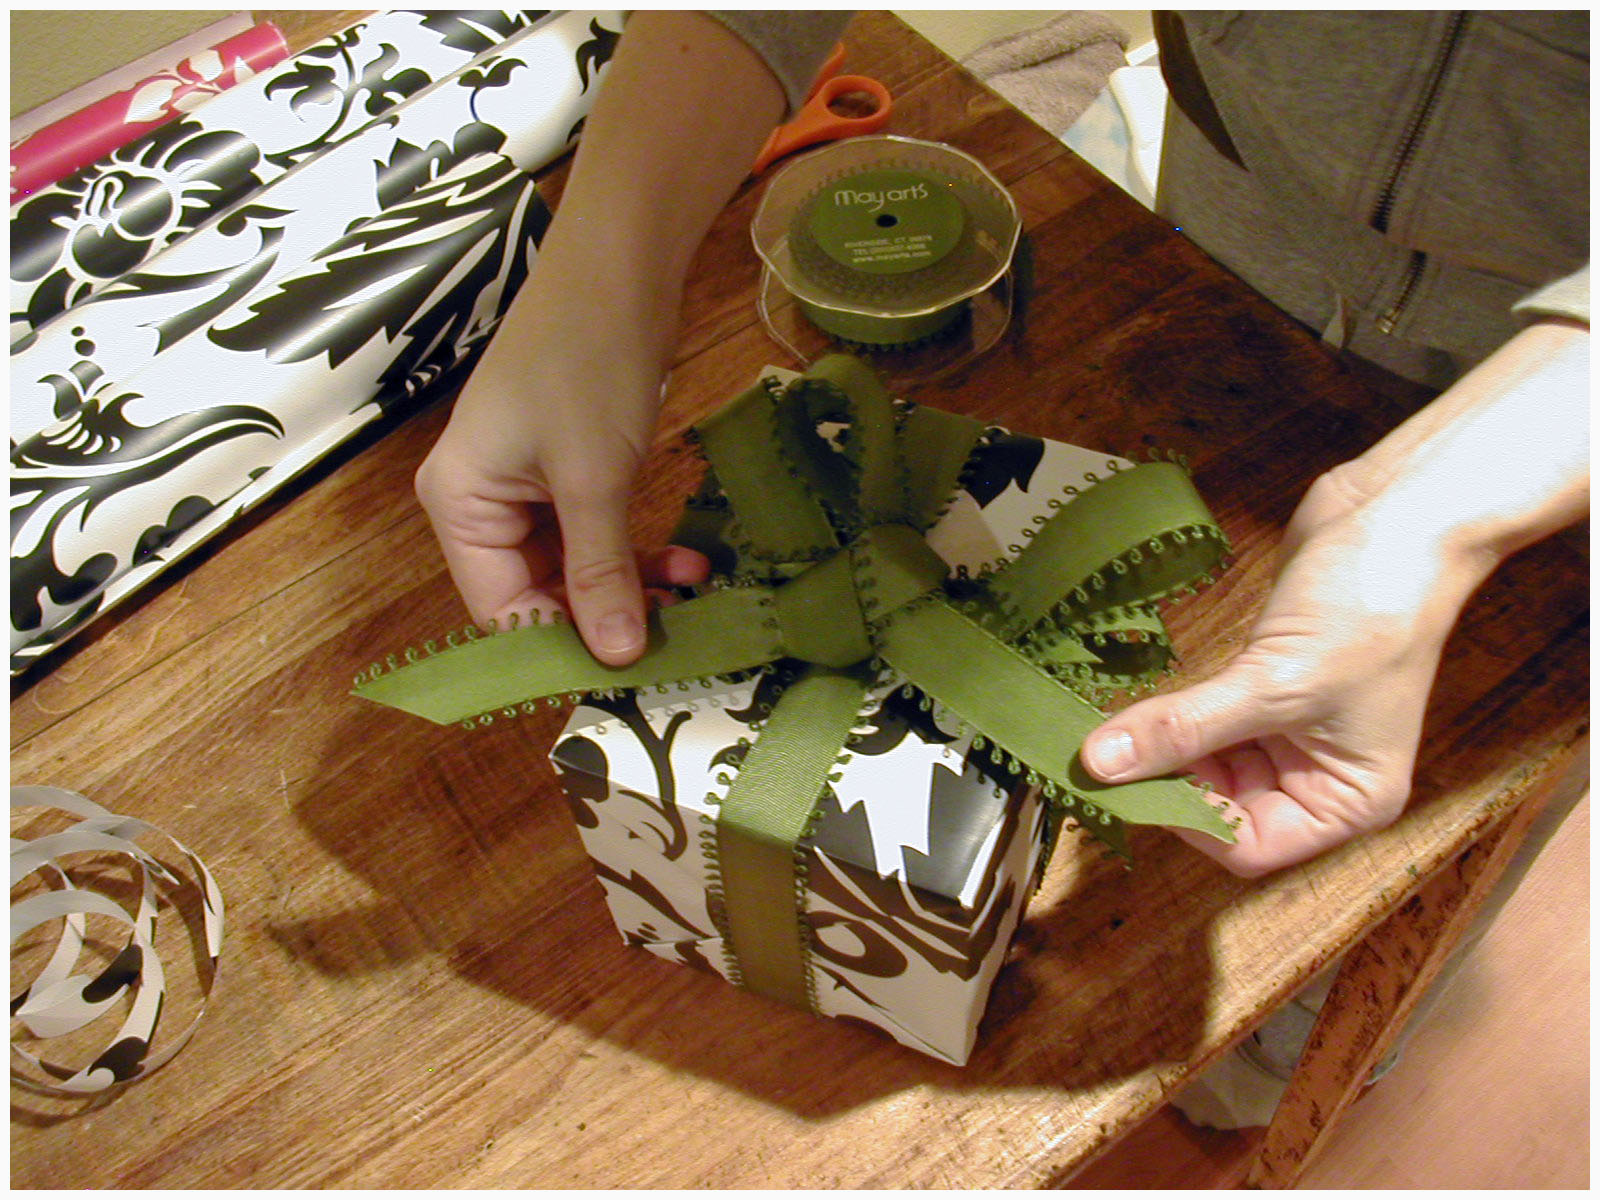
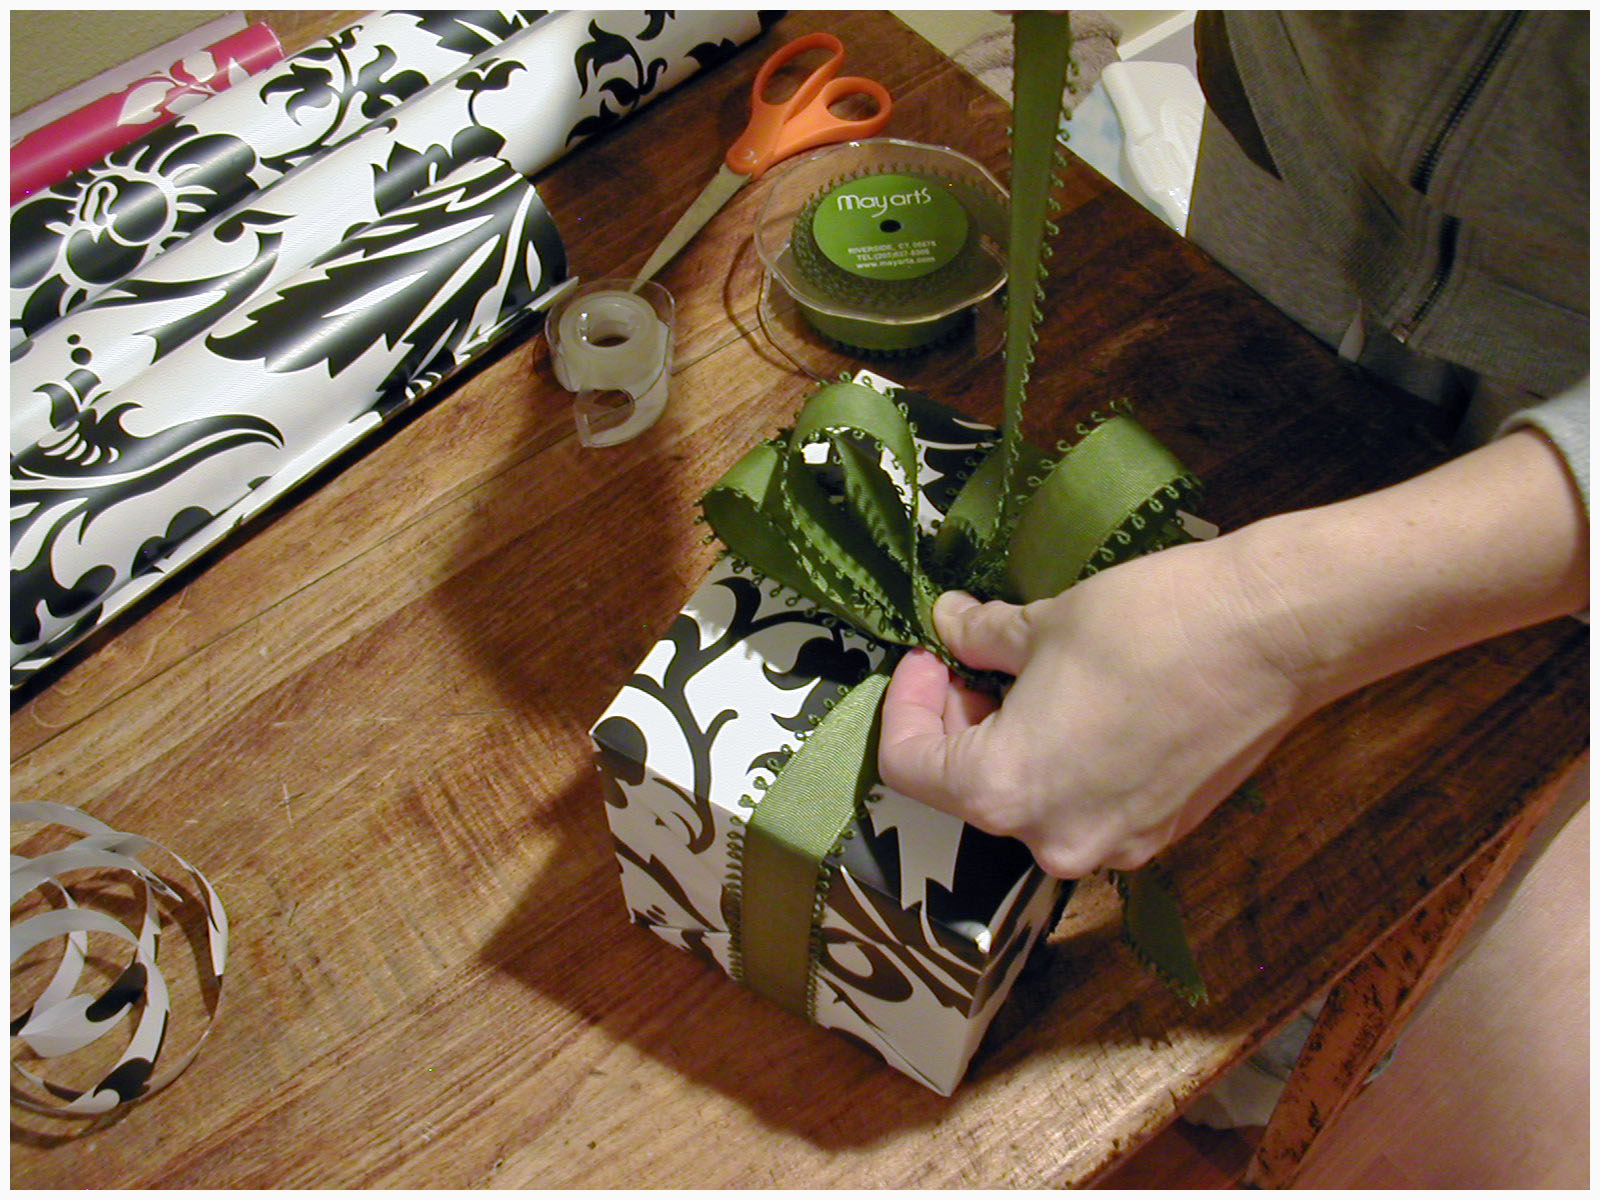
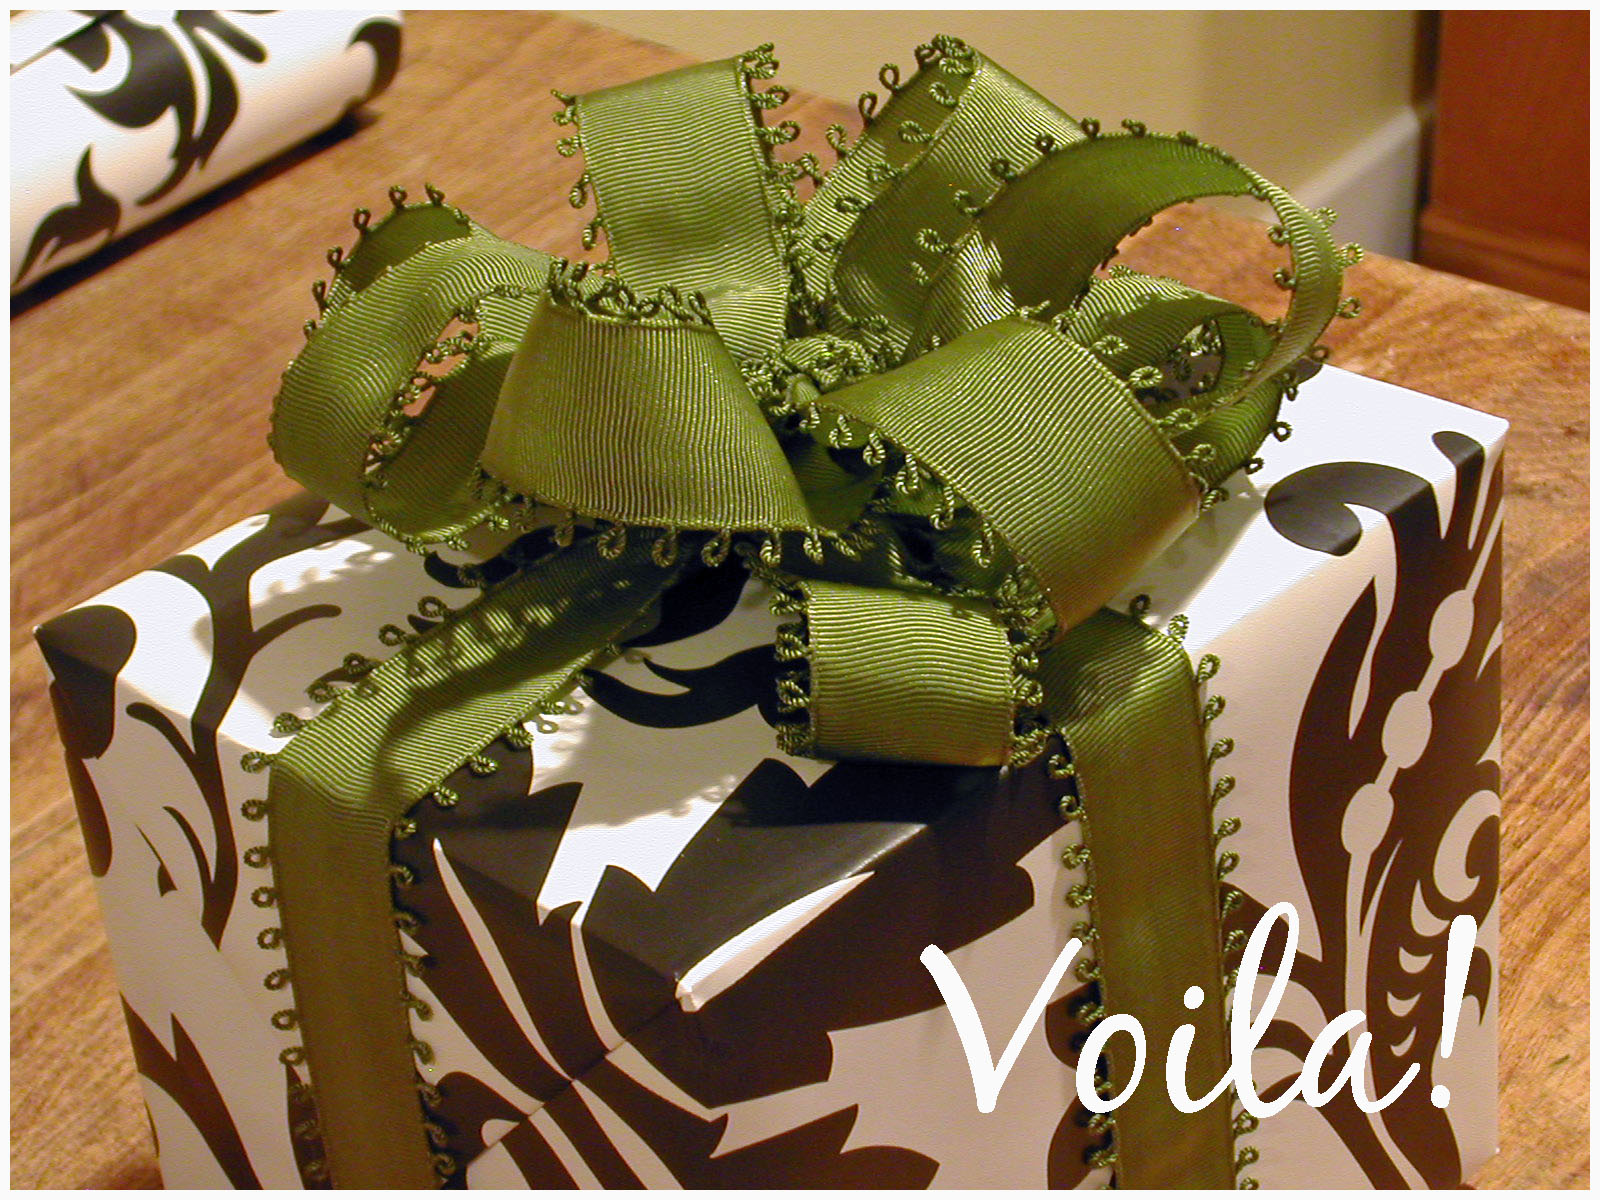
Step 10: Fluff your loops. You have just created a beautiful bow!
Don’t get discouraged with your first couple of tries. It has taken a lot of practice to be able to do this. I know you can do it too!
Facebook Conversations