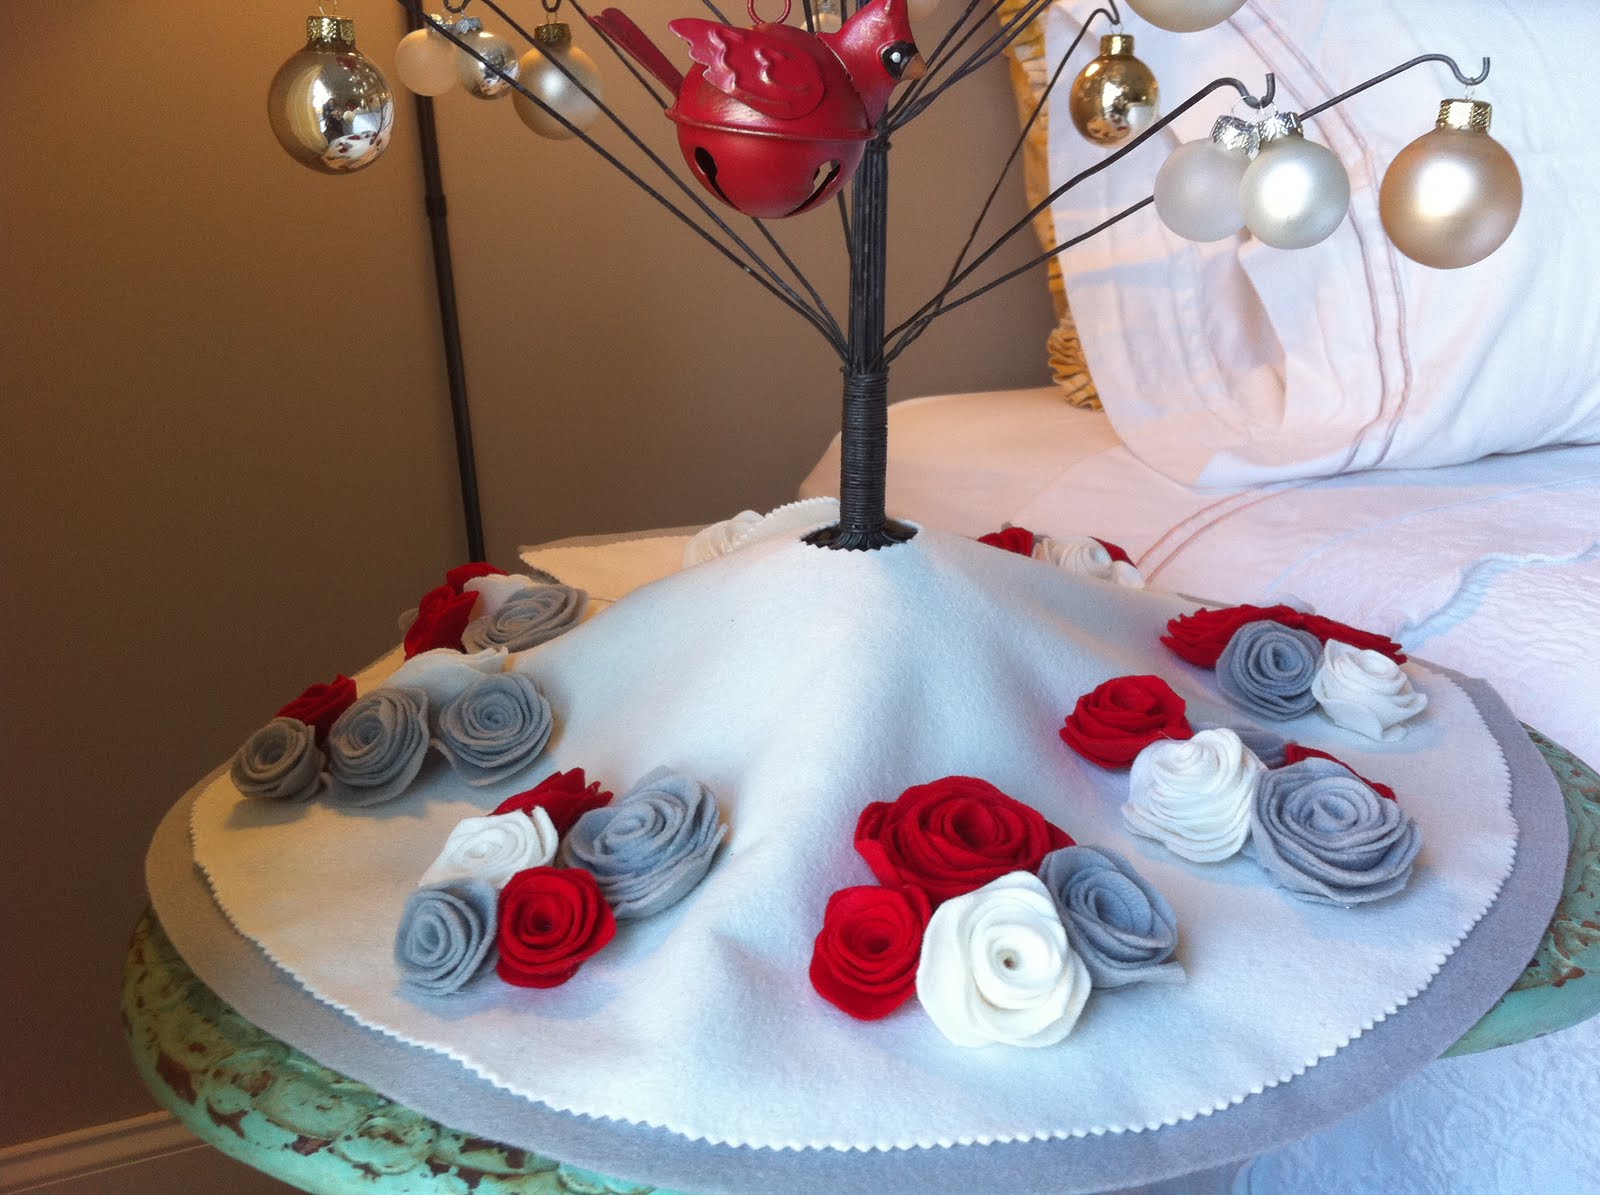
DIY Felt Flower Tree Skirt
Here little tutorial on the DIY felt flower tree skirt. It was super simple and required just three things – scissors, felt, and hot glue.
We have this adorable little wire tree that I got at a flea market years ago. When we were living in much smaller quarters in Boston, this was about as big as the tree got most years. These days we have space for a traditional Frasier fir in the living room, so this little guy now brings holiday cheer to a bedside table in our guest bedroom.
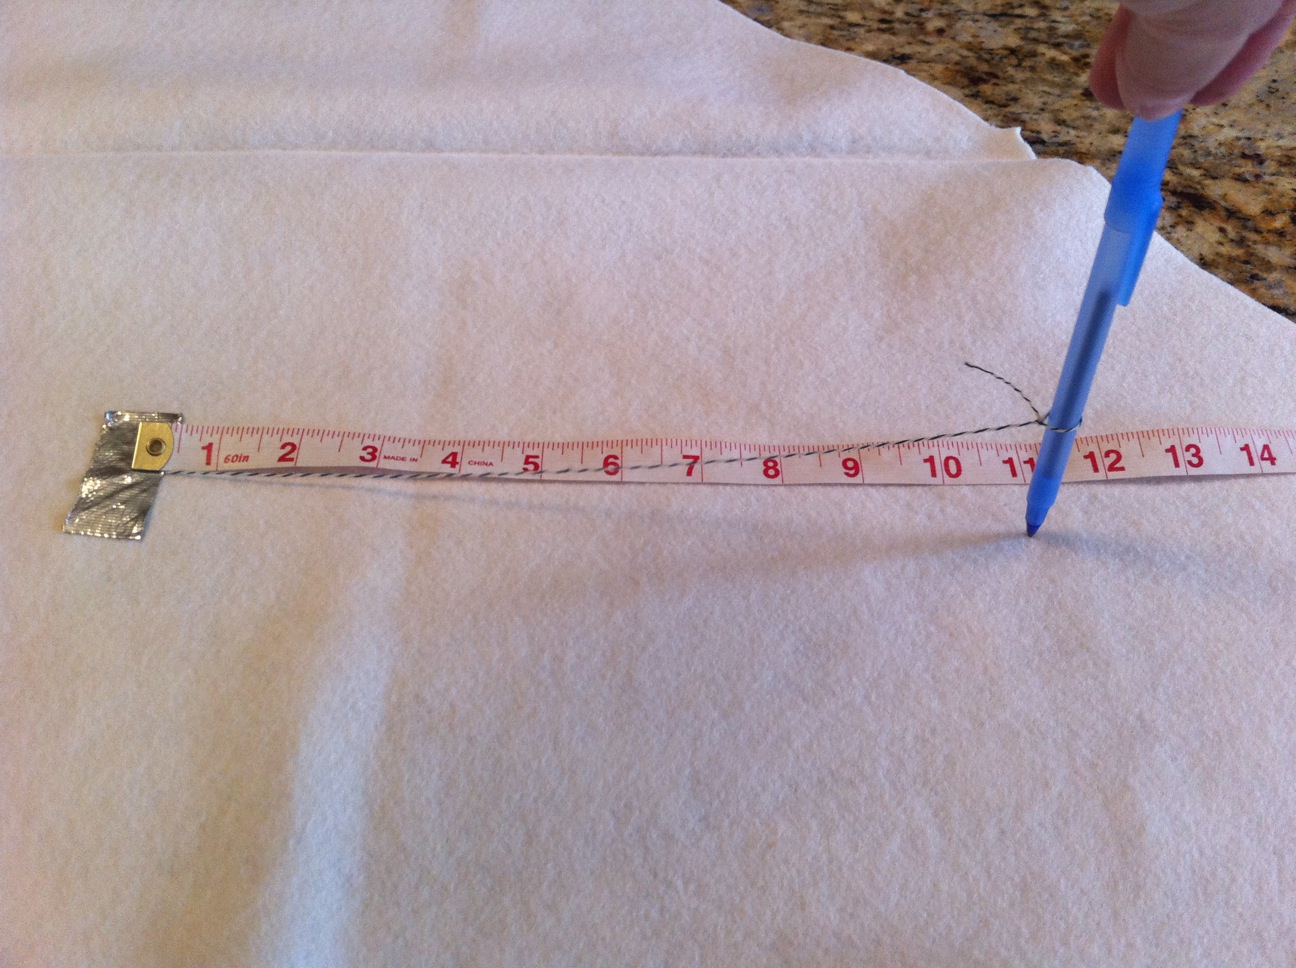
The first thing you’ll need to do is cut out a circle of felt to be used as the skirt base. I’m sure I could have used some high school geometry to figure out the circumference of the skirt for my little tree. But I hated geometry, so instead, I eyeballed it and decided I wanted the skirt to extend about a foot from the stem. I tied 12″ of string to a pen, used some masking tape to secure the other end of the string to the felt, and used this makeshift compass to draw a near-perfect circle. There’s most definitely a better way to do this, but this is how I did it.
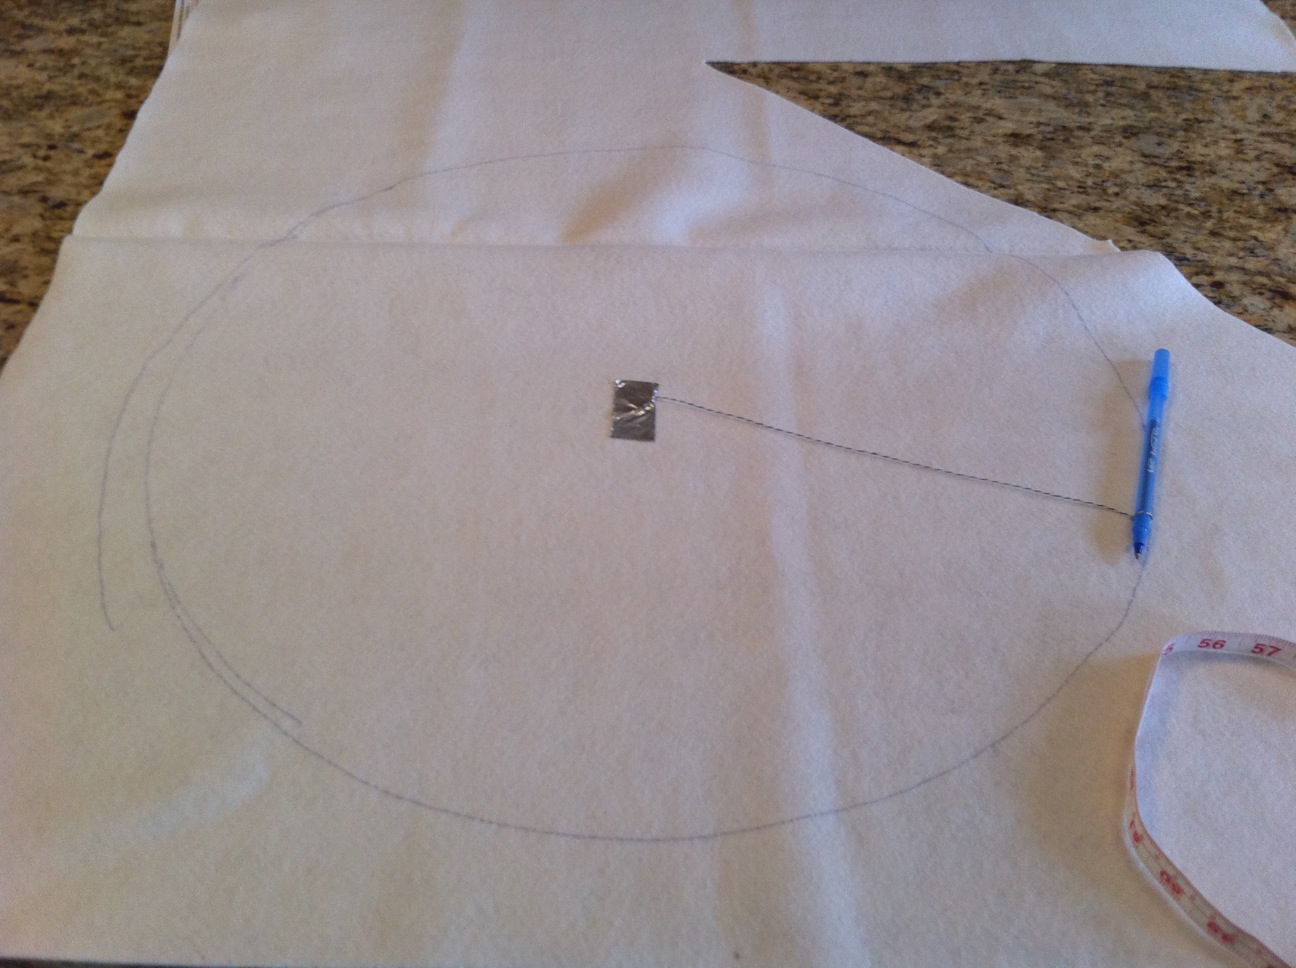
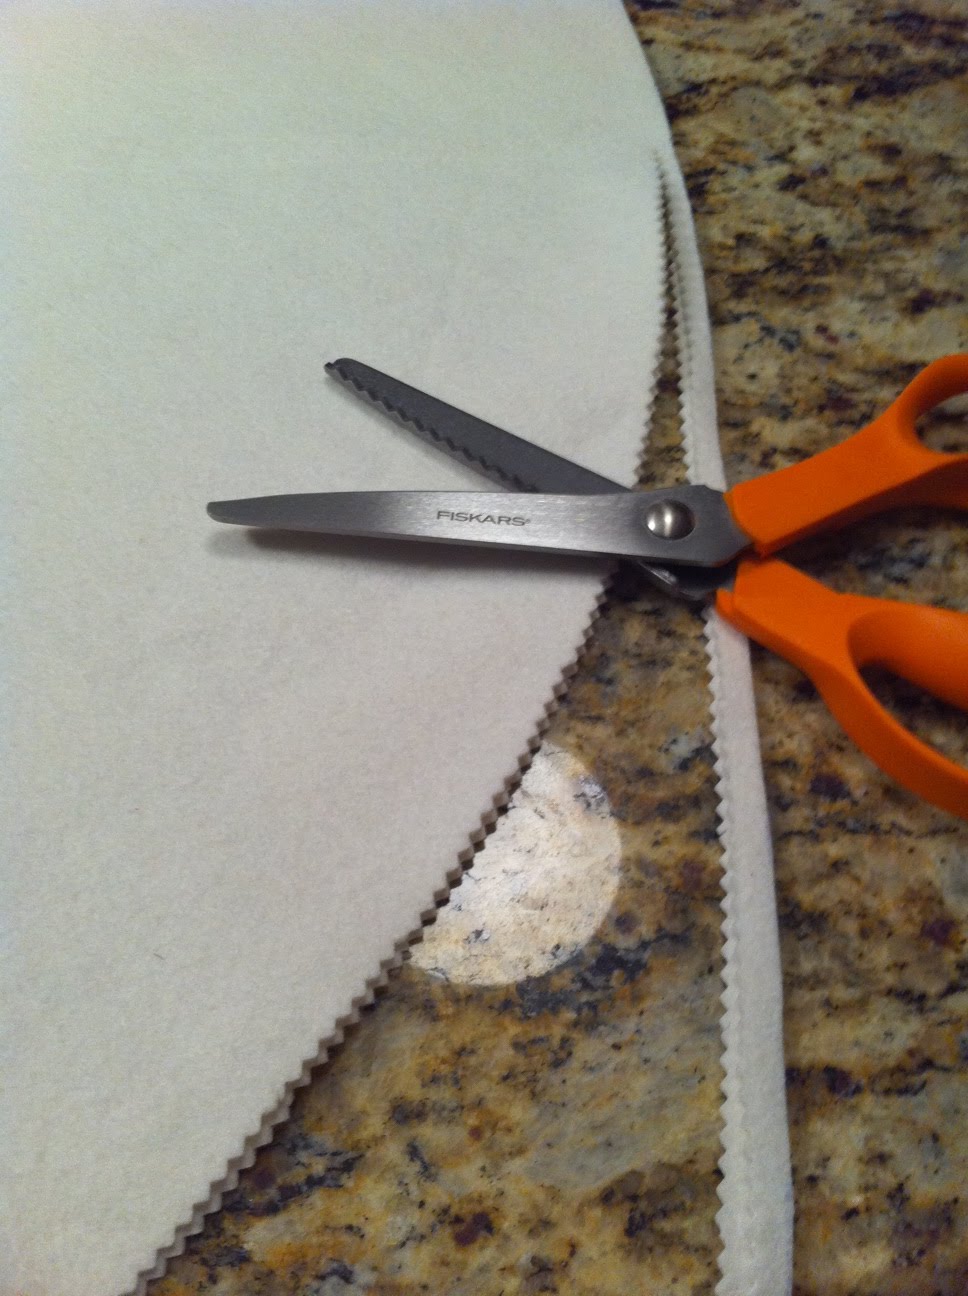
To make the edge a little more interesting, I went back and trimmed it up using some pinking shears. I love the look of a cute little pinked edge! You’ll also, of course, want to cut a slit up one side of the skirt so you can wrap it around your tree. I don’t have a pic of this step, but I just folded the circle in half then in half again (so you have a triangle of sorts), snipped off the top of the triangle and then opened the whole thing up and cut from the hole I just created in the center out to the edge.
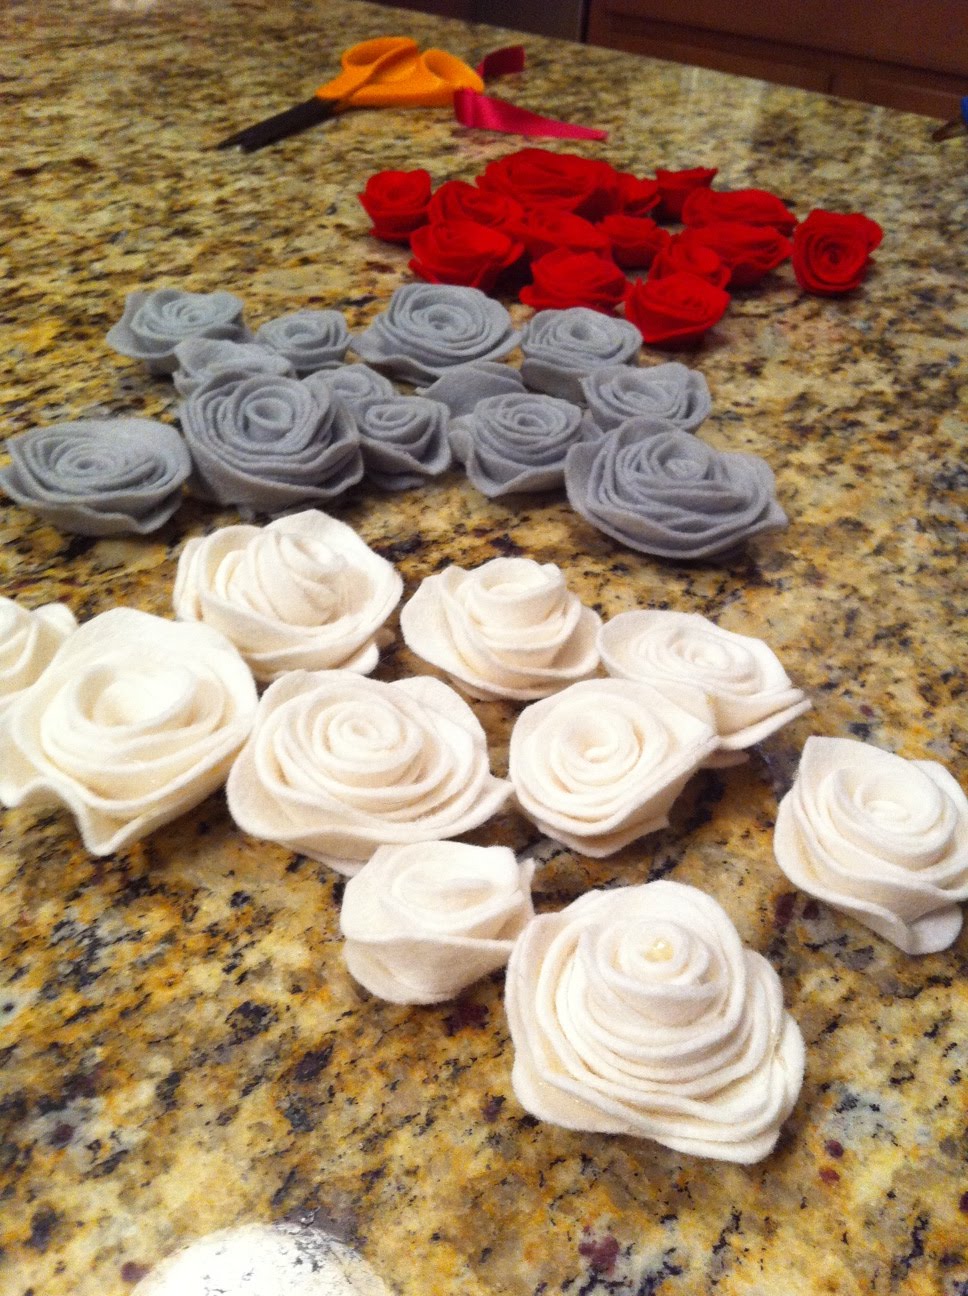
The next step was to make the flowers. There are lots of tutorials online about how to do this, so I won’t reinvent the wheel, but I will share a few little tips I learned along the way.
#1: To get a more realistic looking flower with non-uniform petals, you should cut out your felt in a wavy pattern. This creates the undulating petals that a real flower in nature has. If you cut out a perfect circle with a perfectly straight spiral, you get a much less interesting flower that looks like you rolled up a bunch of felt.
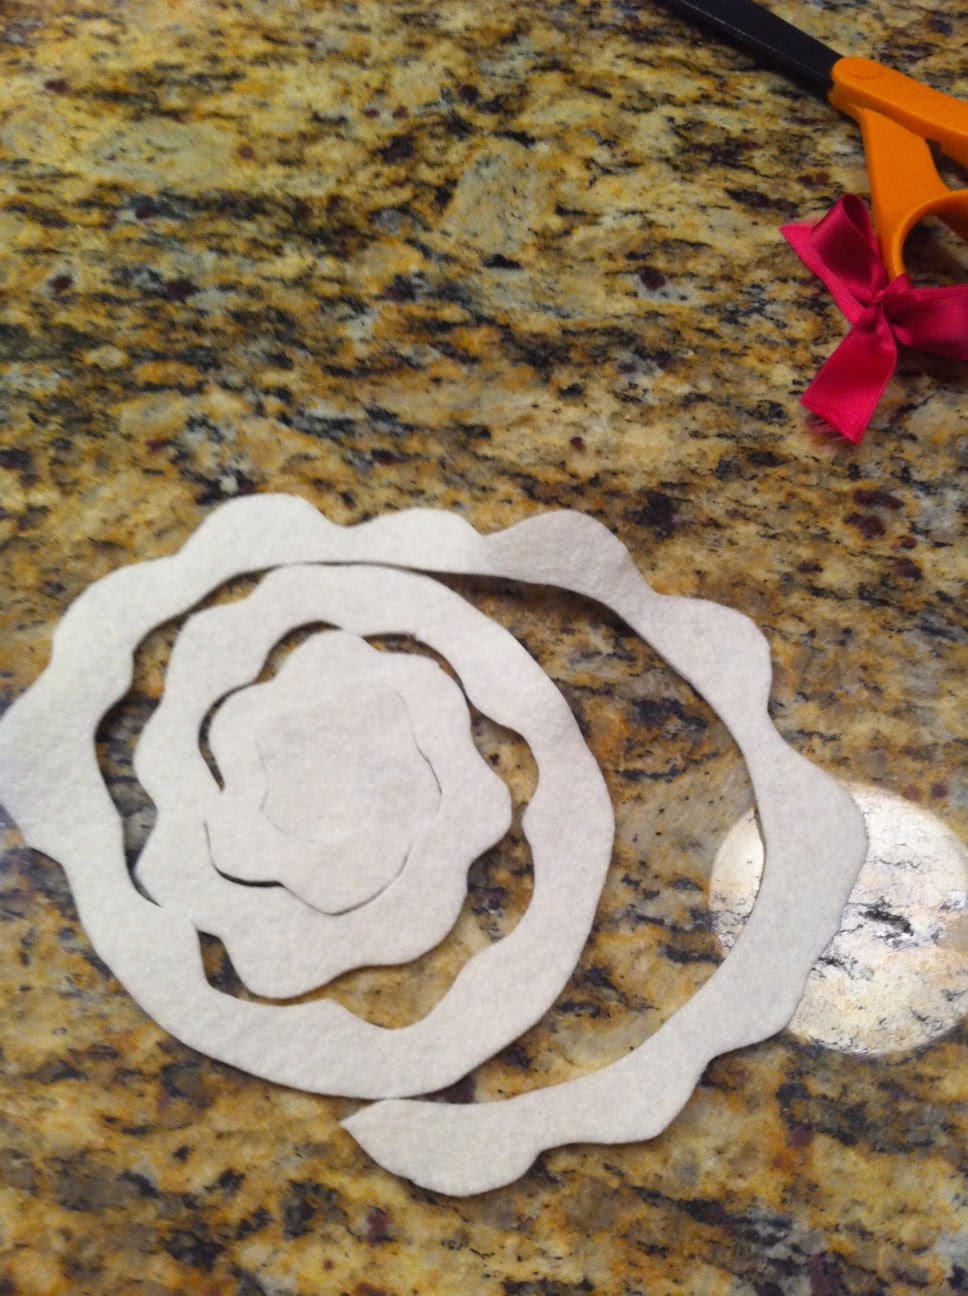
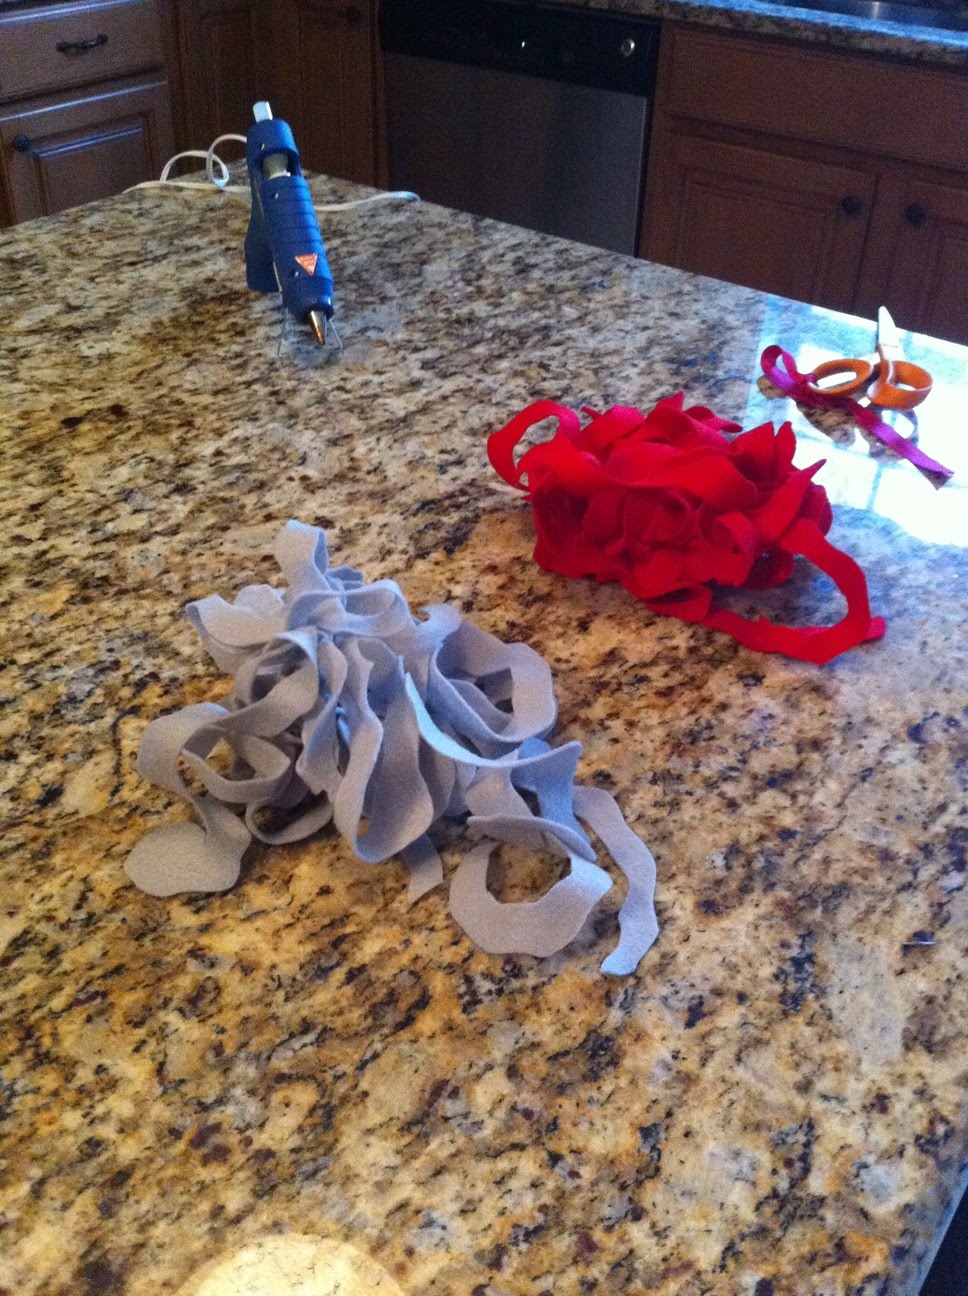
#2: Set up a little assembly line process for yourself. Cut out all your circles, go back and cut out all your spirals and then go back and glue all your flowers. It’s a little less satisfying because there are a bunch of steps before you get your pretty flower made, but I promise it’s a much more efficient way to do this.
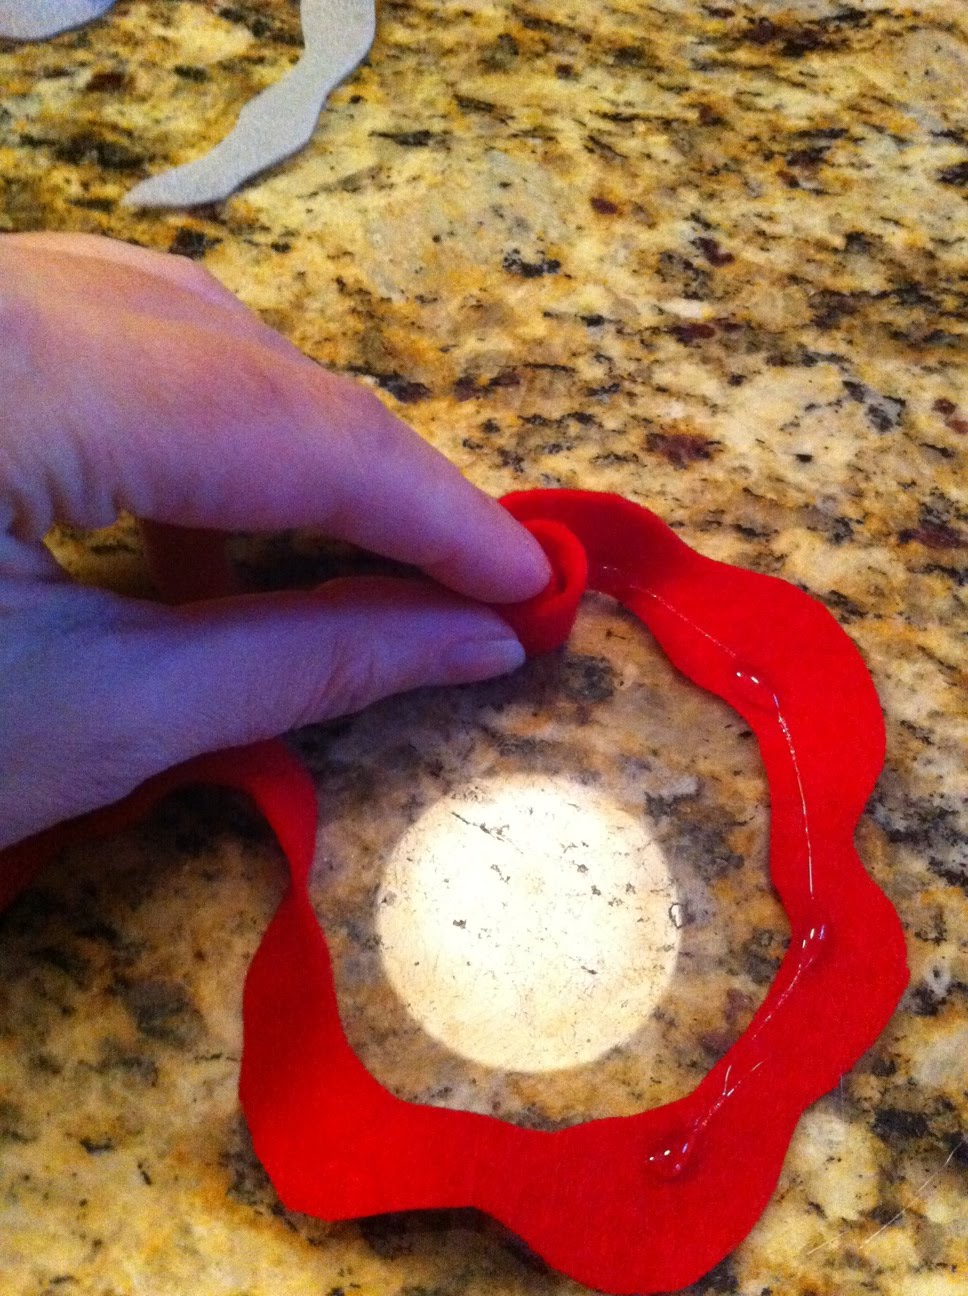
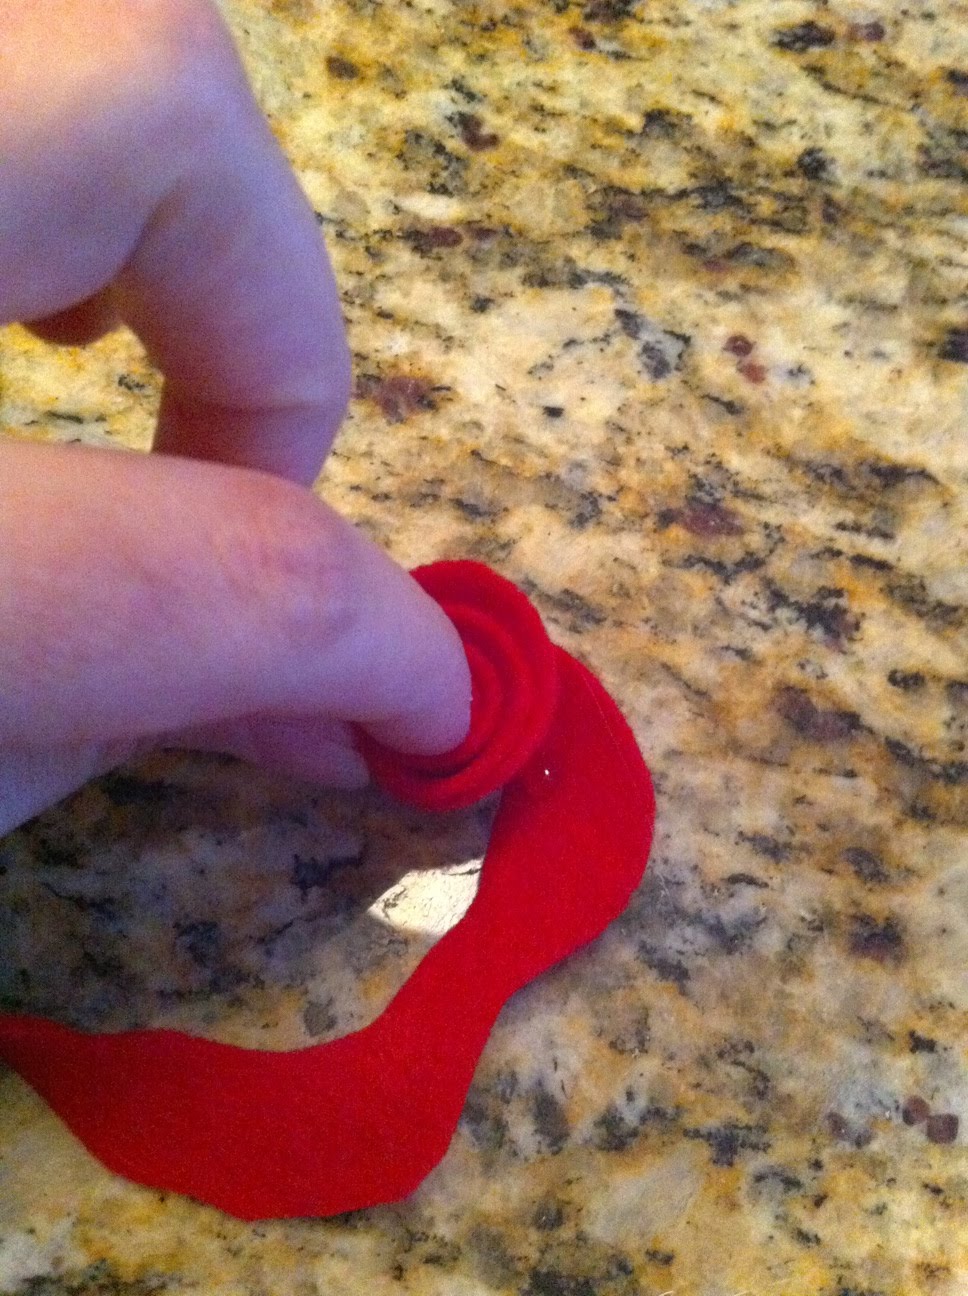
#3: This was the technique I used to assemble my flowers. If you’re using hot glue, you’ll need to work in small sections. Put down a dot of glue about every 3 inches and then stand up your felt and roll it on its side. This lets you glue and keep the base at the same level, which will leave your ruffly top edge to create that signature up and down flower petals that a real rose has.
Now repeat this process a few dozen times, and you get this.
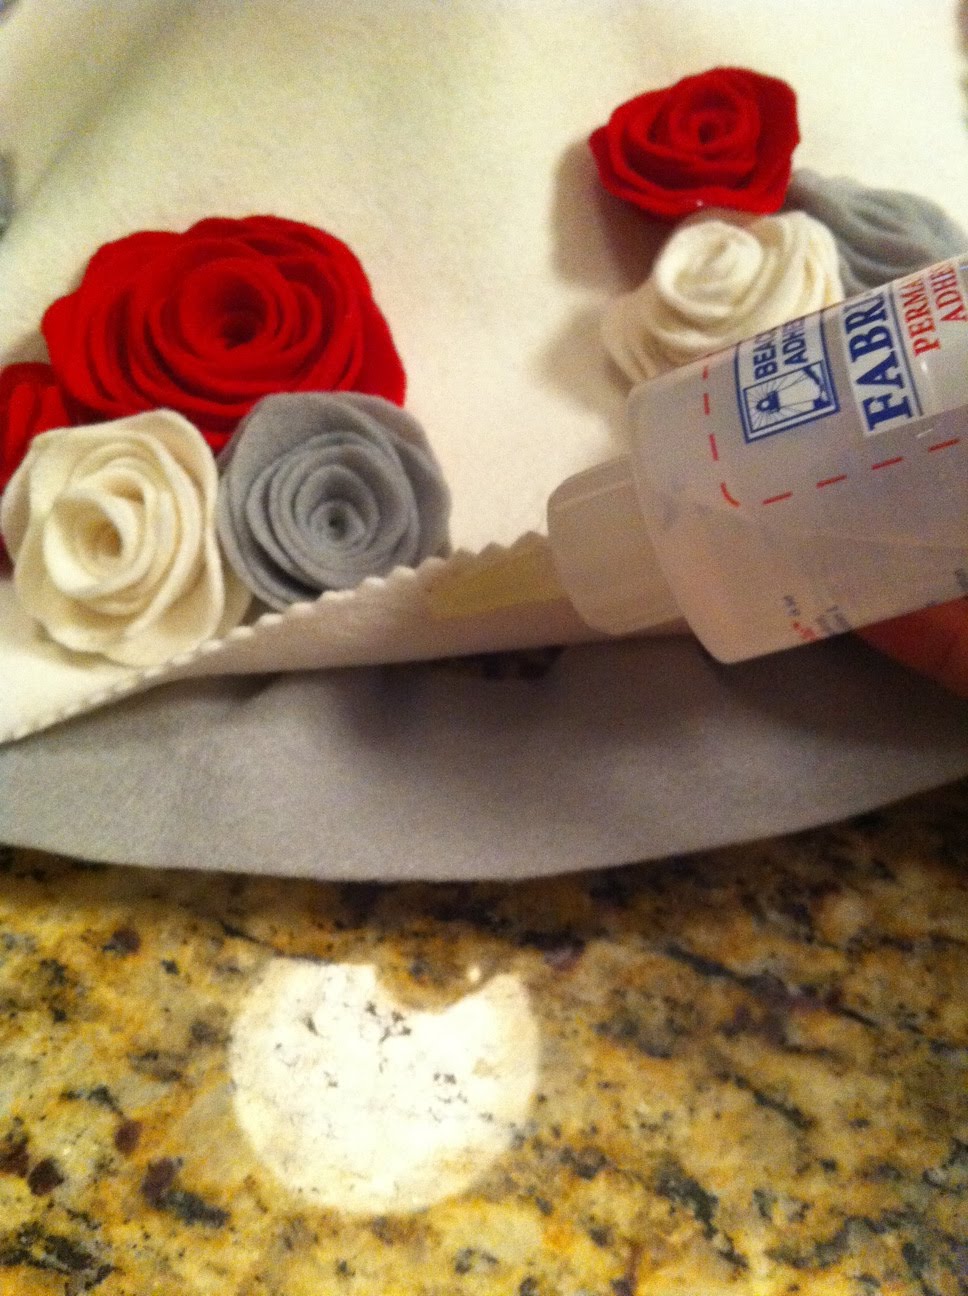
After I glued all my flowers onto my skirt, I decided the pinked edge was getting a little lost. So I added a band of gray felt underneath. Ideally, you would have enough of this contrasting color felt to cut out a slightly larger circle than your skirt and create a full lining. I didn’t have enough, so I just cut one long strip and worked it around the base little by little, using pins to secure it in place.

I then went back over the edge with fabric glue.
And voila! I think it could benefit from a few touches of green…maybe some felt leaves so it doesn’t look quite so Valentines-y. But that will have to wait until next year because mamma is all crafted out for this year 🙂
Facebook Conversations