Easy Summer Dress

Equipment and materials:
Essential
- Sewing machine and thread, sewing basics such as scissors
- Clear Elastic 3/8th inch wide
Optional but useful
- Wash Away Wonder Tape
- Knit stay tape or Stitch Witchery
- Stretch or ball point needle
- Twin Stretch Needle
Your dress is made up of just 4 main pieces, and will be super-quick to sew. Follow through these step by step instructions and enjoy!


Sewing your Easy Summer Dress
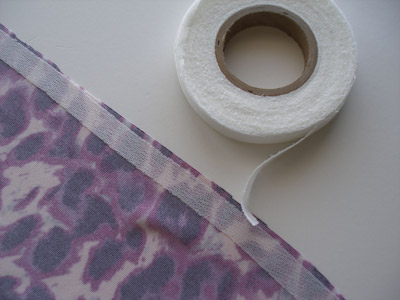
1. Identify the back of the dress (the longer piece) and add a strip of Wash Away Wonder Tape to the top edge, just inside the raw edge on the wrong side.
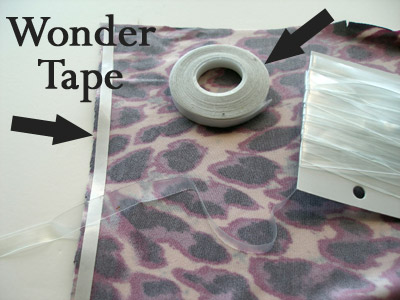
2. Measure across the top edge and cut a length of Clear Elastic 1 inch LESS than the top edge measurement. If you can’t get the clear elastic, then you can also use a regular elastic but it will be bulkier.
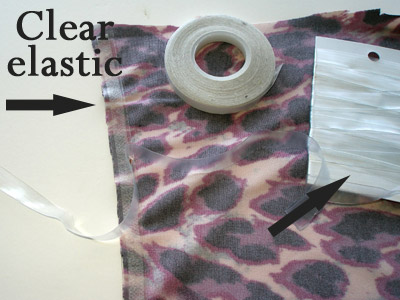
3. Remove the backing tape from the sticky tape and stick your clear elastic in place along the top edge, centering the elastic with about 1/2 inch clear at each end. If you don’t have the sticky tape, then you can pin the elastic in place.
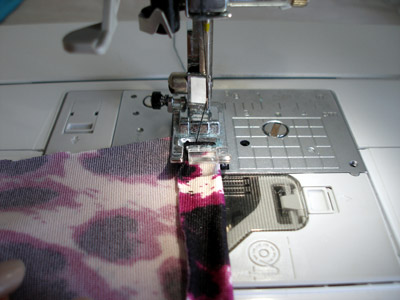
4. Take your dress to the sewing machine and with the wrong side facing up, turn the top seam over using the elastic as a guide to get a straight line. Fit your Stretch or ball point needle. Sew the elastic in place using a triple zigzag stitch if your machine has one (its like a wide zig-zag where each part is made of three small stitches.) If you only have a regular zig zag stitch, use this on a wide setting to sew through the elastic.
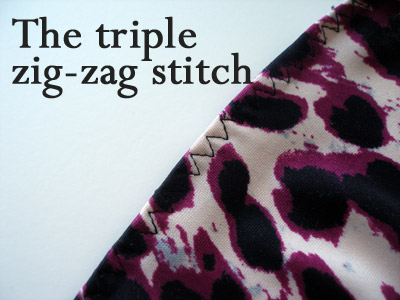
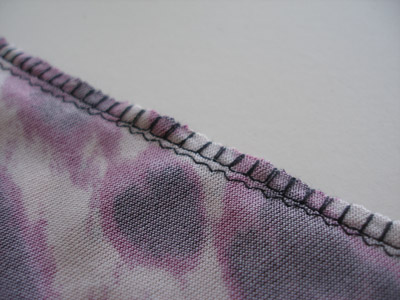
5. Here’s what it looks like from the outside. The stitches allow it to still stretch and the elastic will hold it snugly against your body so the dress doesn’t fall ! Set aside the back for now.
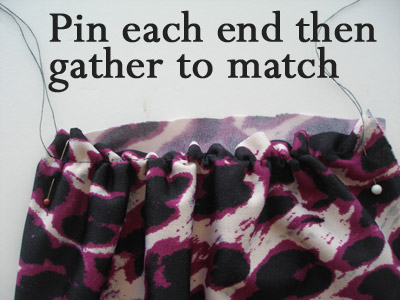
6. Time to make the bust part of the dress. Take the rectangular piece and sew a line of long basting stitches between the circles, 1/4 inch from the edge. Do not back-stitch at each end and leave the thread ends long. Repeat on both sides.

7. Now fold the fabric at the off-center notch, with WRONG sides together. Put in a pin at the fold and then match up the corners and pin these too. Now you need to gently pull the gathering threads to gather up the fabric between the circles. Continue to gather until the gathered edge measures the same as the flat edge.
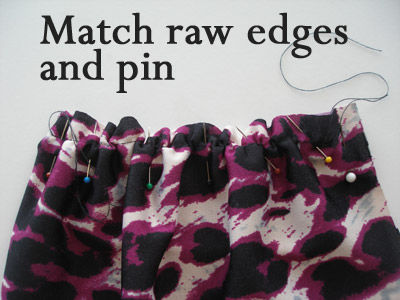
8. Once both edges match in length (or close enough), match up the raw edges and pin together. Repeat these steps for the opposite side.
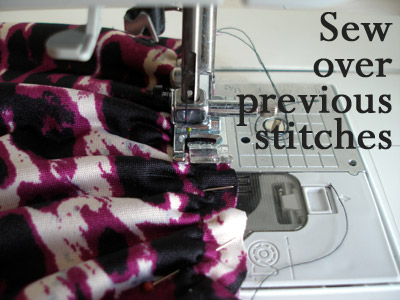
9. Take the fabric to the machine, and with the gathers facing upwards and the raw edges matching, sew in place along the previous line of basting stitches. Adjust the gathers as you sew. Repeat for the other end.
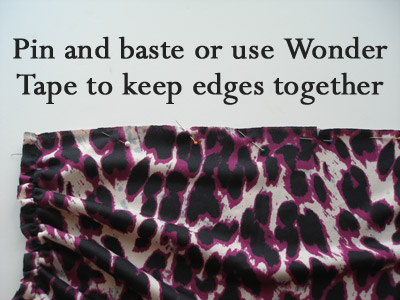
10. Now match the two remaining raw edges on this piece. We need to keep these together. You can either use your Wonder Tape to baste the two edges together, or match, pin and sew close to the edge.
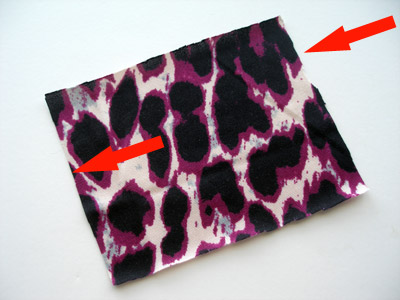
11. Now to make the small piece that gathers the center of the bodice. Find the small rectangular piece of fabric you cut earlier. Fold wrong sides facing with the two shorter sides together – see arrows.
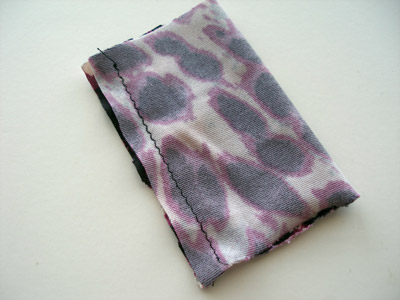
12. Sew along the shorter side to make a tube of fabric. Use a narrow zig-zag stitch so this can stretch.
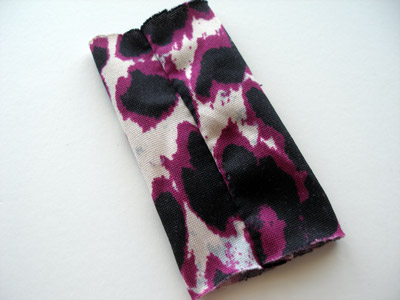
13. Turn inside out and center the seam line facing upwards. This will be in the inside of the gathering piece.
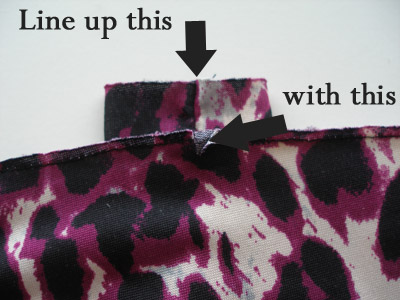
14. Place your bodice piece on top with the raw edges even, and line up the center notch on the bodice with the center seam line on the gathering piece. Pin in place.
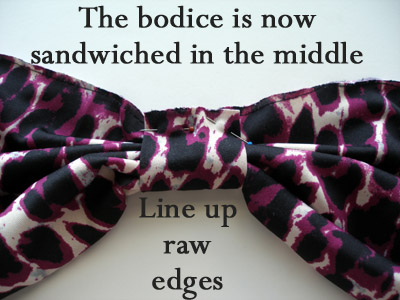
15. Roughly pleat the bodice in the center and bring up the other end of the gathering piece, matching the centers and raw edges until you have a bow shape. Remove pins and replace them through all layers. Sew close to the edge through all layers. An overcasting stitch works best, or a zigzag close to the edge.
16. Now match up the bodice piece with the waist piece. The gathered side of the bodice will be the right side or outside. You can see that the top part will need to be eased into the mid-section.
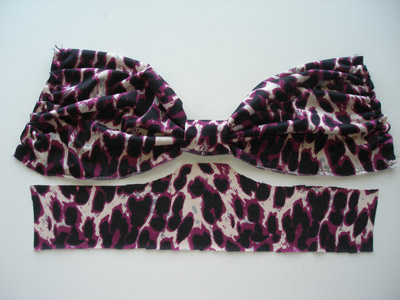
17. Pin the two pieces right sides together, stretching the mid-section piece a little to match to the width of the bodice piece. Line up the center front and the outside seams. It will look a little awkward, like this.

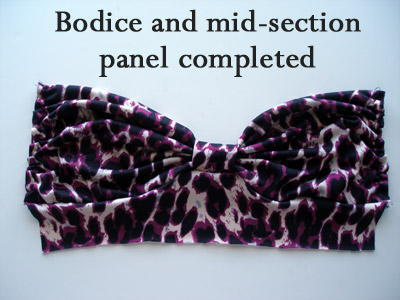
18. Carefully sew the two together using a narrow hem. You can sew with the bodice piece upwards to check as you sew that you are sewing the hem a little wider than your earlier basting stitches along the bottom edge. This saves removing them later.
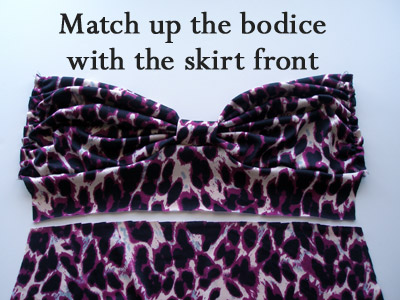
19. Now match up raw edges on the bottom of the mid-section with the top of the front skirt. Pin and stitch in place, right sides together, using a narrow zig-zag stitch or an overcasting stitch and foot. The front piece is now complete.
20. Pin the dress back to the dress front, right sides together along the side seams. Start to pin at the bottom edge keeping fabric even. The front of the dress is slightly longer than the back to allow extra room for the bust. Once you have pinned to approximately the waist area, match the top of the dress back and front, and pin. Then stretch the fabric of the back piece slightly to match the front piece and pin the remaining side seams together. Try on the dress for fit before sewing. Careful with the pins!

21. Sew the side seams using approx a half inch seam. Sew with the gathered bodice side up so that you can make sure that your side seam is slightly larger than the existing basting stitches on the gathered panel to make sure those stitches won’t show on the outside.
22. Now try on your dress and see if you need to make any adjustments in those side seams to get a nice fit.
23. Finish the side seams by either pressing them open and flat, or trimming and finishing with an overcasting stitch to neaten the edges. You can see my narrow overcast seams in this photo – this gives a nice finish on the inside.
24. Now to create a smooth hemline. We don’t want to spoil all the hard work now with a wavy seam as can often happen with knit fabrics, so I recommend using a knit stay tape along the bottom before sewing. Or at least test your intended hemming method and stitch on some scrap fabric first. Iron your stay tape just inside the edge of the fabric.
25. Turn your hem to the inside using the edge of the stay tape as a guide and pin in place. If you have a Twin Stretch Needle, you can use this for a professional, neat and stretchy hem (remember to sew it face up with the twin needle.) If using a single needle, hem with the wrong side up and a single line of straight stitches.


26. Your (strapless) dress is now ready to wear! However you might want to add some support for the bodice. Try some of these optional ideas:
- thread some ribbon/lace/leather/cord through the gathering band at the center of the bodice and tie behind the neck.
- braid three x inch-wide pieces of fabric to make a central halter strap.
- make two tubes of matching (or contrasting) fabric and stitch to the bodice ‘cups’ to create a halter neck. Make them wide or narrow as you prefer. A good option for a larger bust.
- or use a braided strap from the cups to behind the neck.
- make two tubes of fabric and attach them as straps from the bust to the top of the dress at the back. Place them carefully to cover your bra straps for even more support.
Facebook Conversations