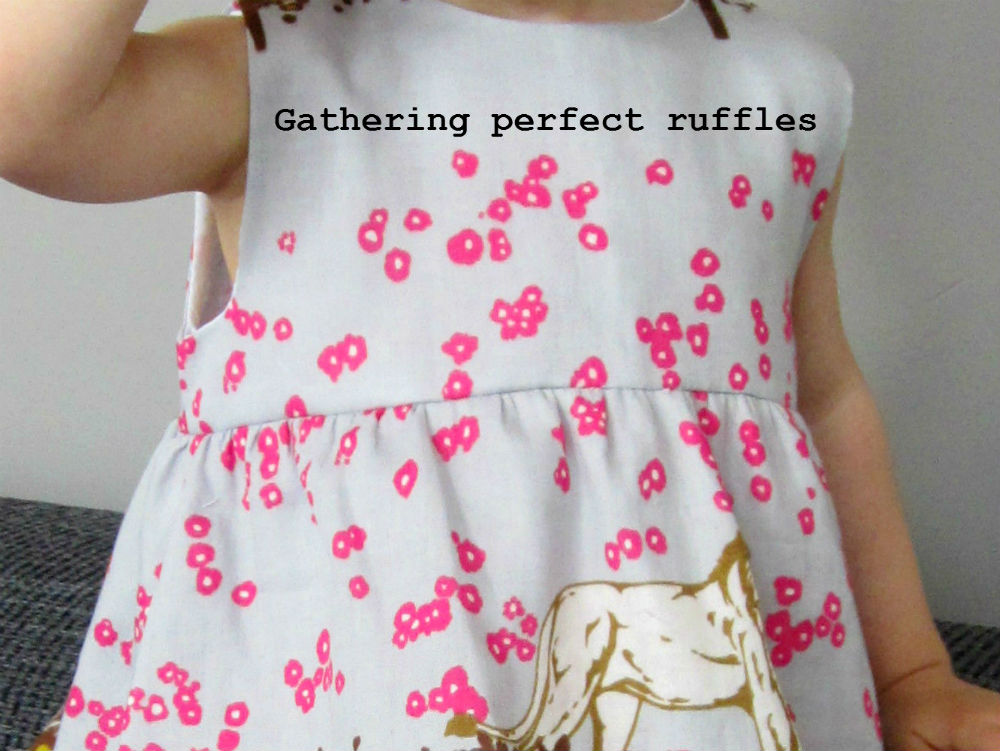
Gathering perfect ruffles (tutorial)
Today, I’d like to share a little trick I use to gather the perfect ruffles. There are plenty of great tutorials online for gathering ruffles, but this one specifically helps you ensure that your ruffles are divided equally over the
entire length of your skirt/dress/whathever you’re making.
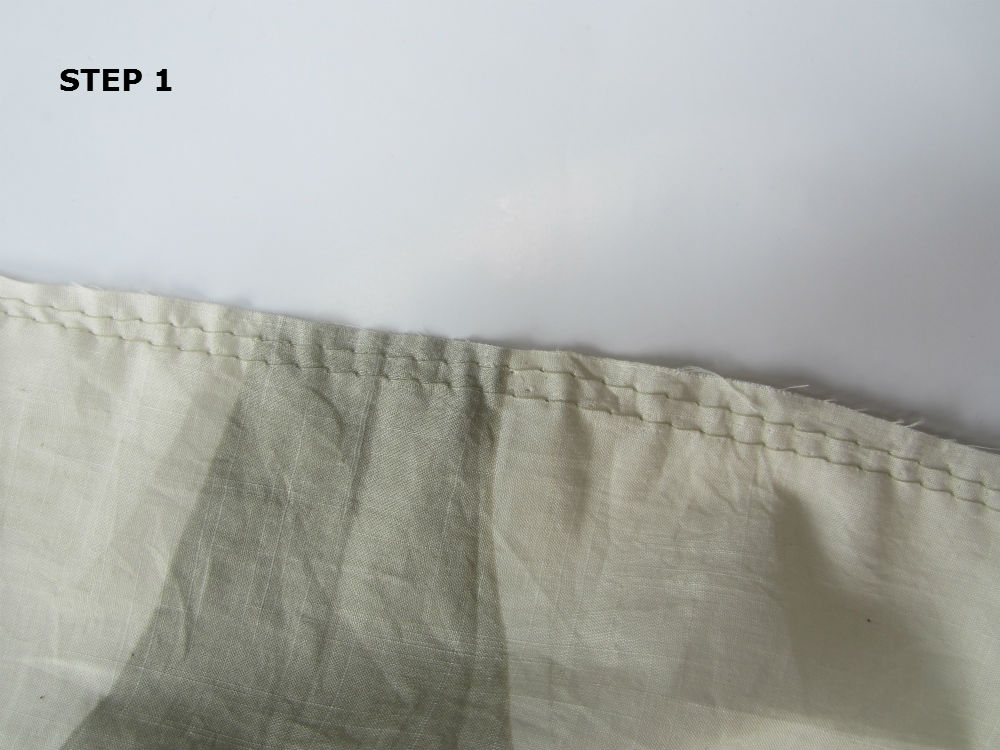
STEP 1.
First, put the stitch length of your machine on (almost) the maximum length. Next, stitch
one line about 1/4 inch (0.7 cm) of the edge of the fabric you want to gather, without stitching forward/backward at
the beginning and end of the stitch. Leave a long tail of thread.
Next, stitch a parallel line at ½ inch from the edge, also without stitching
forward/backward at beginning and end, and also leaving a long tail of thread. These are temporary lines which will be
removed later on.
STEP 2.
Divide your fabric in 4, 8, or 16 parts (depending how long it is). Do
this by folding it in half, putting the side seams together (if applicable),
and pinning in the folds you create. Then, fold the ‘halfs’ in half, and next
those halfs in half, until you get parts of somewhere between 8 and 15 centimeters (3 and 6 inches).
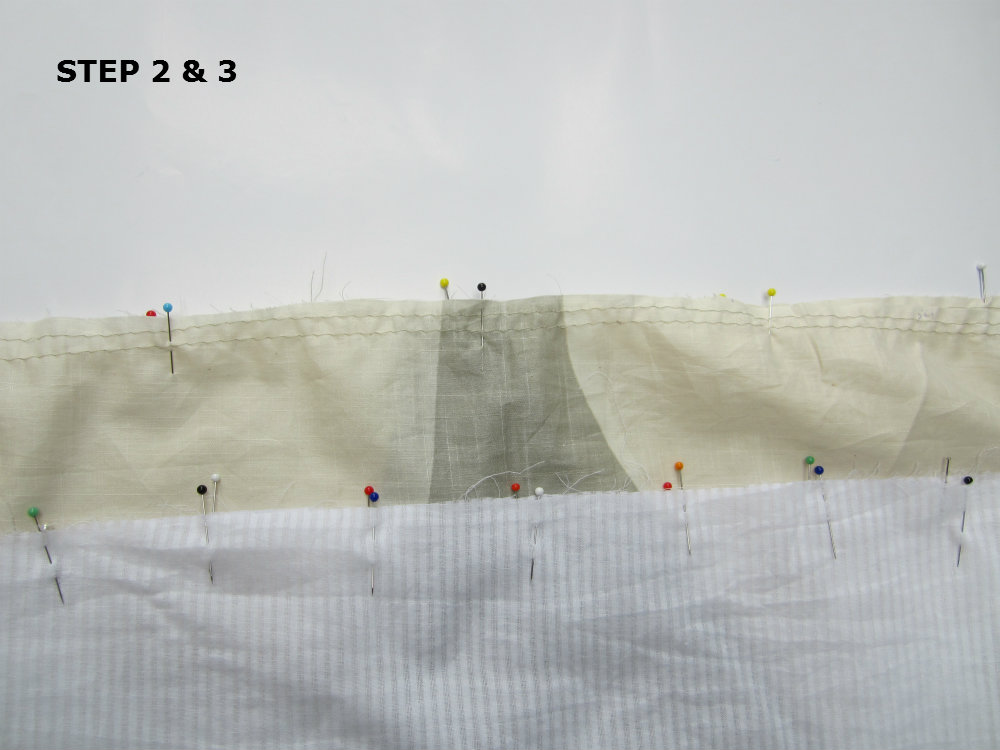
STEP 3.
Now, take the piece of fabric onto which you will stitch the gathered
part (the lining, in most cases). Divide this into the same amount of parts by using the same technique. Evidently, these parts will be smaller than those you made in step 2.
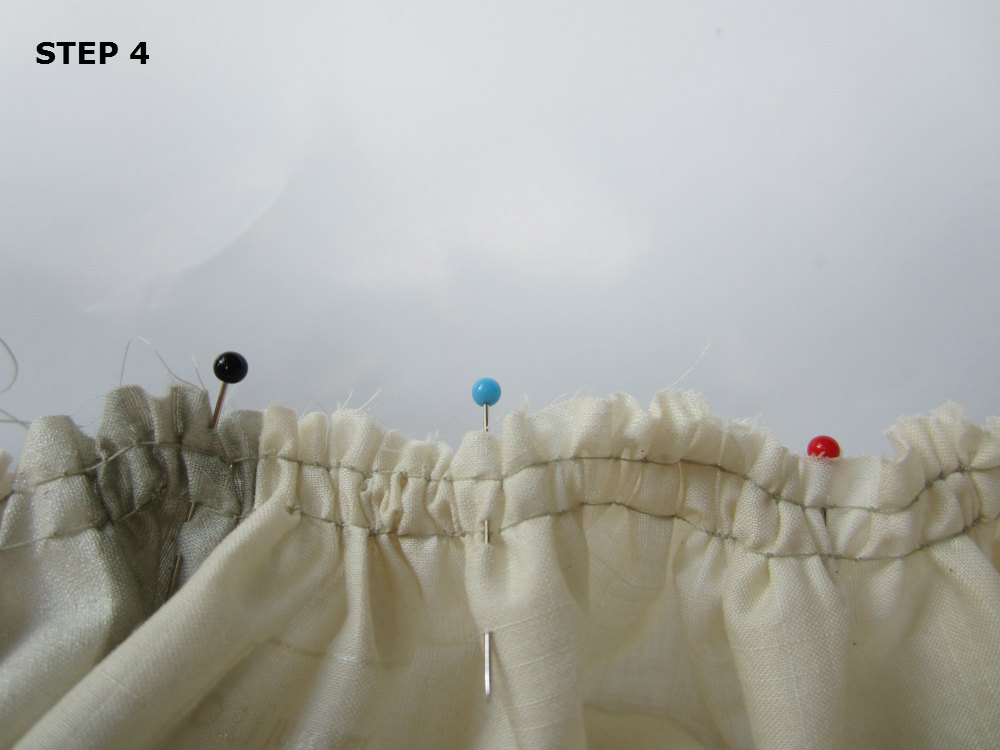
STEP 4.
Next, gather the first piece of fabric by pulling both threads at the
same time. Shift the fabric so that the
gathers are more or less evenly
spaced. At this point, it is better to gather too much rather than too little.
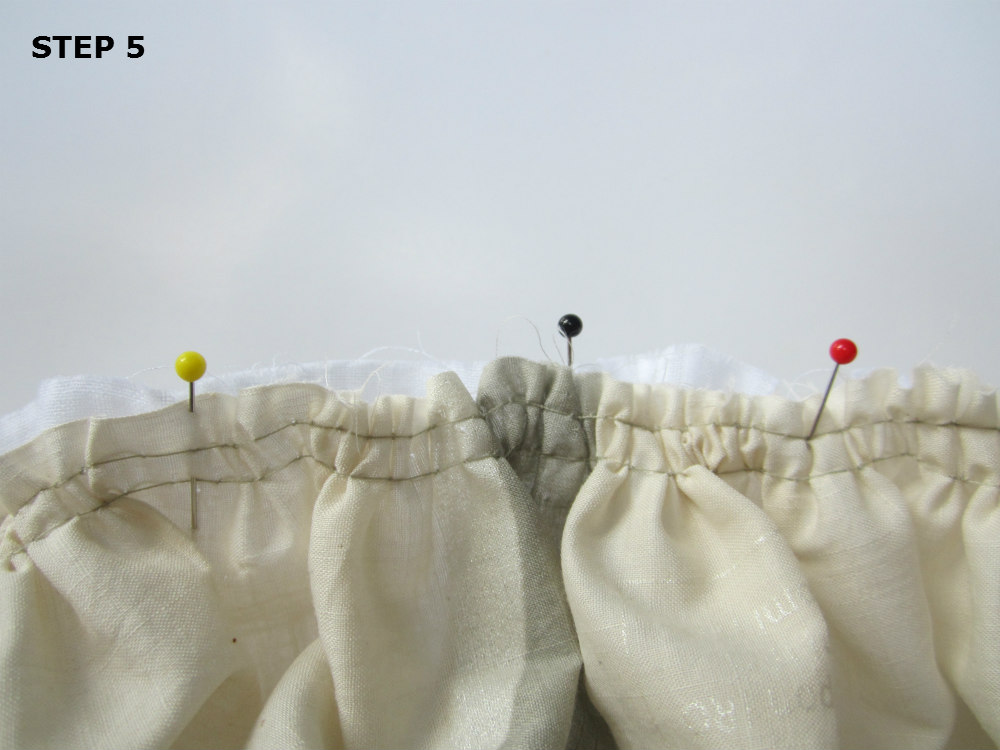
STEP 5.
Now it is time to pin the gathered fabric on the other fabric. Use the
pins you put in steps 2 and 3 to help you to space the ruffles perfectly. So
pin 1 in
the gathered fabric will go together with pin 1 in the other fabric, pin 2
with pin 2, and so on.
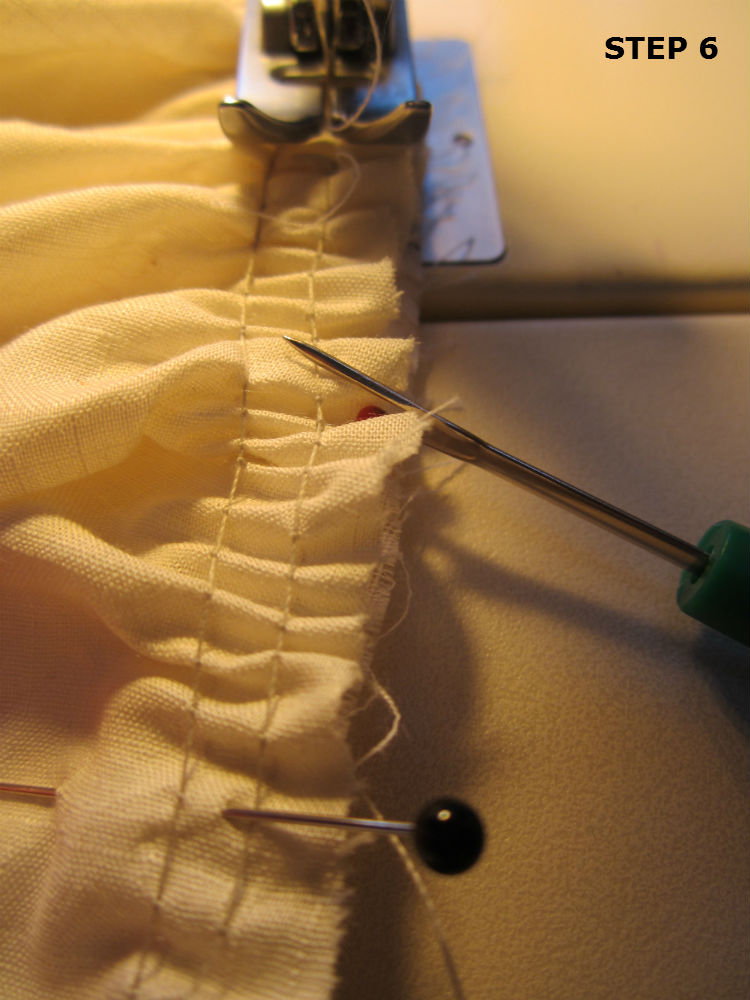
STEP 6.
Finally, change the stitch length on your machine to normal again, and prepare to stitch
the fabrics together right between the two temporary lines you made in step 1.
Put
you needle in the fabric at the beginning (pin 1), and lift up the presser
foot. Take the fabric between thumb and index finger at the next pin (pin 2),
and pull carefully until both pieces are equal in length. Next, divide the
ruffles equally between pin 1 and pin 2 (I use a seam ripper to shift the fabric, but you can also do this with your fingers of course). Then stitch from pin 1 to pin 2.
STEP 7.
Repeat step 6 for al the next parts (between pin 2 and 3, then between
pin 3 and 4, and so on).
STEP 8.
Remove the temporary lines you stitched in step 1. Admire your perfectly gathered ruffles. Excitedly show them to your boyfriend/husband/next of kin, and wonder how they can remain so indifferent to your exceptional sewing talents. The end.
Facebook Conversations