Patchwork Scarf Tutorial
Are you ready to sew along? Let’s all make patchwork scarves to keep the kids warm through the fall and winter! Anything goes and we can’t wait to see what you create. You can follow our little tutorial or do it your own way. If you’re on the beginning end of the sewing spectrum the blog tutorial “talks” you through the scarf. We also have a concise PDF here for you to download if you want a reminder of the steps (and/or want a little less guidance).
Kid’s Patchwork Scarf
What you need:
– a potentially cold kid’s neck
– fabric
– batting (or not… I used a lightweight batting to give this scarf a little extra warmth but you could use interfacing or skip a middle section altogether)
– thread
Optional:
– embellishments like buttons, embroidery, etc.
Getting Started:
First decide on a neck. It helps to visualize the little one you’re sewing for, or to have them model scarves you already have around the house. You want to measure the right length for your scarf (and width). This scarf started as fabric approximately 8″ x 42″ which is not long enough to tie around my almost-two-year-old’s neck (but it works well with a button, Optional Step #2 listed below). OK, have a neck in mind?
We’re going to: lay out our fabric, decide on a design, stitch up the top, sandwich it all together like a mini-quilt, turn it inside out and sew along the outside to make it look extra-finished. Ready? It’s only 10 easy steps!
Optional Step #1:
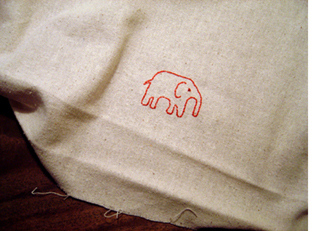
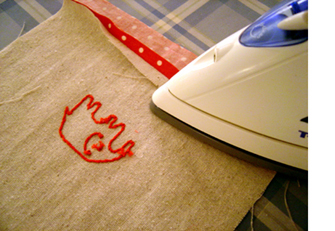
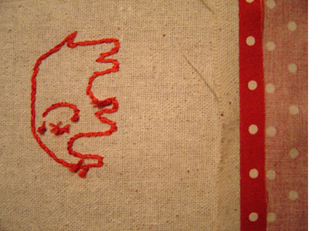
If you want to add embroidery or decorative buttons, now is a good time. Remember to use caution when including buttons on items for small children. I used a water-soluble pen to draw this elephant and then embroidered him on linen.
Official Step #1:
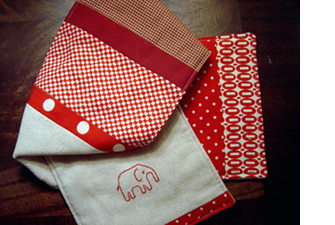
This is the fun part! Throw around some of your favorite fabrics. If you’re going for a “simple” patchwork look sometimes it’s easier to use similar colors (like in this red and tan scarf). It’s also fun to go wild though. Place everything you think might work on the floor or a table and move it around (highly technical directions, eh?).
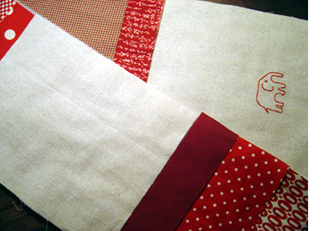
Once you have a color scheme you think works for you (and the intended neck) it’s time to start thinking about amounts of fabric. While the width (8″) remained constant in my scarf, I didn’t measure out any of the lengths. When it looked like I needed a dash of “pop” I added in a row of big dots, for example, and when it was feeling a little busy I added a big chunk of soothing linen. Cut your widths all the same and then play a little with the lengths. These are mine all laid out prior to sewing.
This is also a good time to make sure you have enough fabric for a back (and the same amount of batting or light interfacing if you intend to use it). I designed the whole scarf around a soft corduroy (the back or neck-side of this scarf) I’m using for my boy’s winter coat.
Step #2:
– You should now have many different pieces of fabric all the same width (8″ for this scarf) and of varying lengths.
– You also have an 8″ wide and oh-so-long (mine was 42″) piece of fabric for the back and a piece of batting of the same dimension (8″ x 42″) for the middle.
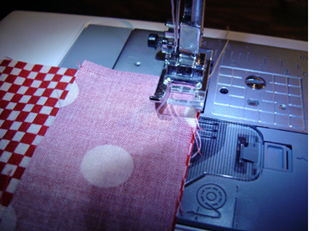
Lay your top fabrics out how you want them (like I did in the above picture) and start sewing two pieces together from one end, right (pretty) sides facing each other. I used a 5/8″ seam allowance and back-stitched at the start and finish each time (both of these choices enhance the strength of your finished scarf– important for kid wear!).
Attach on down the line until your whole top is finished. It should look something like this.
Step #3:
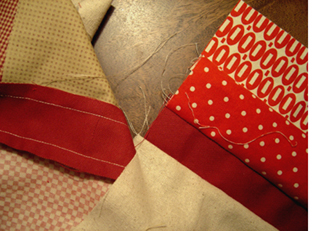
It’s starting to look good, right?! Flip it over and press open all of your seams. This will make for a tidier looking scarf.
Your seams on the back should lay flat like this.
Step #4:
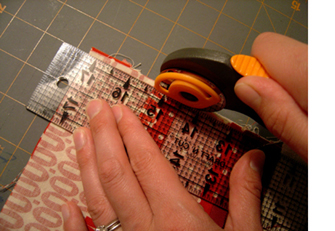
Trim the long edges of your scarf with a ruler and rotary cutter (or scissors, if that’s all you have) to make a clean edge. This just makes the scarf less bunchy along the edges in your finished product.
Step #5:
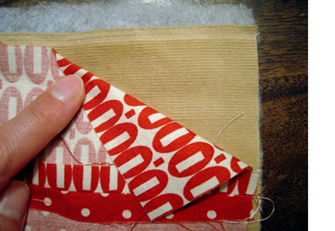
If you’ve never made a quilt before this might seem counter-intuitive, but now you sandwich your scarf together. You put the right (pretty) sides of your top and bottom (patchwork and corduroy here) facing one another and line them up. Batting or interfacing, if you’re using these, goes on the back of this. The sandwich you see from the top is: not-pretty side of the patchwork top, pretty side of the backing fabric, batting. It’s probably easier if your batting hangs out a bit on the sides like mine because you’re sure to catch it with your seams. Pin all of this in place.
Step #6:
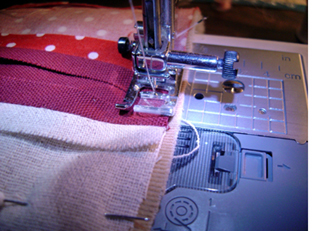
Sew around the sandwiched scarf using a 1/2″ seam allowance. There are different schools of thought about when and how to start/finish such sewing. You need to leave a big enough hole (approx. 4″) as you stitch around the edges so you can turn the scarf. I left one end of the scarf completely open. You might try that, or you could try to place the hole somewhere else.
Step #7:
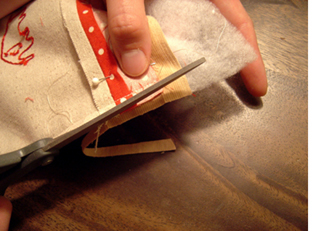
Trim off excess fabric, batting and/or interfacing.
Step #8:
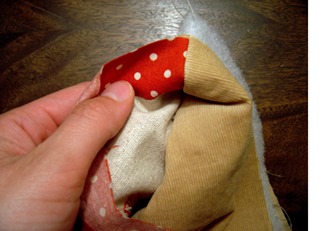
Turn your scarf right side out. Ta da!
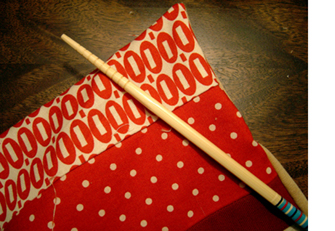
As you turn, use a tool (I like to use a chopstick) to make nice, square corners. Don’t poke too hard though or you might push through and have to re-sew!
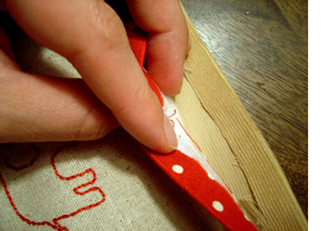
Step #9:
Fold the fabric in at the turning hole. It’s a good idea to press these folds so you have a tidy seam nobody will notice. In fact, it’s a good idea to press the whole thing before you edge-stitch (but none of my photos turned out!).
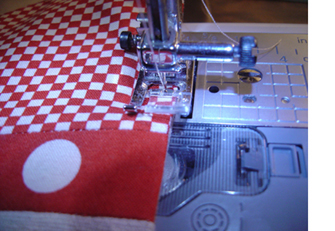
Step #10:
Top stitch along the whole scarf. Start and end at a random place on the side (it’s less noticeable). This top stitching will catch the folds you made at your turning hole and will completely enclose your scarf. It’ll also make it look really good! At this point you can quilt the scarf if you’d like, adding a bit of texture and interest (I wanted the corduroy backing to remain plain so did not quilt this particular scarf).
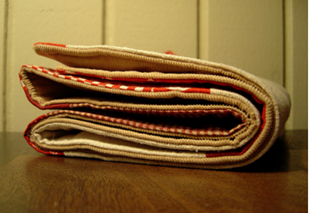
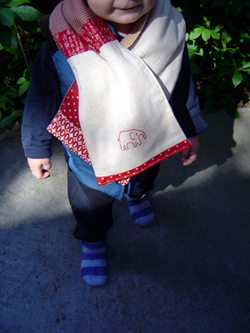
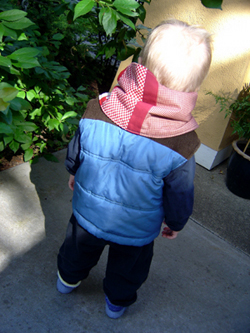
You did it! Here’s mine (er, the boy’s) all folded up. You can see the elephant’s nose poking up.
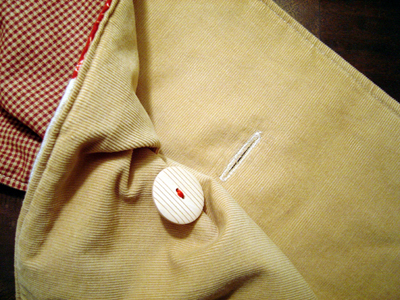
“Invisible button”
Optional Step #2, Adding a Button:
This scarf was too short to knot around the neck. I pictured it loosely wrapped on stroller rides in the winter but my little guy insisted on walking around the house with it bunched up under his chin (chin pinning loads of fabric to his chest). We decided to add a button. I didn’t want to alter the panel with the elephant embroidery but we wanted the scarf to stay in place. He helped me sew a button onto the back panel (centered widthwise) and place a buttonhole on the other side of the scarf. You can’t tell when it’s buttoned, it doesn’t compromise the look of the scarf, it keeps the scarf snug around his neck and when he wears it loose the buttonhole is barely noticeable. Easy and fun.
Fabric included in this scarf: The dots and bright red squares are Sandy Klop of American Jane fabrics, as is the Ovals fabric. The Japanese calligraphy fabric was from a garage sale (sorry, no info on it) and the rest is linen and old quilting cottons.
Facebook Conversations