Leather Wrap Bracelet Tutorial
It took me a while to wrap my mind around the “How To” because i wanted to create a braided full leather version as an alternative to the tedious and time consuming version of weaving beads in and out with bead cord between and around two leather strings.
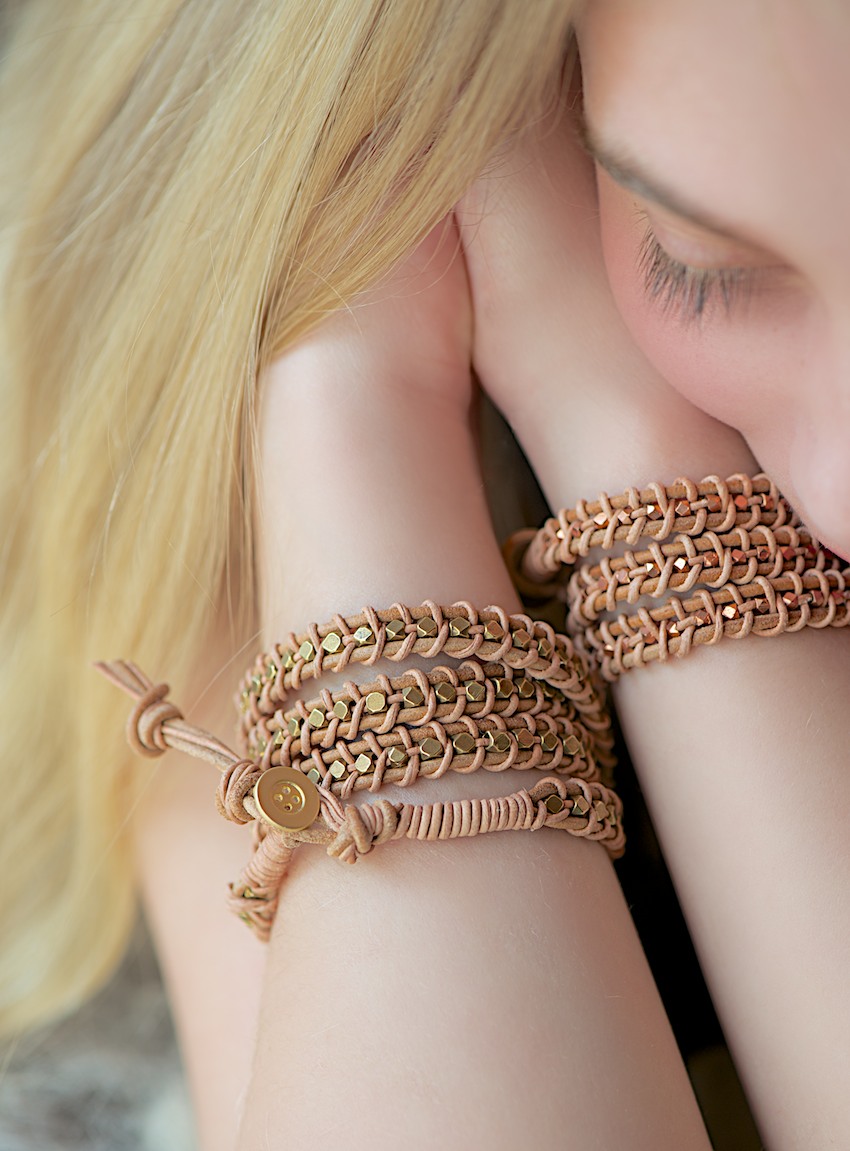
Once you get the hang of the braiding rhythm you will see how quickly these bracelets are done and how beautifully they will turn out!
For one bracelet you will need:
– about 2 meter leather cord size 2mm depending on how many times you want to wrap the bracelet around your wrist (2meter length will wrap around 4x – you could do a shorter or longer version by taking less or more length)
– 1.5 meter leather cord size 1mm
– 6 meter leather cord size 1mm
– about 140 little beads with a large enough hole to thread onto your shorter 1mm leather cord piece.
– optional a little jewelry button or something similar from the bead shop
Of course you are free to choose different sizes of leather cord than I did but make sure there is a thinner and a thicker cord and you are able to thread your beads onto the thinner one.
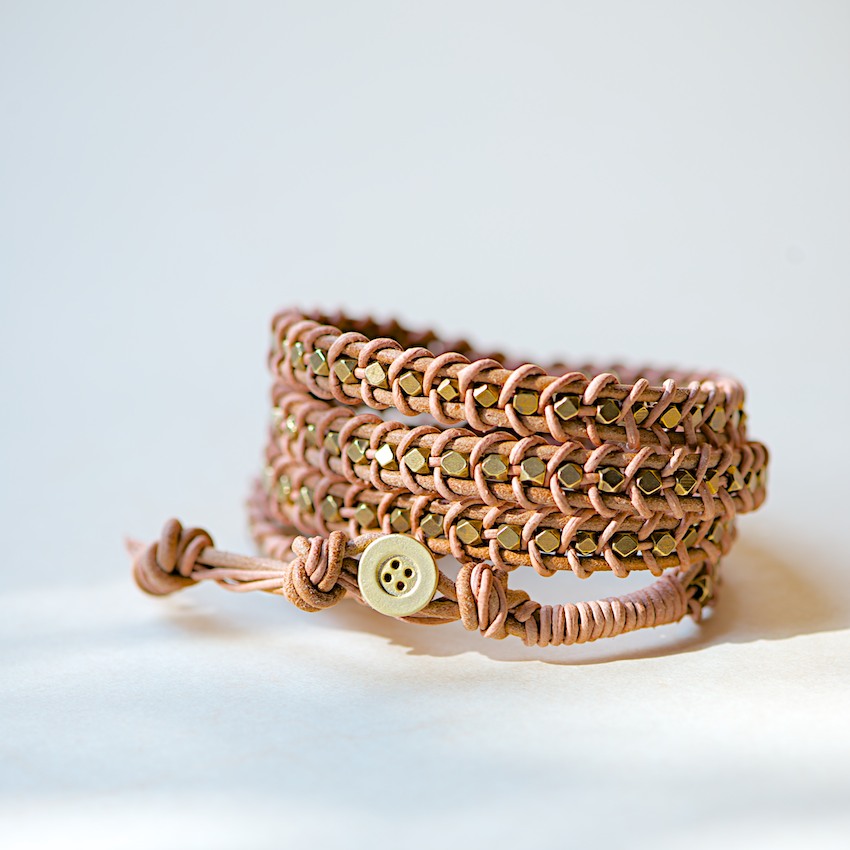
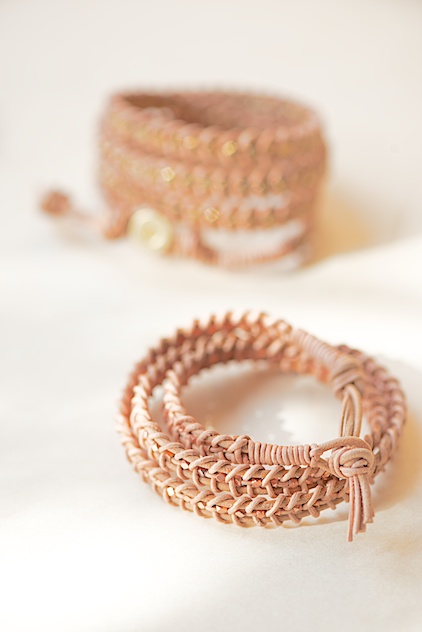
O.K. – here we go! The right one is the version with no button. This bracelet will just close with a loop on one end and a knot on the other end.
Take your 2 meter long piece and fold it into half.
Take your 1.5 meter long piece and knot it around your loop as shown in picture 1.
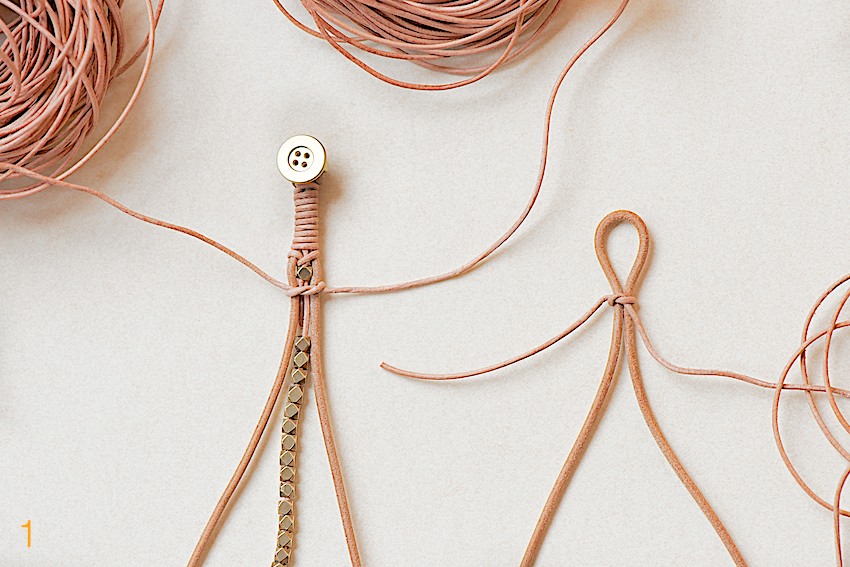
Now fold the short end towards the middle and wrap your long end tight around all leather pieces to create a nice beginning.
ALWAYS pull gently!!! 1 mm leather cord is delicate and you do not want to tear it. Please try on an extra piece how much you can pull before it breaks so you get a feeling on how much strength you can use while pulling.
By the way – once these leather bracelets are done there is no danger of tearing anymore. The more you wear them the prettier and softer they will become.
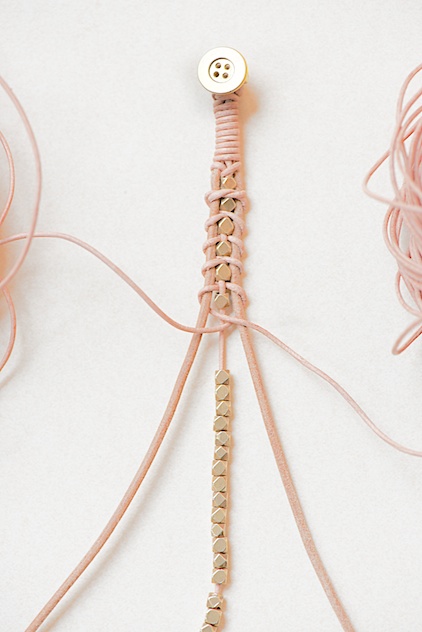
Place a knot as shown in picture 2. Thread all beads onto your thin cord and secure with a knot at the end to make sure they don’t slip off while you are working.
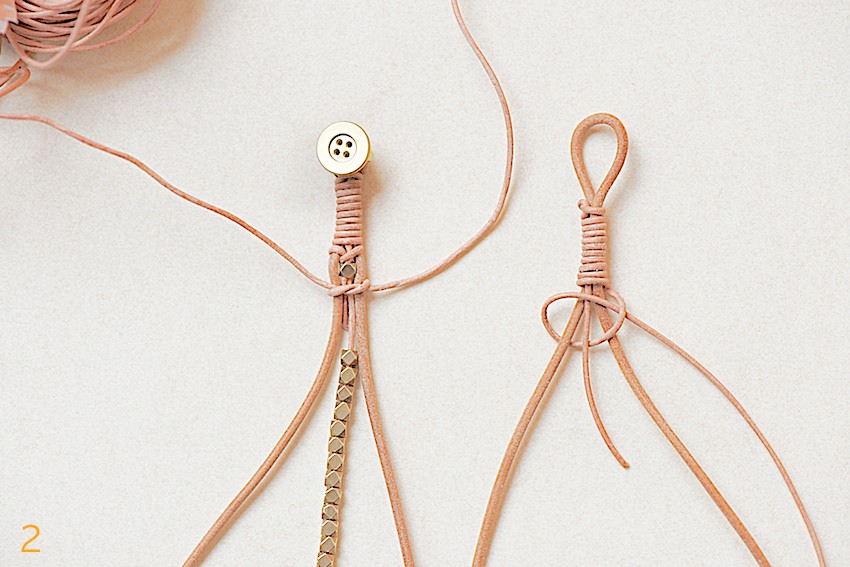
You could now cut the short end or – if your bead holes are big enough – you can hide the end by threading it also into your first bead.
So – Please pull up your first bead.
Now take your 6 meter piece cord and organize it into two equally long pieces. Don’t cut it!
You could roll it into little balls for the beginning to make handling easier. Please take a look back to picture 3. You can see my two organized balls of leather. Mine were much longer than 3 meter each because at this point I had no idea of how much length I would need for a bracelet that long…
Place a knot right under your first bead.

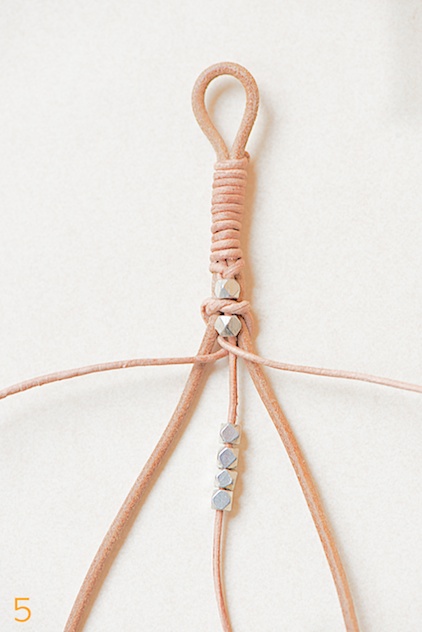
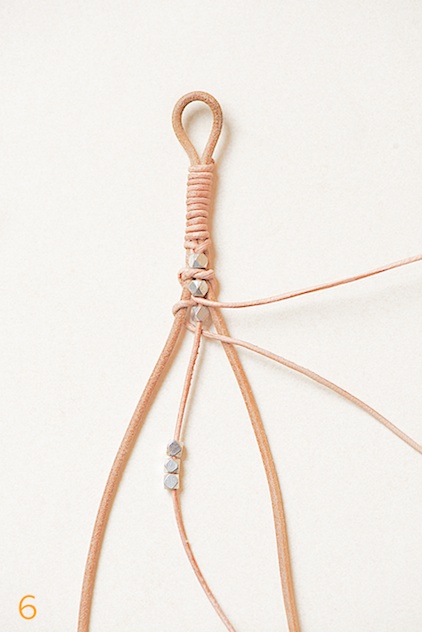
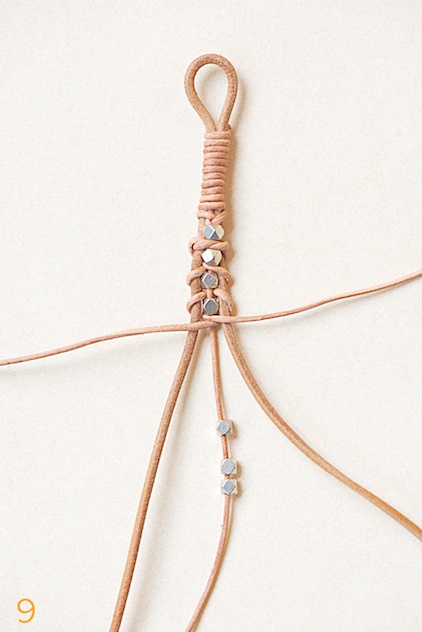
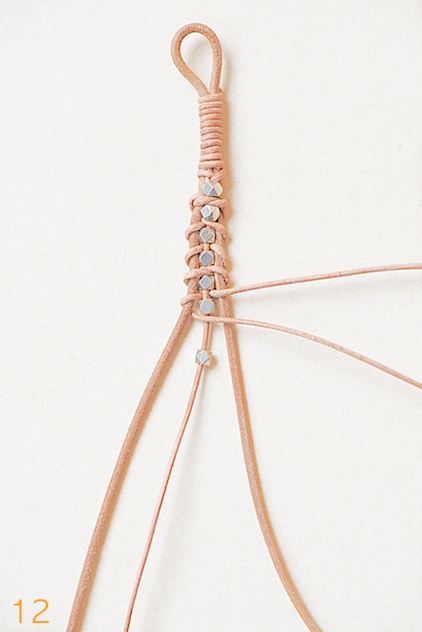
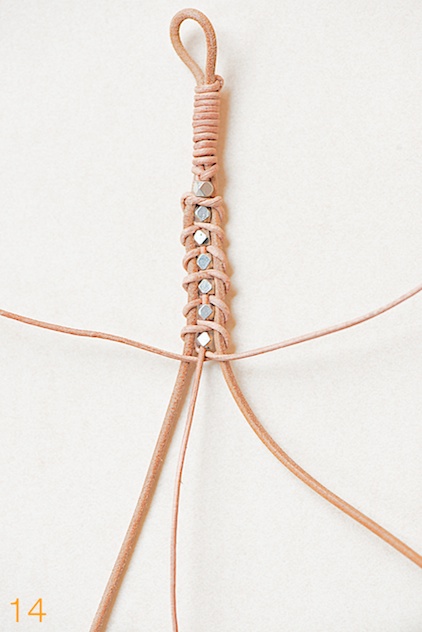
Now start following closely and very slowly pictures 4 to 14. It is very important to carefully follow each single step.
In the beginning it’s very likely that you get confused with over and under. No problem if that happens. Just carefully pull it apart and start over with the second bead.
You always alternate braiding over and then at the next bead under the thin middle cord. It is very important to keep this alternating rhythm to secure the beads nicely in between the two thicker leather strings.
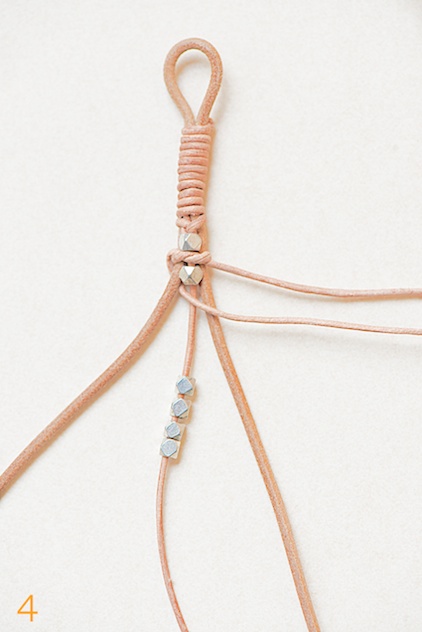
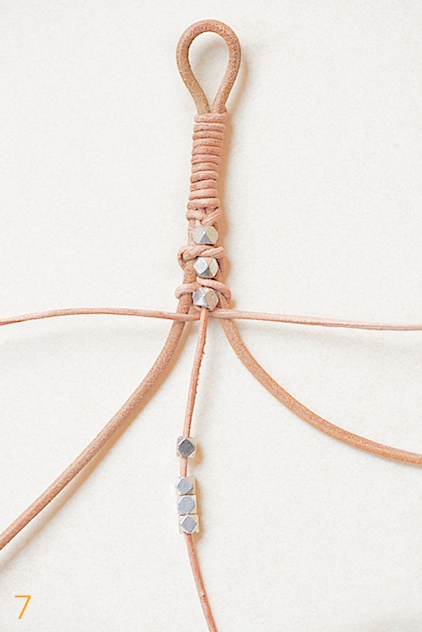

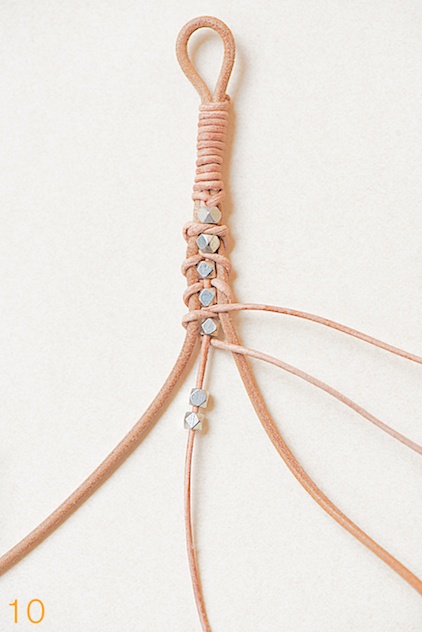


Can you see the always alternating moves?
You will quickly get the hang of it – I promise – it looks much more complicated than it really is!
Make sure you wrap the bracelet around your wrist from time to time to see how much more length you need.
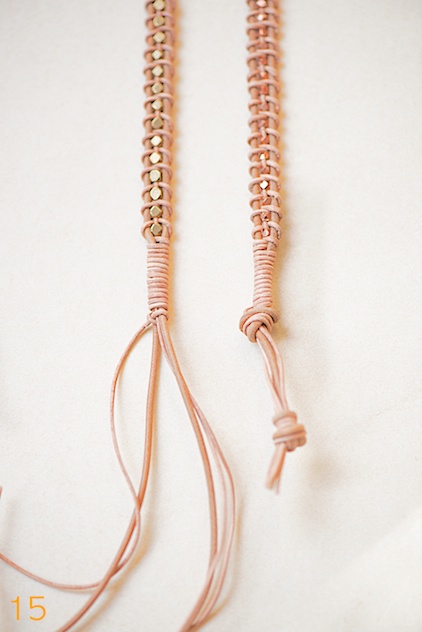
For the ending fold one of your thin braiding ends to the middle and wrap the other one around all cords. Make the same knot you did in the beginning shown on picture 4.
Now take all endings and place a big overhand knot. Pull tight! Depending on the fit you could leave a little room and then do another knot and even another one as I did on the last picture.
If you use a button piece on the other end then this little room between the knots will be the place where to pull your button thru.

Facebook Conversations