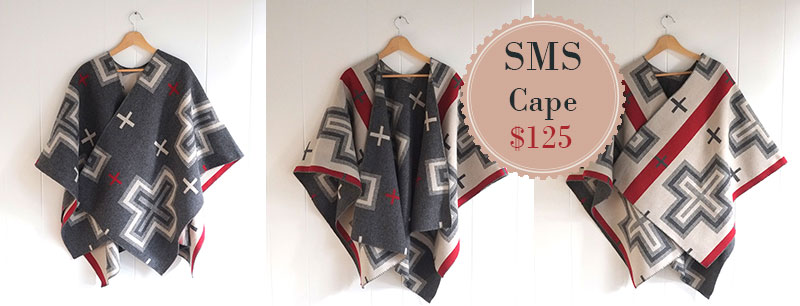
SJP Knock-Off Wool Cape Tutorial
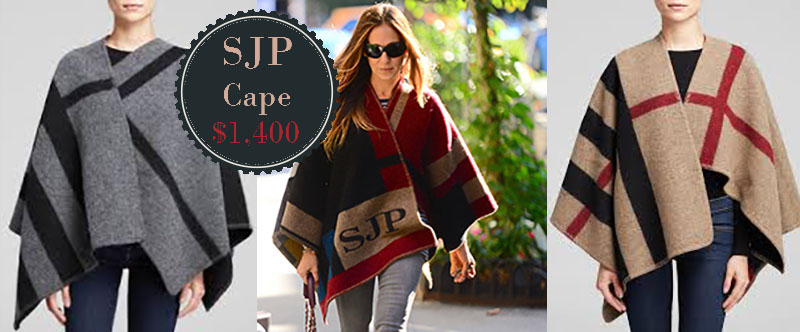
A couple of months ago I stumbled across a photo of Sarah Jessica Parker walking her kids to school in this great, casual, blanket-like wool cape. Of course it was monogrammed (why not, when you’re SJP?) I thought it was amazing so I looked it up and found out it is part of a whole collection of Burberry capes that retail for $1,400. Ahem. Well, this is a can-do kind of blog, so I set off to see if I could make something similar for less.
Success!
Lucky for me, I live in Portland, home of the Pendleton Woolen Mill Store, which carries beautiful wool fabric. The store is a great place to find remnants of blanket-weight and garment-weight wool, as well as fabric right off the bolt. I worked on my cape, but I have to admit that I was reluctant to post a tutorial without knowing where to send our readers for similar fabric online. I prefer to be able to tell people where to find materials that are comparable to what I use, but beautiful double-sided blanket-weight wool isn’t easy to come by. I had put it out of my mind, when out of the blue I was contacted by a representative of Pendleton to ask for help getting the word out about their new online fabric shop from which you can order wool by the yard. Kismet! I was excited to be able to finish my tutorial and direct you to some great fabric, and even more excited when Pendleton offered to give away enough yardage to make a cape (1.5 yards) to two of our readers. (Skip to the end to enter.)
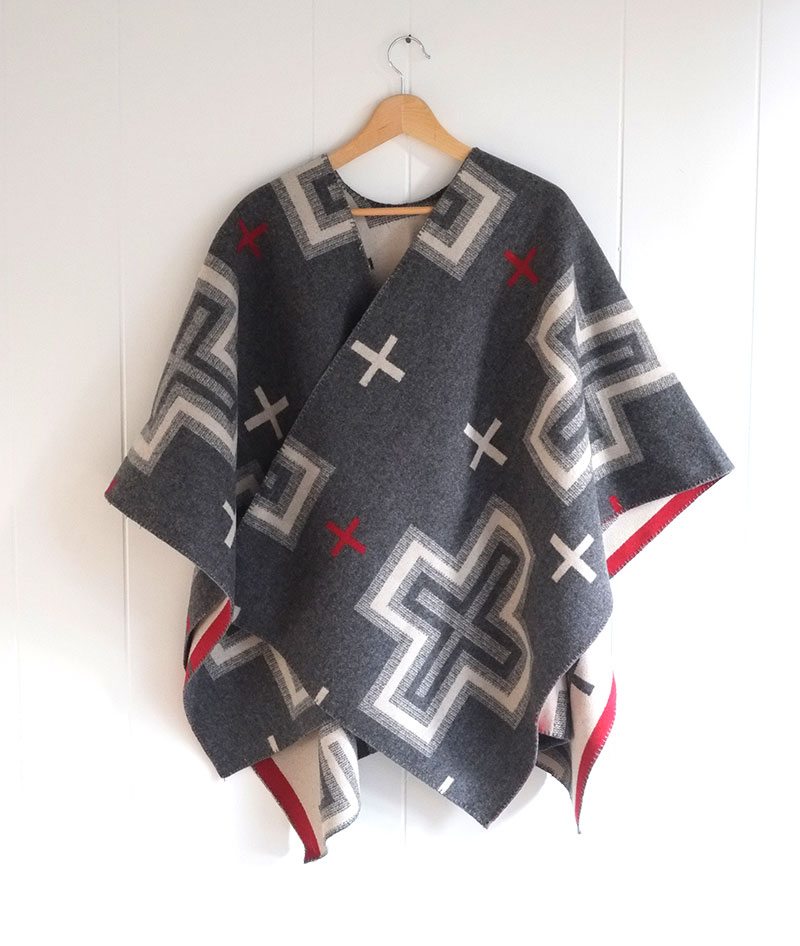
So let’s take a look, and then I’ll show you how INCREDIBLY SIMPLE this is to make. Seriously, you can make it in 4 hours or less! Here it is on a hanger.
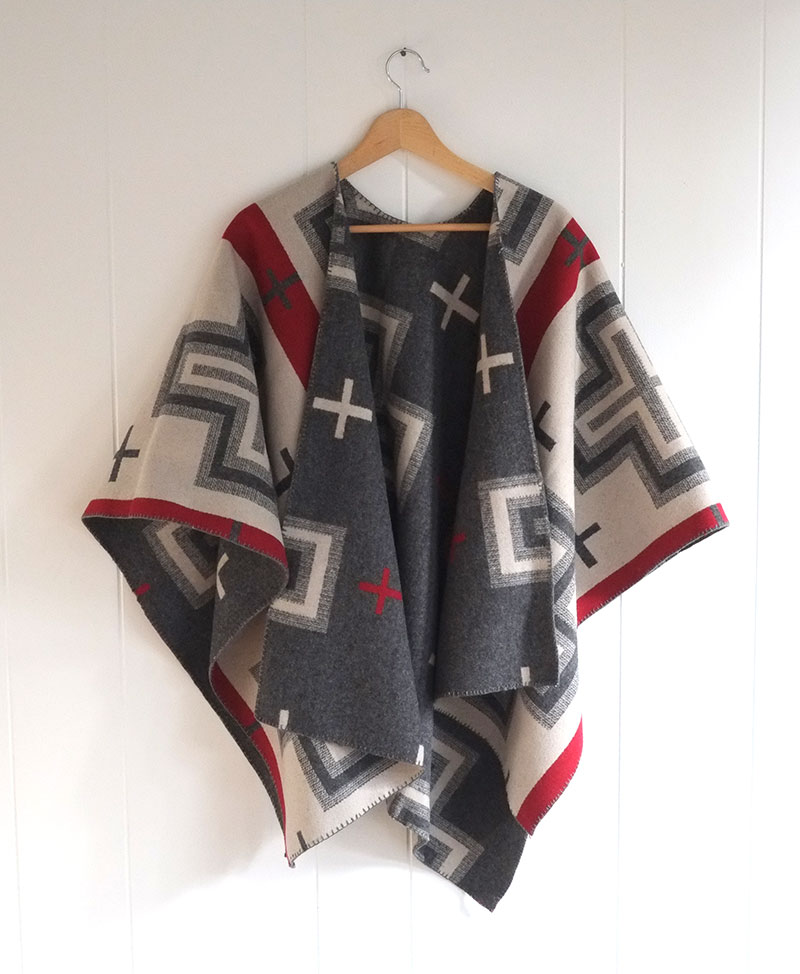
You can see that it is reversible!
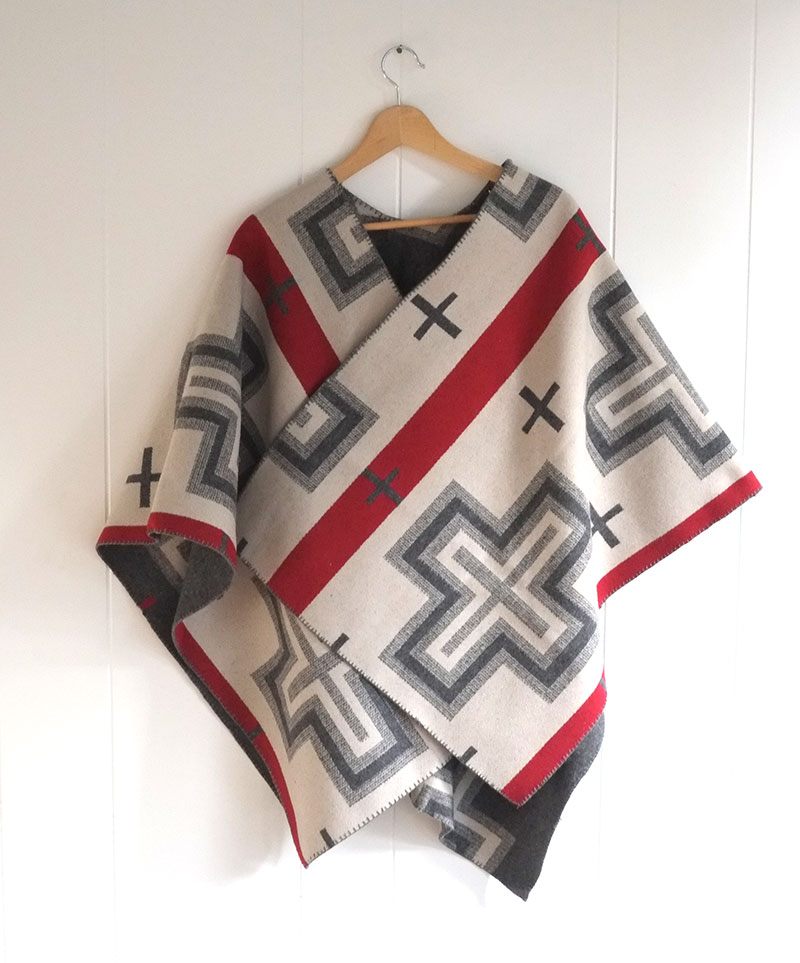
A blanket stitch done in yarn goes all the way around the edges.
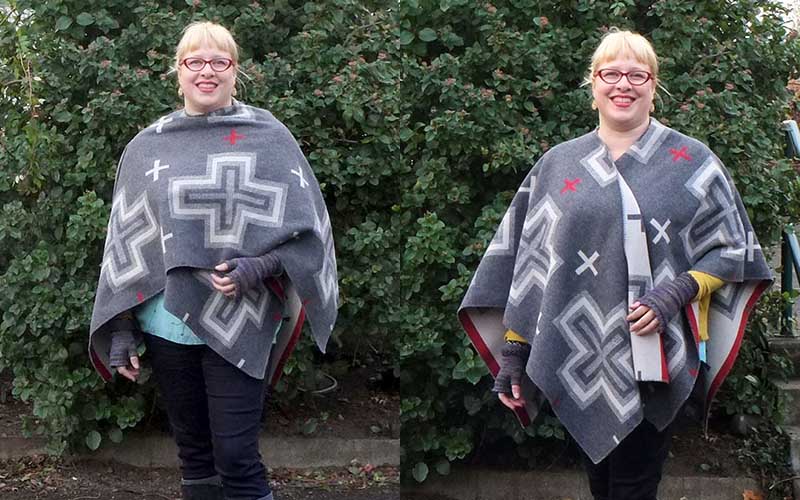
Here is the cape on my lovely friend, Nicole. Note that the sides hit her about where a 3/4 sleeve would hit.
Measuring and Cutting
To make your own amazing wool cape, here’s what you need to know about the measurements:
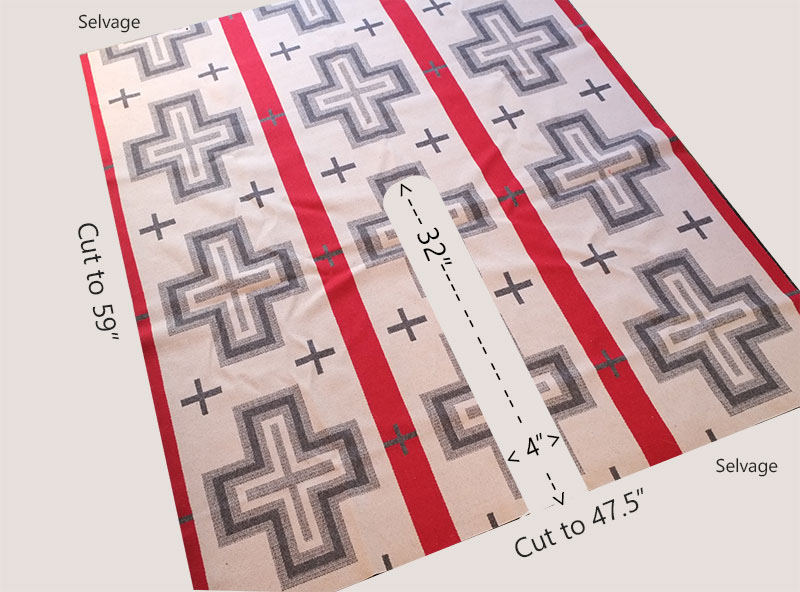
- The fabric is 68″ wide off the bolt. (The website says 64″ but I measured and it was 68″.) The stripes run selvage-to-selvage horizontally across the fabric. (It looks vertical in this photo.)
- I figured out how long I wanted the cape to be by draping a tape measure over my shoulder, starting it where I wanted the cape to end (top of the thigh/bottom of butt) and measuring to where I wanted it to hang on the front. I came up with 59″ which seemed to work for a lot of women who tried it on. If you have an especially long or short torso, you might want to take your own measurements. (I’m 5’6″ with an average torso, by the way.) You cut this length from the width of the fabric (remember you have 68″ to work with if you are using Pendleton blanket-weight wool. Other wools will vary, so be sure to check the width the make sure it is wide enough. )
- To calculate the width of the cape, I determined where I wanted the cape to hit me on the arms and had someone measure me up one arm, across the back, and down the other arm. I added a couple of inches for drape and called it good at 47.5″. You might want to make yours a little wider to hit closer to your wrists. This width comes from the length of the fabric, or the amount that is variable. I had over 1.5 yards (54″), so I was able to trim the sides so the design is perfectly symmetrical on the right and left. (Please note: If you want to order directly from Pendleton, you can only order whole yards at this time, so the least you’d need for this project is 2 yards.)
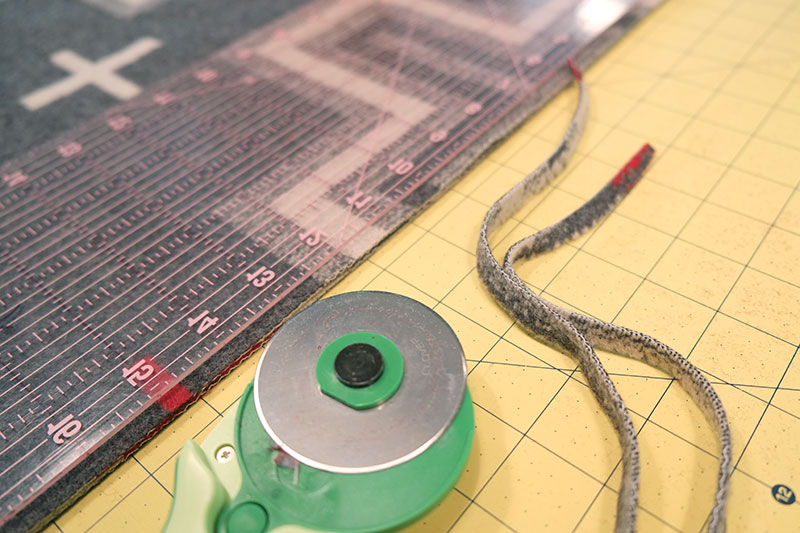
Trim your sides using a very sharp rotary cutter and make sure you are on grain. When you aren’t on grain, you can really tell–the edges look jaggedy, which won’t work for a smooth blanket stitch.
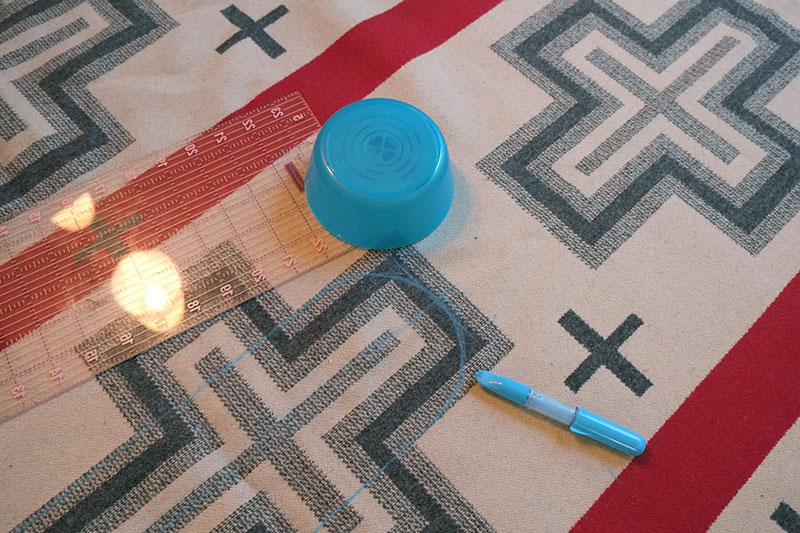
Mark the center. As the measurements above indicate, the top of the curve is 32″ up from the front edge, making the back 27″. The extra 5″ helps accommodate for the curve over the shoulder and slope of the chest. Again, you might want to adjust these measurements according to your body. The width of the “channel” is 4″ and it’s perfectly centered. As you can see, I used a small bowl to mark the curve.
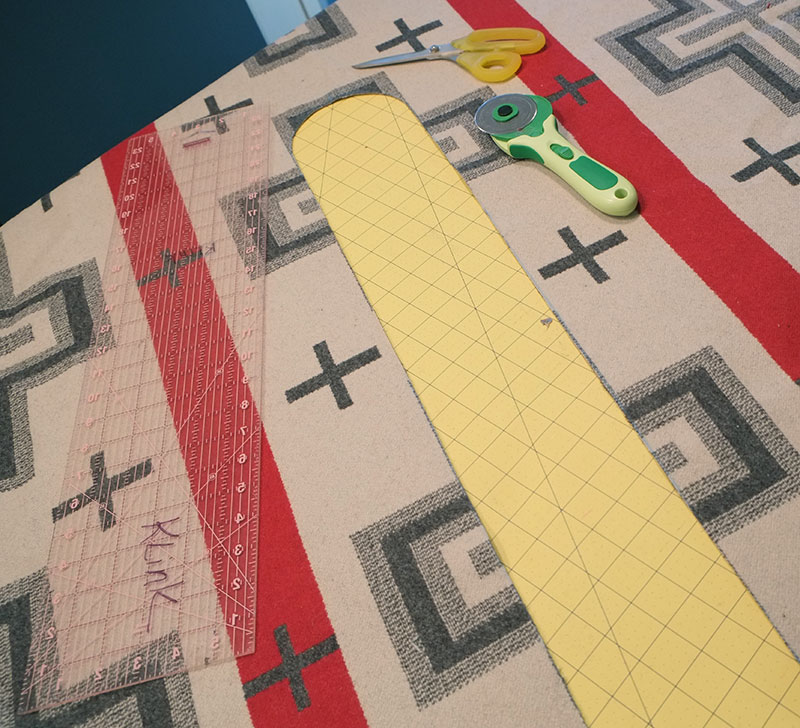
Cut out the center using a rotary cutter as far as you can, then use sharp scissors around the curve.
Finish the Edges Using a Blanket Stitch
![]()
The blanket stitch is often used decoratively, but it can also be used to bind the unfinished edges of fabric to prevent fraying. In this case, it does both–it finishes your raw edges and it looks cool too. If you take a closer look at the Burberry cape, you can see that the stitch is about twice as long as mine. I just felt like I could be more precise with a shorter stitch, so that’s what I went with. I used a very inexpensive cotton/acrylic blend yarn that was light enough to fit through a needle with a large eye (not quite as big as a tapestry needle though.)
Rather than doing step-outs of the binding process, I made three short video tutorials. Doing the stitches on a single-layer of fabric, but double-sided garment was all trial and error for me, so I hope you learn from my experience.
First Stitch and How-To
Changing Threads
Turning the Corner
And that’s it!
TIME SPENT: 1 hour or less of measuring and cutting and about 3 hours of hand stitching.
MONEY SPENT: $120 on fabric and $5 on yarn.
Facebook Conversations